- How to use this e-Toolkit
- 1. Introduction to urban micro-gardens and permaculture design
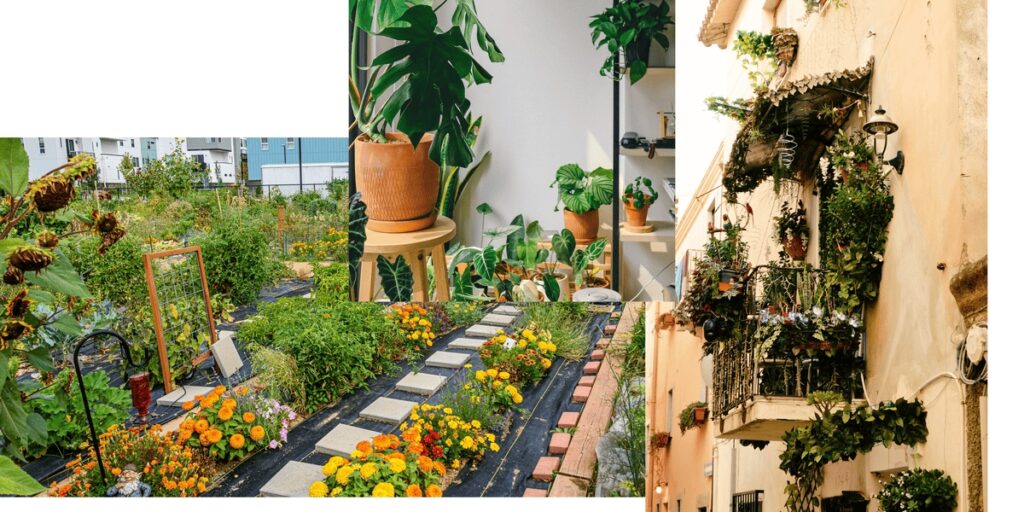
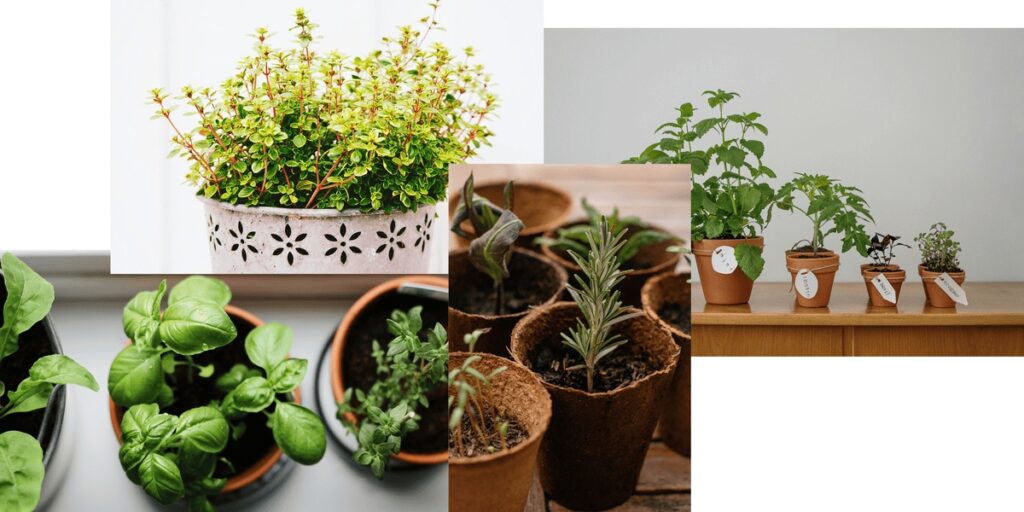
- 2. Indoor micro-gardens: Fresh food from your windowsill
- 3. Balcony micro-gardens: Your mini outdoor paradise
- 4. Community micro-gardens: Grow together, thrive together
- 5. Communal and individual composting and sustainable gardening practices
How to use this e-Toolkit
Welcome to the e-Toolkit. This section provides a detailed explanation of how to navigate and use the PDF version of the toolkit effectively. It also highlights unique features, such as chapter-specific colours, and offers guidance for maximising your experience.
Navigating the PDF version
Chapter colours: Each chapter in this e-Toolkit is distinguished by a specific colour, making navigation easier and visually appealing. These colours are consistent throughout the document to help you quickly identify sections of interest.
Contents page: The table of contents at the beginning serves as a detailed roadmap. Each chapter title is hyperlinked, allowing you to move directly to the desired section by clicking on the title.
Search functionality: Use the search feature in your PDF reader to find specific topics, procedures, or plants.
Offline accessibility: This PDF format ensures that you can access the e-Toolkit at any time, even without an internet connection. This is especially beneficial for use where connectivity may be limited.
Referring the online version
The e-Toolkit was initially created as an interactive online resource, which remains accessible at the InclusiGardens Project Website. While the PDF version is designed for offline use, the online version offers additional features:
- Interactive navigation: A sidebar lists all chapters for instant access.
- Accessibility tools: Readers can adjust settings such as contrast, font size, and text alignment to suit individual preferences, making the content more inclusive.
- Download and print options: Users can download the entire e-Toolkit or print individual sections directly from the online platform.
Maximising the benefits of the e-Toolkit
This e-Toolkit is more than a collection of procedures and plants; it is a comprehensive resource for producing your own food and how to make your household more “resilient”, with minimum effort and maximum impact. To make the most of it:
- Explore urban gardens at different levels: The e-toolkit includes urban garden set-ups for the smallest of spaces and tightest of time constraints, making it work for you.
- Choose the garden that’s right for you:We make it easy to choose a type and size of garden that will seamlessly fit into your lifestyle, meeting you where you’re at in your gardening journey.
- Apply practical tips: Each module provides handy lists and tables with recommended plants to grow, step by step instructions on getting started and valuable insight to the world of permaculture design that can be immediately applied to your garden.
A resource for sustainable living
This e-Toolkit is a tool for embracing gardening and producing your own food. By engaging with its content and applying its principles, you contribute to a healthier planet. Whether you prefer the interactive features of the online version or the practicality of the PDF, this e-Toolkit is designed to support your journey towards growing your own garden and producing your own food.Enjoy every page, every tip, and every step towards a more sustainable household and food sovereignty!
1. Introduction to urban micro-gardens and permaculture design
“To plant a garden is to believe in tomorrow.”
Audrey Hepburn
Ready to grow your own food but not sure where to begin? This e-toolkit is your simple guide to starting a micro-garden without the overwhelm. Inside, you’ll discover the compelling reasons to begin, see exactly what helpful content you’ll receive, and follow a clear, step-by-step plan to get your garden growing. Let’s get started.
1.1. Why start your urban micro-garden?
Imagine stepping onto your balcony or windowsill and plucking a sprig of fresh basil for your pasta or snacking on cherry tomatoes you grew yourself – no grocery trips, no plastic packaging, just pure, know-what-you’re-eating goodness. With permaculture design, your tiny urban space can become a self-sustaining micro-garden, tailored to your needs while saving water, recycling waste, and working in harmony with nature.
Beyond the joy of nurturing something green (and the pride of keeping it alive), you’ll save money, reduce food waste, and build resilience against shortages – all while supporting local ecosystems. Plus, swapping harvests and tips with neighbours turns gardening into a shared adventure, strengthening community ties.
Whether you’re craving fresh flavours, a more sustainable lifestyle, or simply a daily dose of nature, our toolkit helps you grow it all – right where you are.
Let’s grow a greener future, one micro-garden at a time.
1.2. What’s inside the e-Toolkit?
Whether you’re working with a sunny windowsill (hello, fresh herbs and microgreens!), a balcony filled with pots and crates (tomatoes, strawberries, or even a mini salad bar), or a shared community space (think rooftop gardens or a neighbourhood fruit tree), we’ve got you covered. Learn beginner-friendly composting tricks to turn scraps into gold, and dive into permaculture basics – simple, practical ways to grow more with less space, water, and waste. No fancy tools or acres of land needed, just smart, sustainable growing, tailored for urban life.
Your green thumb starts here – no matter how small your space.
Permaculture isn’t just gardening; it’s a whole new way of thinking about your space – a design framework for creating sustainable and resilient human habitats by working with nature rather than against it. Co-founded in the 1970s by Bill Mollison and David Holmgren, permaculture draws inspiration from Indigenous land management practices, ecological systems, and traditional wisdom. It integrates land, people, and resources in a way that mimics natural ecosystems, fostering abundance while minimising waste.
We chose this approach because it works with nature’s wisdom. At its core, permaculture is guided by three ethical foundations:
- Earth care – Protect and regenerate natural ecosystems.
- People care – Support the well-being of individuals and communities.
- Fair share – Redistribute excess resources to reinforce Earth care and people care.
Why choose permaculture design?
Permaculture is selected for its holistic, systems-based approach, emphasising sustainability, resilience, and regenerative practices. It goes beyond mere gardening or farming – it’s a way of thinking that applies to all aspects of life, from food production to energy systems and community building.
Here’s the beautiful part: every “mistake” is just a lesson in disguise. That sad-looking lettuce? It’s teaching you about sunlight needs. Those aphids on your kale? Nature’s way of saying, “Try companion planting!” Start small-maybe just a few herb pots-and let your confidence grow along with your plants.
Our toolkit presents three flexible approaches, tailored to your needs:
Indoor micro-gardening (windowsill edition)
Perfect for sprouts, microgreens and herbs – you’re the boss of temperature, light and water here. Great for quick wins while you learn the ropes.
Balcony gardening (the container revolution)
Pots, crates and small raised beds open up a world of veggies, flowers, even dwarf fruit trees. More space = more possibilities (but still totally manageable).
Community growing (go big, together)
Transform rooftops, terraces or building plots into thriving food forests. This is where permaculture really shines – create self-sustaining ecosystems that need less work over time (nature handles the heavy lifting!).
At the end we finish off with the last module, jam packed with information to help you succeed along your gardening journey. We talk you through the basics of sustainable gardening practices, like composting, rainwater harvesting, season extension, pest control and much more!
| 🍀 Pro tips |
| Plants don’t need perfection-just regular check-ins. Try “habit stacking” by peeking at your greens while you brew morning coffee or check emails. Our toolkit’s reminders and troubleshooting guides will keep you on track. |
| Remember: You’re not just growing plants – you’re growing resilience, community, and a deeper connection to what sustains us all. Every seed you plant is a step toward a greener future. |
Not sure which one is right for you? Start by doing a bit of thinking, observing and analysing to figure it out. Luckily, permaculture is all about giving you simple tools that help you do all the smart thinking and designing, adjusting to your pace.
1.3. How to start your urban garden adventure: a thoughtful (and fun!) permaculture guide
So, you want to turn your apartment, balcony, or tiny outdoor space into a thriving green oasis? Whether you’re dreaming of fresh herbs for cooking, a calming retreat, or just the joy of growing something, this guide will help you start smart – without the overwhelm.
We’ll use the first five steps of GOBRADIME (a permaculture roadmap for designing resilient gardens) to match your plants to your space, lifestyle, and goals. Get some paper and pen and write down your answers – let’s dig in!
Step 1: What’s your ‘why’? (goals)
Before buying seeds or pots, ask: What do I really want from my garden?
| A flavour boost? | Try herbs like basil, cilantro, or compact cherry tomatoes. |
| Instant zen? | Calming lavender, trailing pothos, or a snake plant for low-fuss greenery. |
| Be eco-friendly? | Upcycle containers, compost scraps, or collect rainwater. |
| Beautify your space? | Choose gorgeous Chinese evergreen or towering areca palm. |
| Nutrition fix? | Sprouts and microgreens will fulfil your vitamin and mineral needs. |
| Just for fun? | Start with one “unkillable” plant (like mint or ZZ plant) and see where it takes you! |
Try this: write a mini mission statement. Example: “I want fresh herbs for cooking and a cozy green corner by my window.”
Step 2: Play plant detective (observing)
Plants thrive when they fit their environment. For one week, spy on your space and observe the following factors:
| 1. Sunlight: Use a compass (on your phone or a physical one) to determine which way your window sill/balcony is pointing, and then determine how bright the light inside is and how many hours of sunlight your space gets: |
| a) South-facing = sun heaven (great for peppers), |
| b) North-facing = shade zone (perfect for mint or spinach). |
| c) You can get additional information on sunlight exposure here and an interesting map of shadows from surrounding buildings here. |
| d) 🍀 Pro tips: Snap photos at different times to track light patterns. |
| 2. Wind: Notice how often and how strongly wind moves across your space. Balconies in high-rises tend to get windy – best to choose hardy, wind tolerant plants. |
| 3. Water access: Note spots where rain pools and overflows (free water for a barrel!), location of taps/spigots and opportunities to reuse household grey water. |
| 4. Temperature: Check your thermostat for your inside temperature and/or get an outdoor thermometer for your balcony. Note down the daily and seasonal highs and lows. Help yourself with environmental data your government collects. |
| 5. People traffic: Note which parts of your home are the most used throughout the day and which parts have more stillness. Avoid blocking walkways, and place aromatic herbs where you’ll brush past them daily. |
| 🌱 Permaculture principle in practice: Observe and interact |
| Permaculture favours designing based on the characteristics of the natural environment over individual human wants. Placing wanted elements in the wrong place is just an uphill battle (e.g., wanting to plant an olive tree in your moist, acidic soil will result in never-ending maintenance, or rather, the assured downfall of the tree and also your will to continue). |
| Instead, start by spending time watching natural systems (systems in your home and everyday life) before acting. Track sunlight patterns before planting (e.g., morning vs. afternoon sun). Notice which herbs thrive in your indoor microclimate (e.g., basil needs heat, mint tolerates shade). |
Step 3: Be honest about limits (boundaries)
No one has infinite time, space, or energy – and that’s okay! However, to increase the chances of your project’s success, keep your limits in mind and choose objectives that fit within those limits. Consider:
- Time: How much spare time do you have daily/weekly? Only 5 mins/day? Low-care plants like succulents or chives are your friends.
- Budget: Decide how much money you are willing to invest. Start cheap with yogurt-container planters or seed swaps.
- Renter rules: Make sure you ask any relevant authorities for permission. If you cannot drill into walls, you can use removable hooks for hanging planters or stick to windowsill gardens.
- Climate: Short growing season? Focus on fast growers like radishes or try indoor greens. Learn about season extension in module 5.6.
- Space: Look at the available room in your surroundings, note down the measurements – think in 3D!
Example boundary list: No drilling allowed, 10 mins/day, max €30/month, 1m2 on window sill and 2m3 (1m width x 1m length x 2m height) on balcony.
Step 4: Examine your resources
Think about everything at your disposal: the materials lying about your house, the waste you often see accumulating on city streets, your prior knowledge, skills and motivation, the help and advice from people you know and the access you have to certain groups/places/etc. All this can be used as a resource in your project.
You don’t need fancy gear! Get creative:
- Repurpose: Scavenge your house/neighbourhood for anything that could be upcycled into pots, soil amendments or building materials for garden beds. Egg cartons = seed starters, old jars = herb planters.
- Community power: Ask friends, family and neighbours for advice or a helping hand. Swap cuttings with neighbours or join a local gardening group.
- Knowledge: Never gardened? Think about the skills and experience you do have that could be applied to gardening. Start with foolproof plants (like spider plants or lettuce).
Step 5: Blend your findings (analysis)
Analyse all your notes, then match your goals, observations, boundaries and resources to decide what type of garden is best suited for you. Refer back to your notes later when choosing plants and designing your space.
Here’s a rough guide on which type of urban micro-garden might be best for you based on your time and space constraints. You can find more detailed breakdowns of each type in their respective modules.
| Time \ Space | 1 m² | 2 m² | 5 m² | 10 m² |
| 30 min/week | Indoor micro-garden (5-10 small herbs/microgreens) | Balcony garden (10-15 plants in pots) | Outdoor community garden (20-30 plants) | Outdoor community garden (50+ plants) |
| 1 hour/week | Indoor micro-garden (10-15 microgreens/herbs) | Balcony garden (15-20 plants) | Outdoor community garden (30-50 plants) | Outdoor community garden (60-80 plants) |
| 3 hours/week | Balcony garden (10-15 plants) | Balcony garden (20-30 plants) | Outdoor community garden (50-70 plants) | Outdoor community garden (100+ plants) |
| 5+ hours/week | Balcony garden (15-20 plants) | Balcony/community mix (30-40 plants) | Outdoor community garden (70-100 plants) | Outdoor community garden (150+ plants) |
| 🌱 Permaculture principle in practice: Use small and slow solutions |
| Even if you have enough space to dive right into a big community garden, we encourage beginners to take small steps into the world of urban gardening. |
| Start a small ecosystem (microgreens or sprouts) and then slowly build from there. You’ll gain experience and confidence along the way and will not burn out from trying to do too much, too quickly. |
Embrace the journey
Plants will die. The weather will surprise you. But each season teaches resilience. Celebrate small wins: your first homegrown salad, a buzzing pollinator, or simply the daily ritual of tending your green haven.
Remember: Even one happy plant counts. You’ve got this! 🌿✨
2. Indoor micro-gardens: Fresh food from your windowsill
“Everyone should have a piece of garden, no matter how small, so they can stay in touch with the earth and therefore with something deeper within themselves.”
Carl Jung
Who says you need a backyard to grow your own food? Even in the smallest apartment, you can cultivate fresh sprouts, flavourful herbs, and nutrient-packed microgreens right on your windowsill or on a sunny shelf. The best part? Indoor gardening isn’t tied to seasons. By controlling light, water, and warmth, you can grow vibrant greens year-round, no matter the weather outside.
Within each section of this module, we will provide information about choosing the right plants for you and a step-by-step guide on how to set up your garden. You will find tips for caring for your new friends and how to keep them thriving. There is information a-plenty for each plant about its light, water and space needs, as well as culinary uses and nutritional benefits. You’ll also find design inspiration to seamlessly incorporate greenery into your home, simple maintenance guides, and essential tools to support your success, including how to overcome challenges and even build your own gardening community. Let’s bring your plant dreams to life!
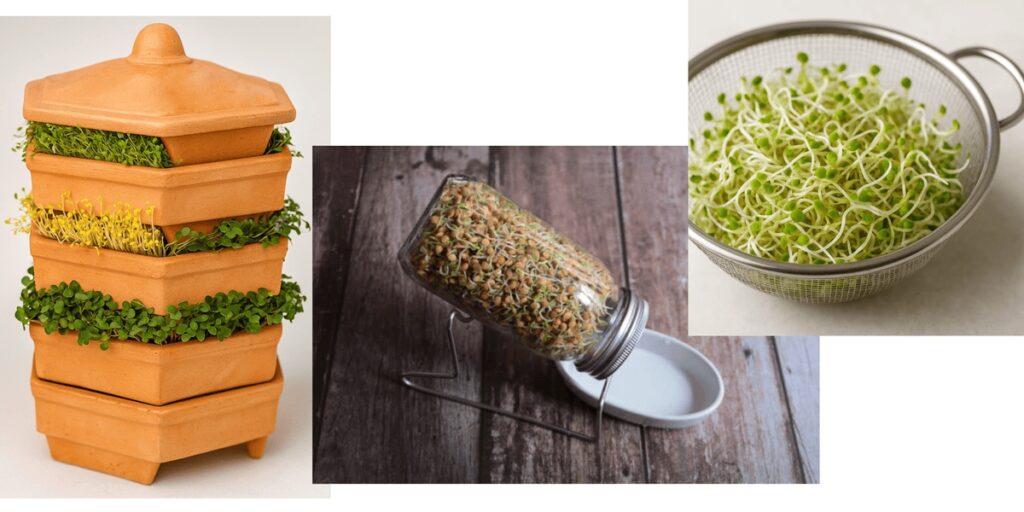
2.1. Sprouts: instant nutrition in just days!
| Starting here? Go back to the design process starting point in the Introduction (1.3), it’s a crucial step of observation and analysis that will ensure the success of your chosen project! |
No soil? No problem! Sprouts are the easiest way to grow fresh, superfood-packed greens right on your countertop. They’re ready in just 2-7 days with the only materials needed being a jar or tray. These tiny powerhouses are bursting with enzymes, vitamins, and immune-boosting goodness.
Top picks & their superpowers:
- Mung beans (Vigna radiata): 3-5 days – Crunchy, fresh, perfect for stir-fries & wraps
- Alfalfa (Medicago sativa): 4-6 days – Mild flavour, ideal for sandwiches & smoothies
- Lentils (Lens culinaris): 2-4 days – Nutty taste, great for salads & snacking
- Broccoli (Brassica oleracea var. italica): 5-6 days – Spicy kick, loaded with antioxidants
- Radish (Raphanus sativus): 3-5 days – Peppery zing, adds punch to any dish
How to enjoy them:
- In sandwiches & wraps
- Tossed into salads
- As a soup/grain bowl topping
- Blended into smoothies

In this section, you’ll find everything you need to successfully grow your own sprouts at home. We’ll cover the ideal growing conditions, list the simple materials you’ll need, and provide a clear, step-by-step guide to get you started. For inspiration on creating a beautiful setup, be sure to check out our design ideas for combining sprout jars and microgreen trays, and use the handy General Maintenance Table as your quick-reference guide for ongoing care.
Ready to sprout your way to better health? Check out when, where and how you can grow them below!
2.1.1. When to grow sprouts & ideal conditions
Sprouts are a year-round crop! Since they’re grown indoors, they aren’t dependent on the seasons. This means we have to provide an environment in which they are happiest. Check out the table below for a quick guide to doing just that.
| Factors | Details |
| Temperature | 👍Ideal: 20-25°C 👌Tolerable: 18°C+ |
| Maturation time | 🏃♀️Fast (3-5 days): Alfalfa, radish, broccoli 🚶♀️Medium (4-6 days): Lentils, mung beans |
| Light | ⛱️Shaded during 3-day growth (e.g., cupboard). ☀️Optional 1-day indirect light for greening. |
| Ventilation | 🌬️Use ventilated containers (jars/trays) to prevent mould. Avoid airtight spaces. |
| Location | 📍Kitchen shelf, pantry, or shaded counter – away from drafts or direct sunlight. |
| Watering | 🌊Rinse 2-3 times daily to maintain moisture and prevent mould. |
Sprouts are low-maintenance and adapt well to most indoor spaces – just keep them clean, moist, and out of direct sunlight until harvest!
| ⚠️ Safety first! |
| Sprouts need extra care to avoid bacteria. Always: |
| ↳ Use seeds marked for sprouting (or sterilise them: more on that below) |
| ↳ Sanitise jars/trays before each use (by boiling, baking or wiping with vinegar) |
| ↳ Wash hands before handling |
| ↳ Eat within 2 days (or cook them) |
2.1.2. How to grow sprouts: a step-by-step guide
Sprouts aren’t very time consuming or physically demanding, but we do need to be careful with cleanliness. Here is a simple list of materials and straightforward step by step instructions.
Materials list 📦
- High quality sprouting seeds (look for “for sprouting” labels)
or organic seeds (if not labelled for sprouting, requires sterilisation🌟).
- Sterilised containers:
- wide-mouth glass jar with mesh lid/cheesecloth,
- fine-mesh colander (holes smaller than seeds) or
- sprouting tray or terracotta dish.
- White vinegar (5% acidity) and
baking soda (for sterilisation)
- Clean towels or paper towels
Best seeds for home sprouting
- Beginner friendly: alfalfa, broccoli, radish (fast, mild flavour)
- Crunchy & substantial: mung beans,
lentils, chickpeas (soak 8-12 hours)
- Avoid in jars (they form a jelly when in touch with water):
basil, rocket, mustard (use tray/paper towel method)
🌟Prepare your seeds: seed sterilisation process
Essential for non-sprouting labelled seeds to kill surface bacteria.
1. Vinegar soak (kills most bacteria)
- Mix 1 tablespoon white vinegar per 1 cup warm water (50°C max).
- Submerge seeds for 5 minutes, stirring gently.
- Drain and rinse thoroughly with cool water.
2. Baking soda soak (removes residual pathogens)
- Mix 1 teaspoon baking soda per 1 cup warm water.
- Soak seeds for 15 minutes (softens hulls for better sprouting).
- Rinse 3x with filtered/purified water to remove all residue.
After the soaks:
- Spread seeds on a clean towel to dry slightly before soaking to sprout.
| 🍀 Pro tips |
| Sterilise your sprouting container with boiling water or vinegar spray while seeds dry. |
| ⚠️ Watch out! |
| Do not combine vinegar and baking soda as they neutralise each other and the seeds will not get sterilised! |
Step-by-step instructions 📋
- Initial soak
- Place sterilised seeds in your container.
- Cover with 2-3x their volume in cool water.
- Soak 8-12 hours (small seeds) or 12-24 hours (large beans).
- Drain completely & rinse. There must be no standing water left after draining!
- Rinse 2-3x daily with cool water
- For jars: Swirl water, drain upside down at 45° angle.
- For colanders: Rinse under gentle running water.
- Harvesting
- Ready when tails are 1-3cm (taste-test daily after Day 3).
- Storage: Pat dry, refrigerate in an airtight container 1-2 days maximum.
| 🍀 Pro tips |
| Start with small batches – grow only as much as you’ll eat in 2 days to ensure freshness. |
| Troubleshooting |
| ↳ Slow growth? Check temperature or soak seeds longer. |
| ↳ Mould? Increase rinsing frequency and ensure full drainage. |
Ready to sprout? Start with forgiving seeds like alfalfa or radish, then experiment with crunchy beans!
Check out the Design Options under the microgreens section 2.3 for layout ideas!
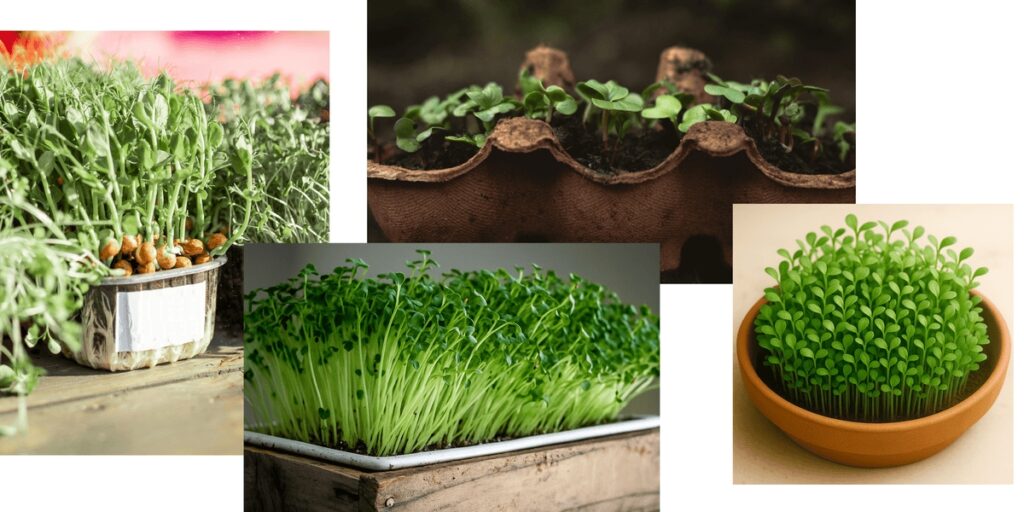
2.2. Microgreens: tiny plants, big flavour & nutrition!
Upgrade your meals with microgreens – the quick-growing, nutrient-packed big siblings of sprouts! These flavourful shoots grow in 5-14 days in trays or repurposed containers (a little soil or substrate is all they need).
Top varieties to try
- Pea shoots (Pisum sativum): 10-12 days – Sweet, crunchy, perfect for beginners
- Radish (Raphanus sativus): 5 days – Peppery kick, great on sandwiches
- Sunflower (Helianthus annuus): 6-7 days – Fresh and nutty, pairs perfectly with tomatoes
- Broccoli (Brassica oleracea var. italica): 5 days – Mildly spicy, salad superstar
Ways to enjoy
- Add to sandwiches & wraps to elevate taste
- Toss into salads for extra texture
- Garnish soups, pastas & risottos like a pro chef

Ready to grow your own vibrant microgreens? This section provides the complete starter guide, detailing the ideal growing conditions, the best container options, and a simple step-by-step process. For creative inspiration on integrating your garden into your home, explore the Design Options section, and keep the General Maintenance Table handy for easy reference on caring for your plants.
Grow a gourmet garden in just days – no green thumb required!
2.2.1. When to grow microgreens & ideal conditions
Microgreens are a year-round crop! Since they’re grown indoors, they aren’t dependent on the seasons. This means we have to provide an environment in which they are happiest. Check out the table below for a quick guide to doing just that.
| Factor | Details |
| Harvest time | 🏃♀️Fast (7-10 days): Radish, broccoli, arugula 🚶♀️Medium (10-14 days): Sunflower, peas, kale 🧘♀️Slow (14-21 days): Beets, chard |
| Watering | 🔁Frequency: 1-2 times daily 📋Method: Bottom-watering preferred (pour water in tray) 💧Water when the surface is slightly dry to the touch |
| Light | ⛱️Shaded during gemination, then bright indirect light (south window) or 12-16hr grow lights |
| Temperature | 🌡️18-24°C – avoid drafts & extreme heat |
| Airflow | 🌬️Gentle ventilation (fan or open window) to prevent mould |
| Location | ☀️Sunny windowsill, shelf with grow lights, or bright kitchen counter |
2.2.2. Where to grow microgreens
Microgreen trays come in different shapes and sizes, even more so if you DIY (do it yourself) or repurpose them. Here are a few options on how to make a tray at home.
| Tray type | Materials list | Assembly steps | Best for | Pros | Cons |
| Recycled plastic containers | Takeout containers, yogurt tubs, cake domes | 1️⃣Drill holes in one container for drainage. 2️⃣Use lid/base as water catcher. | Beginners, making small batches | Free, lightweight, clear lids for light | Limited size options |
| Juice/milk cartons | Cardboard/plastic cartons | 1️⃣Cut horizontally. 2️⃣Poke drainage holes. 3️⃣Line with paper towels. | Soil-free sprouting | Biodegradable (cardboard), cheap | Short lifespan (cardboard) |
| Shallow wooden boxes | Untreated wood, nails, plastic liner | 1️⃣Build a 2-5cm deep box. 2️⃣Line with perforated plastic/mesh. | Larger batches | Durable, customizable | Heavy, needs woodworking |
| Egg cartons | Paper/foam cartons | 1️⃣Fill cups with soil. 2️⃣Use lid as a humidity dome. | Kids, tiny herb gardens | Super cheap, disposable | Small yield, dries quickly |
| Terracotta saucers | Plant saucers, larger tray | 1️⃣Place saucers in a water-filled tray. 2️⃣Bottom-water. | Low-maintenance growers | Prevents overwatering | Fragile, heavier |
See what materials are easily available to make microgreens trays to you and how many of them fit into your space. Use ideas for vertical arrangements to maximise your space, like using small shelves on your window sill. Check out a few design ideas at the end of this module.
2.2.3. How to grow microgreens: a step-by-step guide
Materials list 📦
- Seeds: Untreated organic seeds (from seed banks, libraries, or local stores)
- Container: Shallow tray with drainage (see options above)
- Substrate: 2cm of potting soil or compost
- Extras: Spray bottle, catching tray, sharp scissors
Seed density calculator
Use this handy table to calculate approximately how many seeds you should germinate together in one tray (for a standard 13×18cm tray).
| Microgreen | Seeds needed | Grams/cm² |
| Peas | 34.38g | 0.1469 |
| Radish | 8g | 0.0342 |
| Sunflower | 18g | 0.0769 |
| Broccoli | 3.75g | 0.0160 |
General formula:
Your tray area (cm²) × Grams/cm² = Total seeds needed
Example: 20×30cm tray → 600cm² × 0.0769 = 46g sunflower seeds
Step-by-step instructions 📋
- Prepare the seeds
- Soak large seeds (like peas or sunflower) overnight
- Smaller seeds (like radish or broccoli) can be soaked for less, about 1 hour
- Planting
- Make sure that your container has holes in the bottom. If not, add them.
- Fill the tray with 2cm soil and lightly compress to create a cosy bed for the seeds.
- Spread seeds at 50% density (or use the table ⬆️).
- Cover with a thin soil layer (<1cm), mist lightly.
- Germination (days 1-3)
- Cover tray to create darkness (either with a dark container, a light top with a towel over it, or put it in a dark room)
- Mist daily – keep moist but not soggy
- Growth (Days 4-7+)
- Uncover when shoots reach 2-3cm.
- Move to bright light (window/grow lights).
- Watering: Bottom-water daily and drain excess to prevent mould.
- Harvest
- Cut at soil level when first true leaves appear (use scissors) (see image below ⬇️).
- Peas: Wait for 3 true leaves.
- Storage
- Best eaten fresh (harvested right before consuming).
- If needed, refrigerate cut greens in a paper towel for 1-2 days.
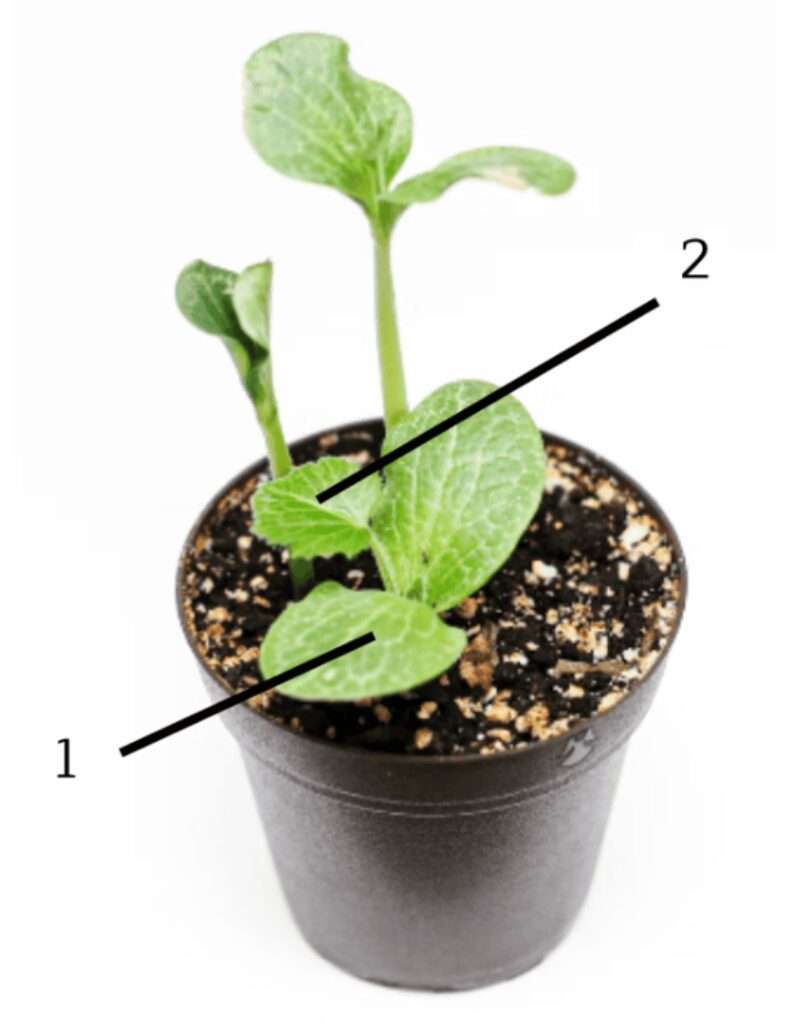
1: seed leaves (cotyledons)
2: true leaves
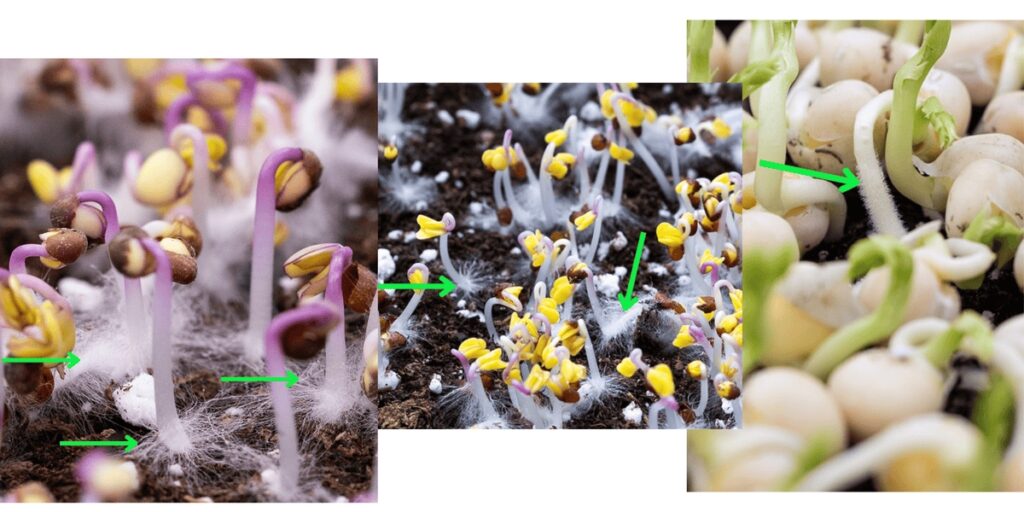
| ⚠️ Mould vs. root hairs |
| When first growing microgreens you can easily confuse tiny little root hair for pesky mould. Use this table to help figure out the difference. |
| Feature | Root hairs | Mould |
| Appearance | Fine, white, even fuzz | Dense, irregular growth |
| Texture | Soft, attached to roots | Fuzzy, spreads randomly |
| Solution | Normal – no action needed | Reduce watering, improve airflow |
All these are mould fibres!
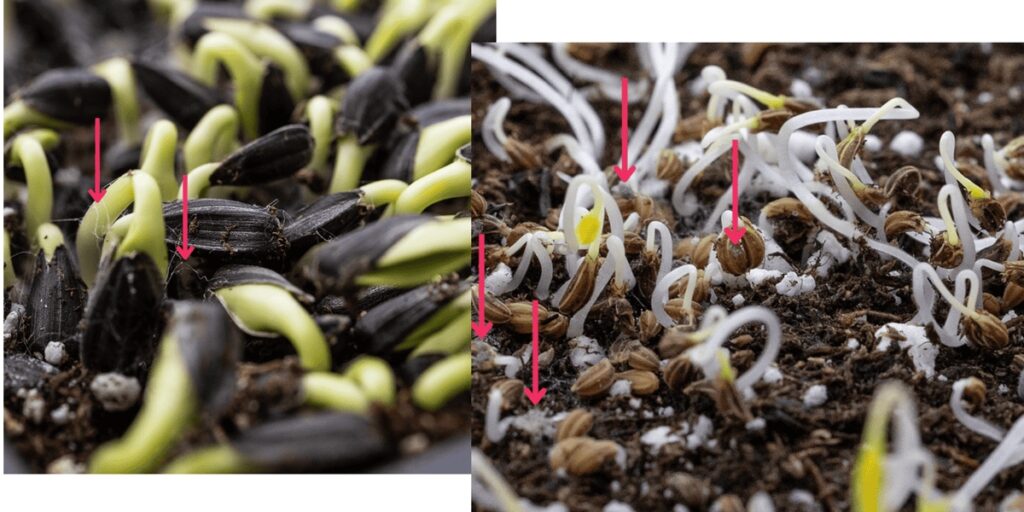
While all these are root hairs!
| 🍀 Pro tips |
| Use a fan for airflow to prevent mould. |
| Harvest in batches – don’t cut all at once! |
2.3. Design options: microgreens (and sprouts)
Depending on your available time and space you can have a varied number of pots and jars on and around your windowsill. You can maximise the space you do have with some simple ideas. Below is an example of a microgreen and sprouting setup based on your available space and time. Remember, these are estimates – consult your list of needs and resources to plan out the micro-garden that suits you.
| Time | 0.5 m² (tiny sill) | 1 m² (sill + hanging/vertical) |
| 10 min/week | 🪣2 microgreen trays (e.g., broccoli, radish) | 🪣4 microgreen trays (staggered planting) |
| 🫙1 sprout jar (alfalfa/clover) | 🫙2 sprout jars | |
| 30 min/week | 🪣4 microgreen trays | 🪣8 microgreen trays (2-tier shelf) |
| 🫙2 sprout jars + 2 small trays | 🫙4 sprout jars |
| 🍀 Pro tips |
| Use small free-standing shelf units to go vertical! |
2.4. General maintenance schedule for sprouts and microgreens
Sprouts and microgreens are both fast-growing, nutrient-packed superfoods grown from seeds, but they differ in harvest time and growth method. Sprouts are germinated seeds eaten whole (root, stem, and seed) after just 3-7 days, while microgreens are young greens harvested at the first true leaves (7-14 days), requiring soil or a growing medium. Both differ from regular plants grown for food, as we intentionally don’t let them grow into their final form, enabling them to flower and fruit. As they are short lived plants, we do not have a yearly maintenance table, but a weekly one.
Below is a simple weekly maintenance schedule to keep your sprouts and microgreens thriving.
| Day | Sprouts (jar/tray method) | Microgreens (tray with soil/coco coir) |
| Day 1 | Soak seeds 4-12 hrs (depending on type). | Soak seeds (if needed), sow densely on moist soil. |
| Day 2 | Drain, rinse 2x/day, keep in the dark. | Mist soil, keep covered (blackout phase). |
| Day 3 | Rinse 2x/day, drain well. | Check moisture, keep covered. |
| Day 4 | Rinse 2x/day, expose to indirect light. | Uncover, move to light, mist daily. |
| Day 5 | Rinse 1x/day, let green up. | Water lightly, ensuring good airflow. |
| Day 6 | Ready to harvest (3-7 days). | Continue misting, check for mould. |
| Day 7 | Store in the fridge (up to 2 days). | Harvest (7-14 days, depending on variety). |
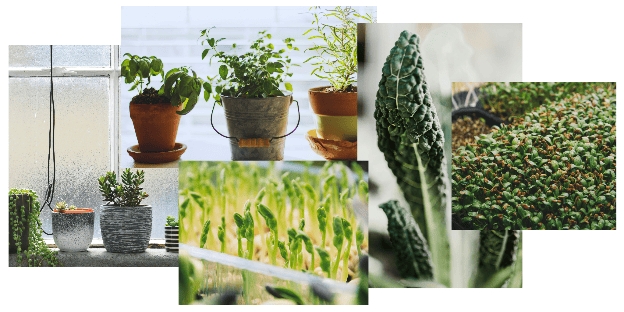
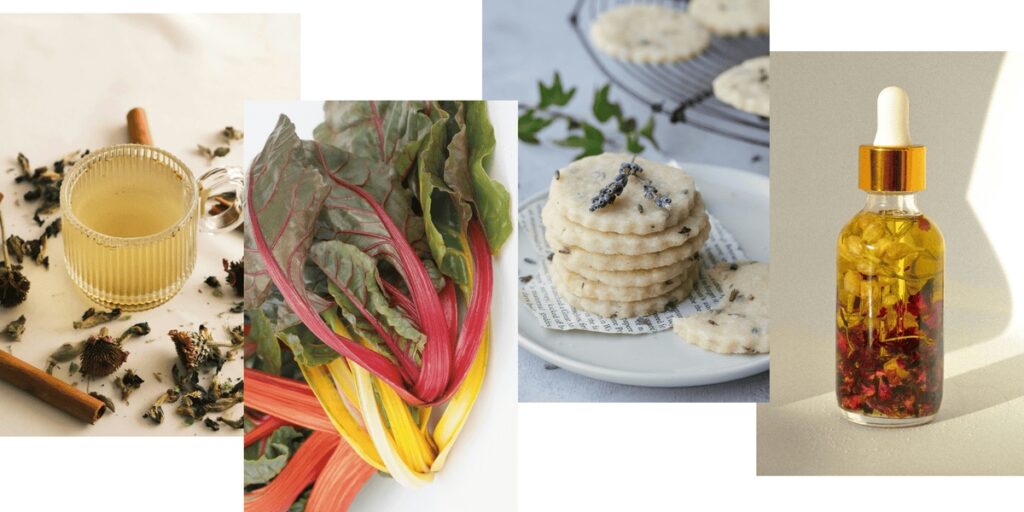
2.5. Herbs & leafy greens: your windowsill flavour factory
Turn any sunny spot into a fragrant, edible oasis! These easy-to-grow herbs and greens thrive in pots indoors, rewarding you with fresh flavours for cooking, teas, and more – just add water and sunlight.
Top multitaskers to grow:
- Chives – Snip into salads, omelettes, or cream cheese spreads (pretty purple flowers make great edible garnishes too!)
- Chamomile – Brew calming tea and use the daisy-like flowers in desserts
- Lavender – flavour cookies/syrups and make relaxing sachets
- Rosemary – Season roasted veggies and infuse olive oils
- Baby spinach/kale – Harvest tender leaves continuously for nutrient-packed salads
- Chard – The cheeriest colourful leaves for your soups and stews
Fun ways to use your harvest:
- Herbal teas (mint + chamomile = bedtime bliss)
- Flavoured honeys/oils (lavender-infused cookies, anyone?)
- DIY beauty (lavender face steam, mint foot soak)
- Freeze herb cubes (blend with oil/water for instant flavour)
Discover the joy of cultivating a constant supply of fresh flavours right in your home. This section is your guide to growing thriving indoor herbs and leafy greens, covering their key characteristics, ideal growing conditions, and the best container options. You’ll find a detailed step-by-step guide complete with troubleshooting tips. For creative ways to integrate these plants into your living space, explore our Design Options, and use the General Maintenance Table for a quick and easy care overview.
A little care = endless fresh flavours right at your fingertips!
2.5.1. Herbs
Here is a detailed table of herbs that can do well in pots indoors. We have included all relevant helpful information to get you started: what each plant needs in terms of sun, soil and water, who they are good neighbours with, how long it takes to see results, any special tips to care for your new friends and how to use them.
| Plant name | Environmental needs | Ecological function, companion plants | Seed to harvest, yield | Spacing and height | Care tips | Culinary uses and nutritional value |
| Basil (Ocimum basilicum) | ☀️ 6-8h sun 💧 Moderate (3x/week) 🧪pH 6.0-7.5 🌬️ Moderate wind sensitivity | ✅ Repels flies/mosquitoes ✳️ Companions: Tomatoes, peppers, oregano ❌ Avoid: Rue, sage | ⌚ 60-90 days 📊 200-500g/plant (leaves) | ↔️ 25×25 cm ↕️ 30-60 cm | Pinch flowers to prolong leaf production. | 🍲 Pesto, caprese, Thai cuisine 🔬 Vit K, antioxidants, anti-inflammatory |
| Mint (Mentha, any species.) | 🌤 4-6h sun 💧 High (keep moist) 🧪pH 6.0-7.0 🌬️ Low | ✅ Attracts pollinators ✳️ Companions: Cabbage, tomatoes ❌ Avoid: Parsley (invasive) | ⌚ 90 days 📊 300-600g/plant | ↔️ 30×30 cm ↕️ 30-90 cm | Grow in containers to control spread. Cut back aggressively. | 🍲 Teas, mojitos, Middle Eastern dishes 🔬 Menthol (digestive aid), vit A |
| Parsley (Petroselinum crispum) | ☀️ 6-8h sun 💧 Moderate (2x/week) 🧪pH 5.5-7.0 🌬️ Low | ✅ Host for swallowtail butterflies ✳️ Companions: Asparagus, tomatoes ❌ Avoid: Mint | ⌚ 70-90 days 📊 150-300g/plant | ↔️ 20×20 cm ↕️ 30-45 cm | Soak seeds 24h before planting. Harvest outer leaves first. | 🍲 Garnish, tabbouleh, soups 🔬 Vit C (3x orange), iron, folate |
| Oregano (Origanum vulgare) | ☀️ 6-8h sun 💧 Low (1x/week) 🧪pH 6.0-8.0 🌬️ Low | ✅ Deters cabbage moths ✳️ Companions: Peppers, squash ❌ Avoid: Basil | ⌚80-90 days 📊 100-200g/plant | ↔️ 30×30 cm ↕️ 25-60 cm | Prune 1/3 in spring. More flavour when slightly stressed. | 🍲 Pizza, Greek dishes, oils 🔬 Antibacterial (carvacrol) |
| Thyme (Thymus vulgaris) | ☀️ 6-8h sun 💧 Low (1x/week) 🧪pH 6.0-8.0 🌬️ Low | ✅ Repels whiteflies ✳️ Companions: Eggplant, potatoes ❌ Avoid: Cilantro | ⌚ 90 days 📊 50-100g/plant | ↔️ 25×25 cm ↕️ 15-30 cm | Avoid wet foliage. Harvest before flowering for best flavour. | 🍲 Roasts, stews, herbes de Provence 🔬 Thymol (antiseptic), iron |
| Rosemary (Rosmarinus officinalis) | ☀️ 6-8h sun 💧 Low (1x/week) 🧪pH 6.0-7.5 🌬️ Moderate | ✅ Deters carrot flies ✳️ Companions: Beans, carrots ❌ Avoid: Basil | ⌚ 180 days 📊 200-400g/plant | ↔️ 60×60 cm ↕️ 60-150 cm | Prune to shape. Bring indoors below -5°C. | 🍲 Roasts, breads, infused oils 🔬 Memory-boosting compounds |
| Chives (Allium schoenoprasum) | ☀️ 6-8h sun 💧 Moderate (2x/week) 🧪pH 6.0-7.0 🌬️ Low | ✅ Deters aphids ✳️ Companions: Carrots, tomatoes ❌ Avoid: Peas/beans | ⌚ 60 days 📊 100-200g/plant | ↔️ 15×15 cm ↕️ 20-40 cm | Divide clumps every 3 years. Cut 5cm above soil. | 🍲 Baked potatoes, omelettes, garnishes 🔬 Sulphur compounds (detox) |
| Lemon Balm (Melissa officinalis) | 🌤 4-6h sun 💧 Moderate (2x/week) 🧪pH 6.0-7.5 🌬️ Low | ✅ Attracts bees ✳️ Companions: Brassicas ❌ Avoid: None | ⌚ 70 days 📊 150-300g/plant | ↔️ 30×30 cm ↕️ 40-80 cm | Cut back to 15cm in summer to prevent legginess. | 🍲 Teas, desserts, fish dishes 🔬 Calming (citronellal) |
| Marjoram (Origanum majorana) | ☀️ 6-8h sun 💧 Low (1x/week) 🧪pH 6.5-7.5 🌬️ Low | ✅ Companion to all veggies ✳️ Companions: Basil, sage ❌ Avoid: None | ⌚ 60-90 days 📊 100-200g/plant | ↔️ 25×25 cm ↕️ 30-60 cm | More tender than oregano; protect from frost. | 🍲 Soups, sausages, dressings 🔬 Digestive aid, anti-inflammatory |
| Dill (Anethum graveolens) | ☀️ 6-8h sun 💧 Moderate (2x/week) 🧪pH 5.5-7.5 🌬️ High | ✅ Host for swallowtails ✳️ Companions: Cabbage, lettuce ❌ Avoid: Carrots | ⌚ 60-90 days 📊 50-150g/plant | ↔️ 30×30 cm ↕️ 60-120 cm | Stake in windy areas. Self-seeds readily. | 🍲 Pickles, fish, potato salad 🔬 Calcium, magnesium |
| Chamomile (Matricaria chamomilla) | ☀️ 6-8h sun 💧 Low (1x/week) 🧪pH 5.6-7.5 🌬️ Low | ✅ Pest repellent ✳️ Companions: Cabbage, onions ❌ Avoid: None | ⌚ 60-70 days 📊 50-100g/plant (flowers) | ↔️ 20×20 cm ↕️ 30-60 cm | Harvest flowers when petals curl backward. | 🍲 Tea, skin salves 🔬 Calming (apigenin) |
| Lemongrass (Cymbopogon citratus) | ☀️ 6-8h sun 💧 High (3x/week) 🧪pH 5.0-7.0 🌬️ Moderate | ✅ Repels mosquitoes ✳️ Companions: Basil, cilantro ❌ Avoid: None | ⌚ 100-120 days 📊 300-500g/plant | ↔️ 30×30 cm ↕️ 60-120 cm | Divide clumps annually. Winter indoors in cold climates. | 🍲 Thai curries, teas, broths 🔬 Citral (anti-anxiety) |
| Lavender (Lavandula angustifolia) | ☀️ 6-8h sun 💧 Low (1x/week) 🧪pH 6.5-8.0 🌬️ Low | ✅ Deters moths/flies ✳️ Companions: Roses, 🎵Parsley, Sage, Rosemary and Thyme🎵 ❌ Avoid: Mint | ⌚ 90-200 days 📊 100-200g/plant | ↔️ 35×35 cm ↕️ 30-90 cm | Prune 1/3 after flowering. Avoid organic mulch. | 🍲 Sachets, baked goods, honey 🔬 Linalool (stress relief) |
| 🍀 Pro tips |
| ↳ Watering: Herbs prefer deep, infrequent watering over frequent sprinkles. |
| ↳ Harvesting: Morning cuts retain more essential oils. |
| ↳ Use soil amendment to change soil pH and texture to suit your chosen plant (more in module 5). |
| ↳ Dwarf Varieties for Pots: Basil: ‘Spicy Globe’; Rosemary: ‘Blue Boy’; Dill: ‘Fernleaf’ |
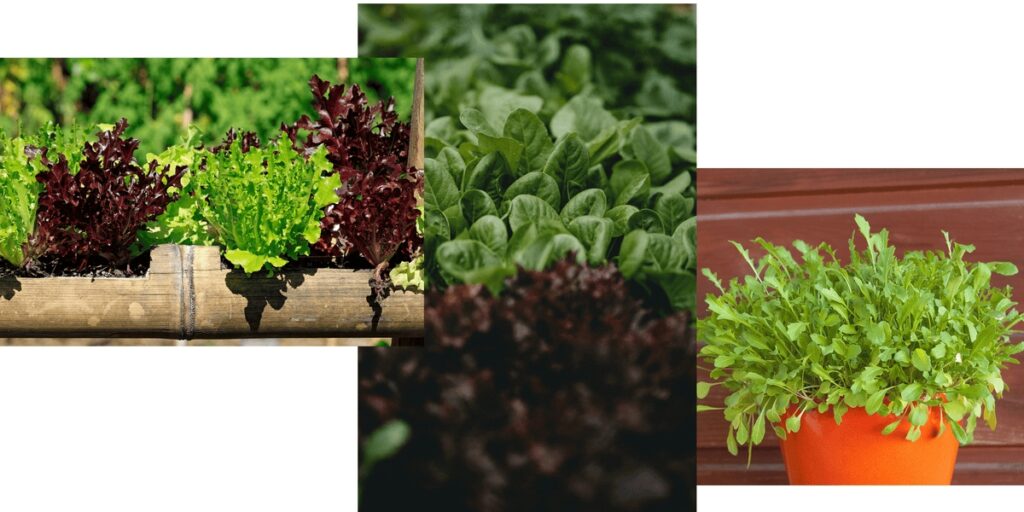
2.5.2. Leafy greens
Here is a detailed table of leafy greens that can do well in pots indoors. We have included all relevant helpful information to get you started: what each plant needs in terms of sun, soil and water, who they are good neighbours with, how long it takes to see results, any special tips to care for your new friends and how to use them.
| Plant name | Environment | Ecological function, companion plants | Seed to harvest, yield | Spacing and height | Care tips | Culinary uses and nutritional value |
| Lettuce (Lactuca sativa) | 🌤4-6h sun 💧High (3x/week) 🧪pH 6.0-7.0 🪱Soil: Moisture-retentive + compost | ✅Living mulch ✳️Strawberries, carrots ❌Avoid: Parsley | ⌚30-60d 📊150-300g/plant | ↔️20×20 cm ↕️15-30 cm | Harvest outer leaves. Grow ‘cut-and-come-again’ varieties like ‘Salad Bowl’ | 🍲 Salads, wraps 🔬 Vit K, folate, hydration (95% water) |
| Spinach (Spinacia oleracea) | 🌤4-6h sun 💧High (3x/week) 🧪pH 6.5-7.5 🪱Soil: Rich in nitrogen | ✅Quick ground cover ✳️Strawberries, peas ❌Avoid: Potatoes | ⌚40-50d 📊200-400g/plant | ↔️15×15 cm ↕️20-40 cm | ‘Baby Leaf’ types ideal for containers | 🍲 Saag, salads, quiches 🔬 Iron, vit A/C, antioxidants |
| Chard (Beta vulgaris subsp. cicla) | ☀️6h sun 💧Moderate (2x/week) 🧪pH 6.0-7.5 🪱Soil: Well-draining + compost | ✅Colourful pest deterrent ✳️Beans, onions ❌Avoid: Pole beans | ⌚50-60d 📊500g-1 kg/plant | ↔️30×30 cm ↕️40-60 cm | Cut outer leaves at base. Tip: ‘Bright Lights’ adds colour to patio gardens. | 🍲 Sautéed stems, soups 🔬 Vit K (3x daily needs), magnesium, inulin feeds probiotics |
| Chicory (Cichorium intybus) | ☀️6-8h sun 💧Moderate (2x/week) 🧪pH 5.5-7.5 🪱Soil: Sandy-loam | ✅Deep roots aerate soil ✳️Tomatoes, carrots ❌Avoid: Lettuce | ⌚60-85d 📊300-600g/plant | ↔️25×25 cm ↕️30-60 cm | Blanch heads for milder flavour. Tip: Grow ‘Sugar Loaf’ for compact heads. | 🍲 Radicchio salads, coffee substitute 🔬 Inulin (prebiotic), vit A/K |
| Rocket (Eruca sativa) | ☀️3-6h sun 💧Moderate-High (keep consistently moist) 🧪pH 6.0-7.0 🪱Soil: Fertile, well-draining | ✅Quick ground cover ✳️Bush beans, cucumbers, lettuce, onions ❌Avoid: Strawberries | ⌚21-40d 📊100-200g/plant | ↔️10×10 cm ↕️20-30 cm | Prone to bolting in heat; keep in a cool spot (15-18°C). Harvest with scissors 1″ above base for “cut-and-come-again”. Supplement with a grow light if natural light is low. | 🍲 Peppery salads, pesto, pizza topping 🔬 Glucosinolates (cancer-fighting), vit K, calcium, antioxidants |
For the adventurous: regrowing veggie scraps
Feel silly throwing out big chunks of veggies you “cannot” use? Try regrowing some veggies you bought at the supermarket by leaving the roots intact and placing them in water! It’s also a great idea to get kids involved. Here is a handy table with great tips to get started.
| 🌱 Permaculture principle in practice: Produce no waste |
| Take a leaf out of Mother Nature’s book and always find a new use for any “waste/leftovers” you create. E.g.: Make fertiliser from kitchen scraps for a nutrient boost (check out how in module 5). |
| Vegetable | How to regrow | Time to harvest | Tips for success | Yield |
| Green onions (Allium fistulosum) | Place roots (with 2-3cm stems) in water; change water every 3 days. Transplant to soil after 1 week. | 7-10 days (leaves) | Cut leaves from the outside to encourage growth. | 3-5 harvests per plant |
| Lettuce (Lactuca sativa) | Save the base (5cm). Place in shallow water; mist daily. Transplant when new leaves appear. | 10-14 days (leaves) | Works best with romaine or butterhead. Avoid ‘Iceberg’ (low success). | 1-2 small heads |
| Celery (Apium graveolens) | Cut base (5cm thick). Suspend in water; transplant after 1 week. | 3-4 weeks (stems) | New growth will be thinner than store-bought. | 1-2 harvests |
| Bok choy (Brassica rapa subsp. chinensis) | Submerge base (2cm) in water. Move to soil after roots develop. | 2-3 weeks (leaves) | Prefers cooler temps (<24°C). | 1 harvest |
| Leek (Allium ampeloprasum) | Replant root ends (3cm) in soil. Keep moist. | 8-10 weeks (stems) | Blanch stems by mounding soil for tenderness. | 1-2 harvests |
| Fennel (Foeniculum vulgare) | Save bulb base (3cm). Soak in water; transplant when roots form. | 4-5 weeks (bulb) | Needs deep soil for bulb development. | 1 small bulb |

| 🍀 Pro tips |
| Water vs soil: |
| ↳ Start in water: Green onions, lettuce, celery (easy to monitor roots). |
| ↳ Plant directly in soil: Leek (prevents rot). |
| Light requirements: |
| ↳ Low light (indoor windowsill): Lettuce, bok choy. |
| ↳ Full sun (outdoors/balcony): Leek, green onions. |
| Boost growth: |
| ↳ Add compost tea to water for nutrients (check out module 5.2.2.). |
| ↳ Use terracotta pots for better airflow to roots. |
| ⚠️ Common mistakes to avoid |
| ↳ Overcrowding: Give leeks space to expand. |
| ↳ Stagnant water: Change every 3 days to prevent mould. |
| ↳ Harvesting too soon: Wait until new growth is at least 10cm tall. |
2.5.3. When to grow herbs and leafy greens & ideal conditions
Herbs and leafy greens can be a year-round crop. Since they’re grown indoors, they aren’t so dependent on the seasons. This means we have to provide an environment in which they are happiest, even in winter with the help of artificial light. Check out the table below for a quick guide to doing just that.
| Factor | Details |
| Light needs | 🏞️Natural: 4-6 hrs direct sun (south window) 🤖Artificial: 12-14 hrs under 18W+ LED (15-30cm above plants, 5000-6000K light warmth) |
| Watering | 💧When the top 2cm of soil is dry. Avoid soggy soil! |
| Harvest time | 🏃♀️Fast (3-4 weeks): Lettuce, arugula 🚶♀️Medium (6-8 weeks): Basil, parsley |
| Ideal temperature | 🌡️18-24°C – Keep away from drafts |
2.5.4. Where to grow herbs and leafy greens
You can use a wide variety of containers, either shop-bought or reusing some household waste. Have a look at this short guide.
| Container type | Best for | 🍀 Pro tips |
| Terracotta pots | Mediterranean herbs (rosemary, thyme) | Breathable material prevents soggy roots – perfect for herbs that hate wet feet! |
| Plastic pots | Leafy greens (lettuce, kale) | Lightweight and retains moisture well. Add perlite to soil for better drainage. |
| Egg cartons | Starting seedlings | Place on a tray. Best for short-term use (2-3 weeks max). |
| Window boxes | Mixed herb gardens | Space plants 10cm apart. Rotate box weekly for even sun exposure. |
| Upcycled containers (yogurt cups, tin cans) | Budget-friendly starts | Sanitise with vinegar first! Use coffee filters to cover drainage holes and prevent soil loss. |
| Self-watering pots | Basil, mint (thirsty plants) | Great for forgetful waterers. Check the reservoir weekly. |
See what materials are easily available to repurpose as plant pots to you and how many of them fit into your space. Use these ideas for vertical arrangements to maximise your space. Check out a few design ideas at the end of this module.
2.5.5. How to grow herbs and leafy greens: a step-by-step guide
Materials list 📦
- Seeds or seedlings (basil, mint, lettuce, kale)
- Containers with drainage holes (pots, recycled containers)
- Potting mix (store-bought or sterilised outdoor soil)
- Light source (sunny window or 5000-6000K grow light)
- Watering can or spray bottle
Step-by-step instructions 📋
- Planting
- Fill containers with moist potting mix.
- Seeds: Sow 2-3x deeper than seed size. Cover lightly.
- Seedlings: Transplant gently, firm soil around roots.
- Light & location
- Place on a sunny windowsill or under grow lights.
- Rotate pots daily for even growth.
- Daily care
- Water: Use the finger test – only water when soil feels dry deeper than 2 cm
- Harvest: Snip outer leaves first (encourages regrowth).
- Troubleshooting
- Leggy plants? Move closer to light.
- Yellow leaves? Check for overwatering.
| 🍀 Pro tips |
| Start easy: Try mint or lettuce – forgiving and fast! |
| Boost flavour: Harvest in morning for peak oils. |
| Drainage is non-negotiable – Drill holes if none exist |
| Size matters – 15cm+ depth for most greens, 20cm+ for deep-rooted herbs (dill, parsley) |
| Group wisely – Combine herbs with similar water needs (e.g. rosemary + sage = dry lovers; basil + cilantro = water lovers) |
Design options: herbs and leafy greens
Check out the Design options in the houseplants section (module 2.7) for some layout options!
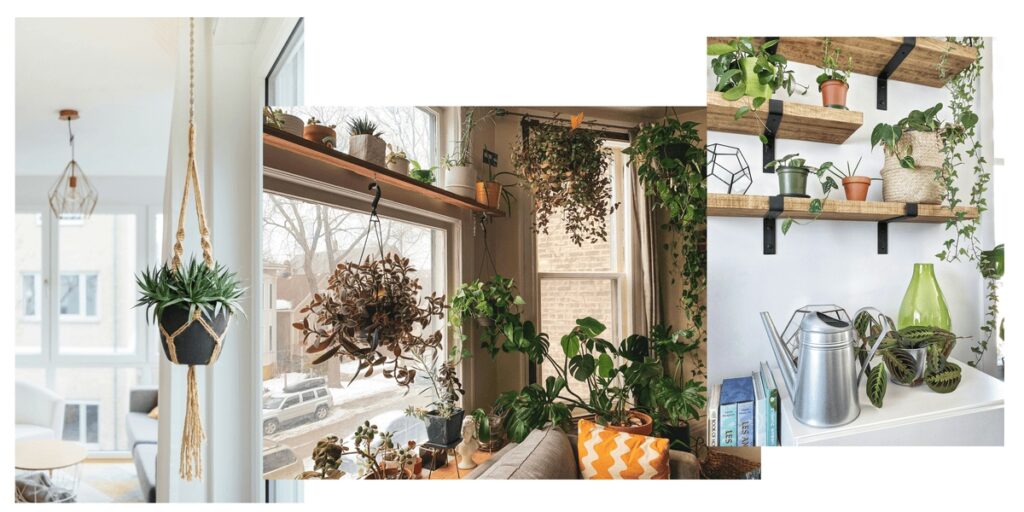
2.6. Houseplants: your lush, air-purifying companions!
Who says houseplants are just pretty decor? These easy-care greens help oxygenate your air, boost your mood, and thrive with minimal fuss – perfect for first-time plant parents! Just match them to your home’s light and temperature, and they’ll do the rest.
Top beginner-friendly picks
- Pothos (devil’s ivy) – Thrives in low light, removes formaldehyde (great for offices or dim corners)
- Spider plant – Purifies air rapidly; produces cute “baby” plants you can share with friends
- Aloe vera – Loves sunny spots; soothes burns with its healing gel (first aid essential!)
- Snake plant – Survives neglect, releases oxygen at night (ideal for bedrooms)
Bonus benefits you’ll love
- Natural air filters – They help remove toxins like benzene and formaldehyde
- Stress reducers – Studies show caring for plants lowers anxiety
- Living decor – Instant cozy vibes for any space
Transform your home into a lush, green sanctuary with the perfect beginner-friendly houseplants. This section introduces you to easy-care varieties, details their ideal growing conditions, and provides practical guides for propagation and repotting. Discover creative container ideas and inspiration for styling your plants in the Design Options section, and use the General Maintenance Table as your essential quick-reference guide for keeping your new greenery thriving.
Your urban jungle starts with just one plant – which will you choose?
2.6.1. Which houseplants to pick
Here is a detailed table of herbs that can do well in pots indoors. We have included all relevant helpful information to get you started: what each plant needs in terms of sun, soil and water, who they are good neighbours with, how long it takes to see results, any special tips to care for your new friends and how to use them.
| Common & Latin name | Environmental needs | Care tips | Toxicity | Propagation |
| Snake Plant (Sanseveria, any species) | ☀️ Low-bright indirect 💧 Every 3-4 weeks 🪱 Well-draining cactus mix 🌡️ 15-29°C | ✔️ Thrives on neglect ✂️ Wipe leaves of dust | 🐾 Toxic to pets (saponins) | ➗ Division or leaf cuttings |
| Spider Plant (Chlorophytum comosum) | ☀️ Bright indirect 💧 Weekly (keep moist) 🪱 Peat-based mix 🌡️ 15-25°C | ✔️ Browning tips = fluoride (use rainwater) ✂️ Trim “pups” to encourage growth | 🐾 Non-toxic | 🌱 Plantlets (pups) in water/soil |
| Pothos (Epipremnum aureum) | ☀️ Low-bright indirect 💧 Every 1-2 weeks 🪱 Universal potting mix 🌡️ 18-29°C | ✔️ Yellow leaves = overwatering ✂️ Prune to control length | 🐾 Toxic (oral irritation) | ✂️ Stem cuttings in water |
| Peace Lily (Spathiphyllum spp.) | ☀️ Low-medium indirect 💧 Weekly (loves humidity) 🪱 Peat-moss mix 🌡️ 18-26°C | ✔️ Droops dramatically when thirsty 💦 Mist leaves weekly | 🐾 Toxic (calcium oxalate) | ➗ Division at roots |
| ZZ Plant (Zamioculcas zamiifolia) | ☀️ Low-bright indirect 💧 Every 3-4 weeks 🪱 Sandy, well-draining 🌡️ 18-26°C | ✔️ Tolerates drought (rhizomes store water) 🚫 Overwatering kills | 🐾 Toxic (all parts) | ➗ Rhizome division or leaf cuttings |
| Aloe Vera (Aloe barbadensis) | ☀️ Bright indirect-direct 💧 Every 3 weeks 🪱 Cactus/succulent mix 🌡️ 18-26°C | ✔️ Brown leaves = sunburn 🌱 Harvest gel from mature leaves | 🐾 Mildly toxic (diarrhoea) | 🌱 Offsets (pups) or leaf cuttings |
| Chinese Evergreen (Aglaonema spp.) | ☀️ Low-medium indirect 💧 Every 1-2 weeks 🪱 Peat-based mix 🌡️ 18-27°C | ✔️ Variegation fades in low light 💦 Prefers 40-60% humidity | 🐾 Toxic (oral irritation) | ✂️ Stem cuttings in water/soil |
| Rubber Plant (Ficus elastica) | ☀️ Bright indirect 💧 Every 1-2 weeks 🪱 Well-draining mix 🌡️ 16-29°C | ✔️ Wipe leaves monthly ✂️ Prune top to encourage bushiness | 🐾 Toxic (latex sap) | ✂️ Air layering or stem cuttings |
| Areca Palm (Dypsis lutescens) | ☀️ Bright indirect 💧 Weekly (keep moist) 🪱 Loamy, well-draining 🌡️ 18-27°C | ✔️ Brown tips = low humidity/fluoride 💦 Mist frequently | 🐾 Non-toxic | 🌱 Division at root clump |
| Dracaena (Dracaena spp.) | ☀️ Low-bright indirect 💧 Every 2 weeks 🪱 Peat-based mix 🌡️ 18-24°C | ✔️ Fluoride-sensitive (use distilled water) ✂️ Cut cane to propagate | 🐾 Toxic to pets (vomiting) | ✂️ Stem cuttings or air layering |
| 🍀 Pro tips |
| Light (use phone app to measure): Low (50-150 lux), Bright indirect (1,000-2,500 lux), Direct (3,000+ lux) |
| Low-Light Champions: Snake plant, ZZ plant, Chinese evergreen |
| Humidity Lovers: Peace lily, areca palm (look for microclimate hacks in module 5.6) |
| Pet-Safe Options: Spider plant, areca palm, calathea |
| Air Purifiers: Peace lily, snake plant, dracaena |
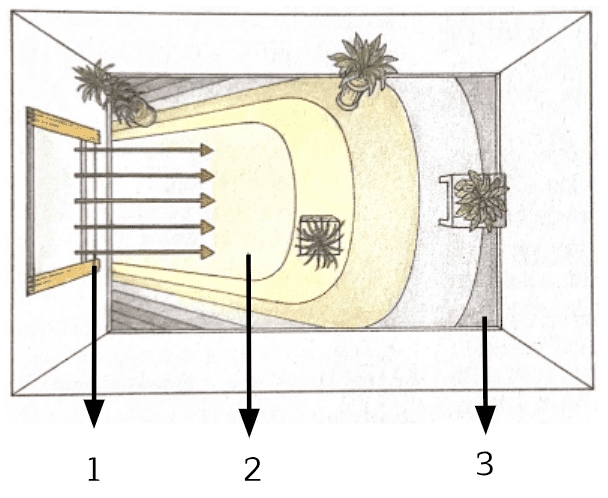
1 – Direction of light from the window
2 – Area with the most natural light
3 – Area with the least natural light
Plants that are furthest from the window get the least light. If the plant is 2m away, it receives only 20% of the light that it would if it were right at the window. Plants that are on either side of the window also don’t get much light, especially if the windowsill is very wide.
2.6.2. When to grow houseplants & ideal conditions
In Europe, most houseplants are tropical or desert species that couldn’t survive in our outdoor temperate climate – they’re essentially “climate refugees” we keep indoors. While some do flower or even bear fruit in their natural habitat (like monstera or orchids – vanilla beans come from an orchid!), our homes typically lack the intense sunlight, humidity, or seasonal cues needed to trigger these stages. Instead, we grow them for their foliage, unusual shapes, or air-purifying qualities – not for food, since many are mildly toxic or nutritionally insignificant. A fiddle-leaf fig won’t fruit in your living room, and a monstera’s edible “fruit” requires decades of perfect jungle-like conditions. So, we enjoy them as decorative, low-maintenance companions that connect us to ecosystems far beyond our own winters.
Since they’re grown indoors, they aren’t dependent on the seasons, but they can experience winter dormancy if we can’t provide an optimal environment. Check out module 5.6 for tips on how to amend your soil and environment to please your new plants, wherever they’re originally from.
2.6.3. How to grow houseplants: a step-by-step guide
🌱 Getting new plants
- Buying:
- Home improvement stores, garden centres, or plant swaps.
- Propagating from friends:
- Ask for cuttings from healthy plants (see methods below).
Propagation methods
a) Stem cuttings (best for Pothos, Spider Plants, Dracaena)
Materials list📦
- Jar/vase
- Water
- Sphagnum moss (optional)
- Plastic container (if using moss)
Step-by-step instructions📋
| 1. Cut a stem with at least 1 node (the bump where roots grow). | 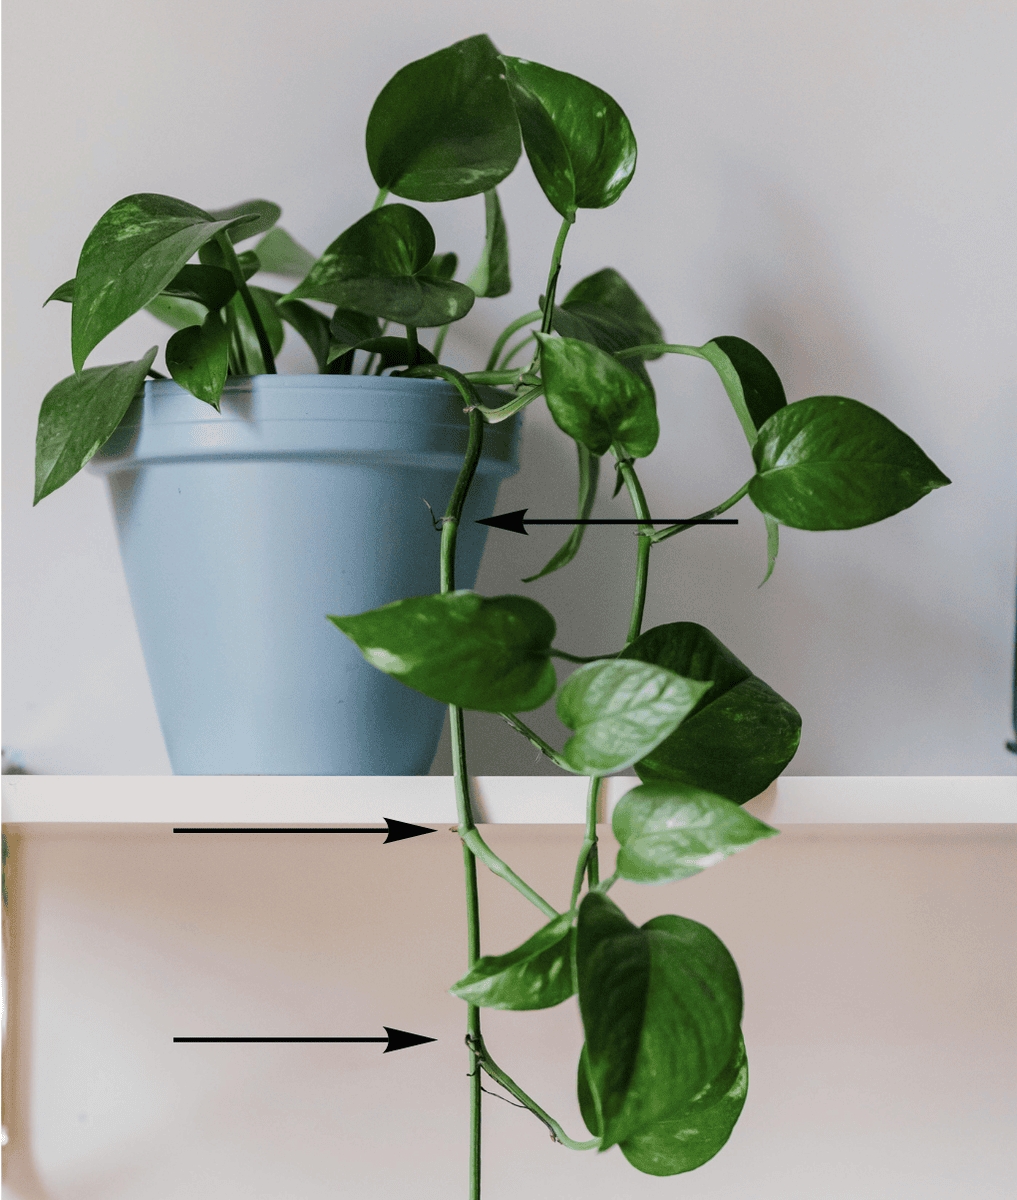 |
| 2. Place in water (change weekly) OR wrap the stem in damp sphagnum moss and keep in a ventilated container. | 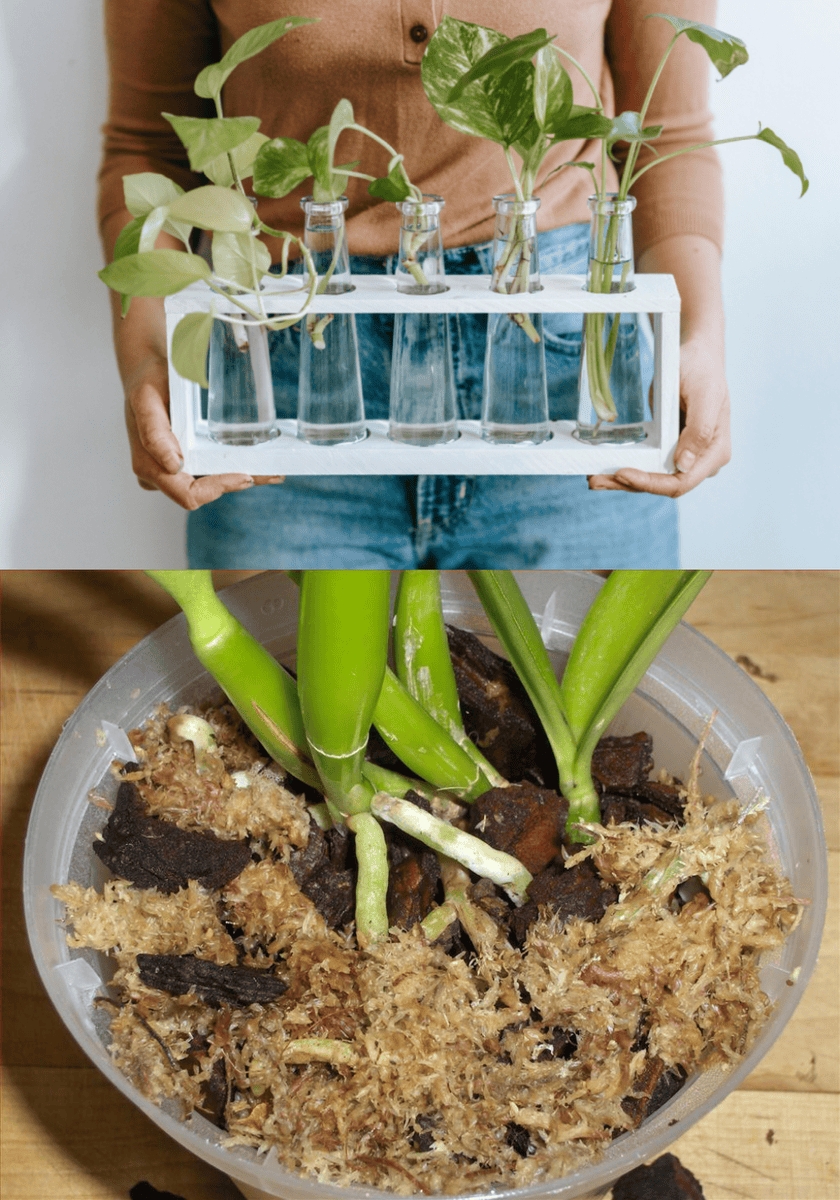 |
| 3. Wait 2–4 weeks until roots are 3–5 cm long, then plant in soil. |
b) Leaf cuttings (succulents like Aloe, Snake Plant)
Materials list📦
- Healthy leaves
- Well-draining soil
Step-by-step instructions📋
- Gently twist off a healthy leaf.
- Let it dry for 1–2 days (to prevent rot).
- Place on damp soil—roots should sprout in a few weeks!

c) Root division (Peace Lily, ZZ Plant, Areca Palm)
Materials list📦
- Sharp knife (optional)
- Fresh soil
- New pots
Best time: Spring or autumn.
Step-by-step instructions📋
- Remove the plant from its pot gently by placing two fingers either side of the stem base, tipping it out slowly.
- Separate root clumps by hand or with a clean knife.
- Replant divisions in fresh soil.
| 🍀 Pro tips |
| This revives overgrown plants for free! |
| 🌿 Repotting 101 |
| Roots growing out of drainage holes = time to repot! |
| Materials list📦 |
| ↳ Appropriate potting mix (e.g., “cactus soil” for succulents) |
| ↳ New pot (only 2–5 cm larger than the old one) |
| ↳ Perlite/pumice (for DIY soil mixes – see Module 5 for recipes) |
| Step-by-step instructions📋 |
| ↳ Gently remove the plant from its old pot. |
| ↳ Loosen roots if they’re tightly bound. |
| ↳ Place in a new bigger pot with fresh soil, filling gaps around the roots. |
| ↳ Water deeply and let it adjust. |
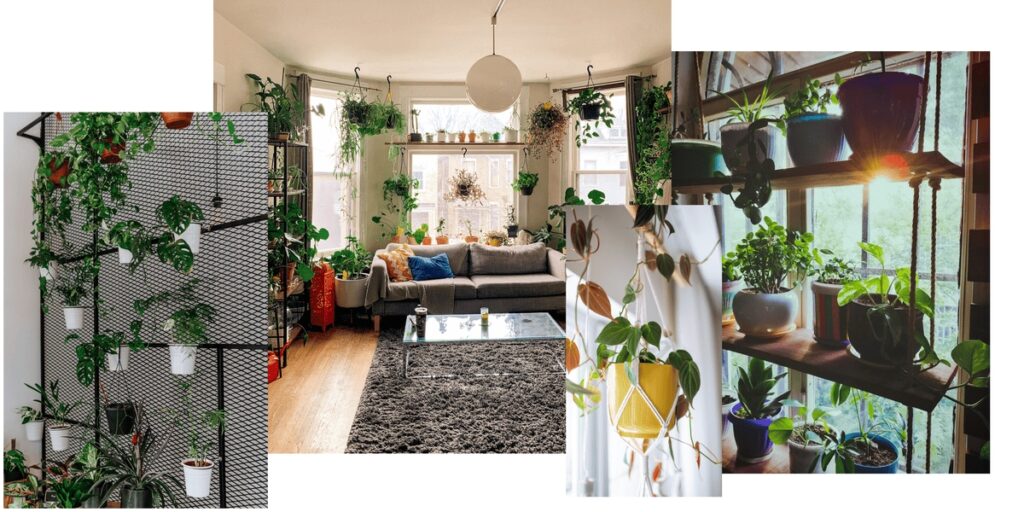
2.7. Design options: houseplants (+ herbs and leafy greens)
Depending on your available time and space you can have a varied number of pots and jars on and around your windowsill. You can maximise the space you do have with some simple ideas. Below is an example of a microgreen and sprouting setup based on your available space and time. Remember, these are estimates – consult your list of needs and resources to plan out the micro-garden that suits you.
| Time \ Space | 0.5 m² (e.g., 1-2 small trays/pots) | 1 m² (e.g., 3-5 pots or a long planter) | 2 m² (e.g., shelves + hanging pots) |
| 10 min/week | 🌿 Herbs: 2-3 small pots 🥬 Leafy greens: 1-2 plants 🪴 Houseplants: 1-2 plants. | 🌿 Herbs: 4-5 pots. 🥬 Leafy greens: 3-4 plants 🪴 Houseplants: 2-3 plants | 🌿 Herbs: 6-8 pots 🥬 Leafy greens: 5-6 plants 🪴 Houseplants: 4-5 plants |
| 30 min/week | 🌿 Herbs: 3-4 pots 🥬 Leafy greens: 2-3 plants 🪴 Houseplants: 2-3 plants | 🌿 Herbs: 5-6 pots 🥬 Leafy greens: 4-5 plants 🪴 Houseplants: 3-4 plants | 🌿 Herbs: 8-10 pots 🥬 Leafy greens: 6-8 plants 🪴 Houseplants: 5-6 plants |
| 1 hour/week | 🌿 Herbs: 4-5 pots 🥬 Leafy greens: 3-4 plants 🪴 Houseplants: 3-4 plants | 🌿 Herbs: 6-7 pots 🥬 Leafy greens: 5-6+ plants 🪴 Houseplants: 4-5 plants | 🌿 Herbs: 10-12 pots 🥬 Leafy greens: 8-10 plants 🪴 Houseplants: 6-8 plants |
INSPIRATION
Here are a few visual layout techniques for maximising your window sill urban garden:
- Use small free-standing shelf units on or near the window sill
- Hang light plants from the ceiling or curtain pole above your window
- Install shelves or grid planters on bright walls close to windows or take advantage of the free space on tops of cabinets close to windows.
- Use a tension rod vertical planter close to bright windows, taking up almost no floor space.

| 🌿 Design tip: Thriller, Filler, Spiller |
| Thriller: Tall centrepiece (Dracaena). |
| Filler: Bushy mid-height plants (Chinese Evergreen). |
| Spiller: Trailing plants (Pothos). |
2.8. General maintenance schedule for herbs, leafy greens and houseplants
Unlike fast-growing sprouts and microgreens that thrive on a weekly schedule, indoor herbs, leafy greens, and houseplants require a steadier, long-term care routine. These plants are grown to maturity – some for continuous harvests, others for lasting greenery – and benefit from a structured monthly check-in.
This calendar covers essential tasks like pruning, feeding, and pest prevention to keep your plants productive and healthy year-round. Adjust care seasonally (less water in winter, more light in summer) and enjoy fresh flavours and foliage every month!
This is a general look at maintenance tasks you can focus on each week, don’t forget about individual plants’ watering schedules.
| Season/week | SUMMER ☀️ | WINTER ❄️ |
| General guidelines | 👉 Regular watering, fertilising and harvesting. Ensure plenty of water and sunlight, avoid scorching | 👉 Stop fertilising, harvest and water 50% less, ensure minimum environmental needs |
| Week 1 | 👉 Shower plants down in the bathroom deeply to remove dust and flush soil of salts build-up. Let drain completely. 👉 Harvest sprigs and leaves of edible plants. | 👉 Water lightly (only if soil is dry) 👉 Wipe dust off leaves. 👉 Clean glass for 30% more light |
| Week 2 | 👉 Fertilise 👉 Harvest sprigs and leaves of edible plants. | 👉 Pause fertilising 👉 Harvest only tiny amounts. |
| Week 3 | 👉 Check for disease and pests, apply treatments as needed. 👉 Prune back dead/diseased parts. Prune flower buds to preserve flavour. 👉 Rotate plants for even growth direction. | 👉 Check for disease and pests, apply treatments as needed. 👉 Prune back dead/diseased parts. 👉 Monitor for mould in soil. 👉 Rotate plants for even growth direction. |
| Week 4 | 👉 Check if plants are rootbound and repot 👉 Take cuttings for propagation 👉 Rotate plants for even growth direction 👉 Fertilise | 👉 Move away from cold drafts and closer to windows. 👉 Use grow lights if needed or move closer to bright windows 👉 Check room humidity, use pebble trays next to humidity-loving plants, move away from radiators. |
2.9. Rewards vs. challenges
🌿 Rewards
- Fresh flavours: Homegrown herbs & greens for smoothies, salads, and meals.
- Better air: More fresh oxygen in your space.
- Instant vibe boost: Your own cozy, green oasis.
- Conversation starter: Connect with others over gardening tips.
- DIY pest control: Use lavender or rosemary to make natural mosquito repellent (steep in alcohol or oil).
🌱 Challenges
- Watering smarts: Not all plants need daily water! Check soil first – if the top few centimetres are dry, water; if damp, wait.
- Dry spells happen: Don’t stress – try self-watering tricks (like bottle irrigation).
- Plants die sometimes: Compost them instead! They’ll feed new life.
- Conflicting advice? Everyone’s experience differs – stay curious and test what works for your space.
2.10. Community connection checklist
Fun ways to grow your gardening network – from beginner to pro!
🌿 Connecting with others
🌱 Basic
- Ask neighbours for spare flower pots/seeds
- Browse indoor gardening books at the library
- Find people giving away plants on social media
🌿 Intermediate
- Attend a local gardening workshop (check community centres/libraries/local eco-groups)
- Join a plant swap – or start one!
- Post on your building board: “Have herbs to share! Need soil?”
🌳 Advanced
Find your plant tribe:
- Spot them: People carrying cuttings, staring at nursery plants too long.
- Find them: Facebook groups, urban farming meetups, guerrilla gardening chats.
- Connect: “Hey, I’m growing basil – want to trade for your mint?”
🧘 Community with yourself (because growth starts at home!)
- Learned a new plant fact
- Kept going after a plant casualty (compost = life’s next chapter!)
- Repotted your first plant without panic
- Witnessed a seed’s “ta-da!” moment (germination wins!)
Remember: Every gardener was once a beginner. Celebrate your progress! 🌟
3. Balcony micro-gardens: Your mini outdoor paradise
“It is not half so important to know as to feel.”
Rachel Carson
Think your balcony is too small for a garden? Think again! Even with just a few square meters, you can grow fresh herbs, crisp veggies, and even sweet fruits – right outside your door. Whether you’ve got a sunny ledge or a shady corner, our toolkit helps you transform your balcony into a thriving edible oasis.
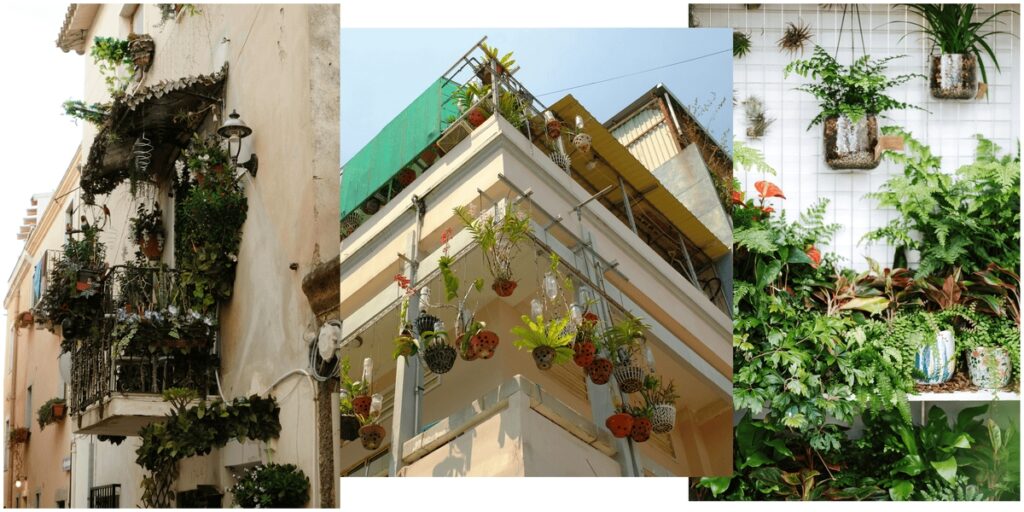
Why you’ll love balcony gardening:
- Fresh, homegrown flavour – Snip herbs or pick veggies minutes before eating.
- Maximise small spaces – Vertical planters, railing pots, and stacking crates make every inch count.
- Permaculture perks – Companion planting and natural pest control keep your garden thriving.
- Community connection – Swap harvests or tips with neighbours (who might envy your green thumb!).
Ready to transform your balcony into a thriving oasis? This module is your complete guide to cultivating a vibrant container garden, featuring a comprehensive list of ideal plants and compact fruit trees for your space. You’ll discover the ideal growing conditions, container options, and a step-by-step guide to growing from seeds. Find inspiration with our balcony design ideas and simplify care with a handy general maintenance calendar. To ensure your success, we’ve also included tools to help you anticipate challenges and even build your own gardening community.
Ready to turn your balcony into a productive paradise? Let’s grow!
| Starting here? Go back to the design process starting point in the Introduction, it’s a crucial step of observation and analysis that will ensure the success of your chosen project! |
3.1. What to grow on your balcony
Look back at your notes where you observed how much sunlight, precipitation and wind you have crossing your balcony. Choose the plants that best fit your space. You can try to grow plants that don’t exactly fit your environment, but they’ll need some extra support. Read more about this in module 5.6.
Here is a detailed table of herbs, veggies and fruits that can do well in pots and containers on your balcony. We have included all relevant helpful information to get you started: what each plant needs in terms of sun, soil and water, who they are good neighbours with, how long it takes to see results, any special tips to care for your new friends and how to use them. Any of the herbs and leafy greens we introduced in the previous module can also be planted on the balcony!
| 🌱 Permaculture principle in practice: Obtain a yield |
| “You can’t work on an empty stomach!” and “It’s only sustainable if it’s fun!” come to mind here. Whatever you choose to do, on whatever scale, make sure you have a net positive outcome throughout the process, not only will it keep your motivation up, it will make the whole thing more enjoyable. Don’t think only in terms of money, your yield could be the friends you made along the way, the satisfaction of your first strawberry harvest or learning something new. |
| Common & Latin name | Environmental needs | Functions & companions | Growth & yield | Spacing & height | Care tips | Culinary use & nutritional value |
| Cabbage (Brassica oleracea var. capitata) | ☀️6-8h sun 💧Moderate (3x/week) 🧪pH 6.0-7.5 🪱Well-draining, loamy, rich in organic matter 🌬️High | ✅Trap crop for pests ✳️Dill, chamomile ❌Strawberries | ⌚80-180d 📊1 compact head (0.5-1.5kg) | ↔️ 45×45 cm ↕️ 30-45 cm | Use fabric pots for airflow; rotate yearly | 🍲 Fermented (sauerkraut), soups 🔬 Vit K, glucosinolates |
| Broccoli (Brassica oleracea var. italica) | ☀️6-8h sun 💧High (3x/week) 🧪pH 6.0-7.0 🪱Well-draining, fertile, loamy 🌬️Moderate | ✅Pest deterrent (flea beetles) ✳️Basil, onions ❌Tomatoes | ⌚60-100d 📊1 main head + side shoots (0.3-0.8kg) | ↔️ 45×45 cm ↕️ 45-60 cm | Harvest at 10-15cm diameter; shade in heat | 🍲 Steamed, stir-fries 🔬 Sulforaphane (anti-cancer) |
| Kale (Brassica oleracea var. sabauda) | ☀️4-6h sun 💧Moderate (2x/week) 🧪pH 6.0-7.5 🪱Moderate drainage, loamy, organic-rich 🌬️Low | ✅Cold-tolerant ✳️Herbs, onions ❌Tomatoes | ⌚50-70d 📊Continuous leaves (0.5-1kg/plant) | ↔️ 30×30 cm ↕️ 40-60 cm | Pick outer leaves; frost improves flavour | 🍲 Chips, smoothies 🔬 Vit A (200% DV per cup) |
| Onion (Allium cepa) | ☀️6-8h sun 💧Moderate (2x/week) 🧪pH 6.0-7.0 🪱Excellent drainage, sandy loam 🌬️Low | ✅Pest repellent ✳️Carrots, lettuce ❌Peas/beans | ⌚100-150d 📊10-15 bulbs (0.5-1kg) | ↔️ 10×10 cm ↕️ 30-45 cm | Stop watering when tops fall over | 🍲 Raw, caramelised 🔬 Quercetin (anti-inflammatory) |
| Garlic (Allium sativum) | ☀️6-8h sun 💧Low (1x/week) 🧪pH 6.0-7.5 🪱Excellent drainage, sandy loam 🌬️Low | ✅Fungal suppressor ✳️Tomatoes, kale ❌Peas/beans | ⌚150-210d 📊1 bulb per clove (50-100g) | ↔️ 15×15 cm ↕️ 30-60 cm | Plant cloves in fall; harvest when 50% leaves brown | 🍲 Raw, roasted 🔬 Allicin (antibacterial) |
| Radish (Raphanus sativus) | ☀️6-8h sun 💧Moderate (2x/week) 🧪pH 6.0-7.0 🪱Well-draining, sandy, loose 🌬️Low | ✅Quick crop ✳️Cucumbers, peas ❌Hyssop | ⌚25-30d 📊10-20 roots (200-400g) | ↔️ 5×5 cm ↕️ 15-30 cm | Thin seedlings early; harvest promptly | 🍲 Salads, pickled 🔬 Digestive enzymes |
| Zucchini (Cucurbita pepo) | ☀️6-8h sun 💧High (3x/week) 🧪pH 6.0-7.5 🪱Well-draining, rich, loamy 🌬️Moderate | ✅Pollinator flowers ✳️Beans, nasturtiums ❌Potatoes | ⌚45-60d 📊5-10 fruits (2-5kg) | ↔️ 60×60 cm ↕️ 60-90 cm | Hand-pollinate; harvest at 15-20cm | 🍲 Grilled, baked 🔬 Manganese, vit C |
| Cucumber (Cucumis sativus) | ☀️6-8h sun 💧High (3x/week) 🧪pH 6.0-7.0 🪱Well-draining, fertile, loose 🌬️High (trellis needed) | ✅Vertical space saver ✳️Dill, radishes ❌Aromatic herbs | ⌚50-70d 📊10-15 fruits (1-3kg) | ↔️ 30×30 cm (trellised) ↕️ 1-2m | Use tomato cages; mulch to retain moisture | 🍲 Salads, pickles 🔬 Hydrating (96% water) |
| Beans (Phaseolus vulgaris) | ☀️6-8h sun 💧Moderate (2x/week) 🧪pH 6.0-7.5 🪱Well-draining, loamy, not overly rich 🌬️Moderate (pole types) | ✅Nitrogen fixer ✳️Corn, squash ❌Onions/garlic | ⌚50-70d 📊30-60 pods (0.5-1.5kg) | ↔️ 20×20 cm (bush) ↕️ 30-200 cm | Soak seeds overnight; avoid overwatering | 🍲 Stews, hummus 🔬 Plant-based protein |
| Peas (Pisum sativum) | ☀️6-8h sun 💧Moderate (2x/week) 🧪pH 6.0-7.5 🪱Well-draining, light, loamy 🌬️Moderate | ✅Early-season crop ✳️Carrots, radishes ❌Onions/garlic | ⌚60-80d 📊20-50 pods (0.2-0.5kg) | ↔️ 10×10 cm (bush) ↕️ 30-150 cm | Provide twig supports; pinch tips | 🍲 Raw, soups 🔬 Fiber, vit K |
| Tomatoes (Solanum lycopersicum) | ☀️8+h sun 💧High (3x/week) 🧪pH 6.0-6.8 🪱Well-draining, rich, loamy 🌬️High (staking needed) | ✅Lycopene source ✳️Basil, marigolds ❌Cabbage | ⌚60-100d 📊2-5kg/plant (determinate) | ↔️ 45×45 cm ↕️ 60-120 cm | Prune suckers; mulch to prevent blight | 🍲 Sauces, fresh 🔬 Lycopene (heart health) |
| Potatoes (Solanum tuberosum) | ☀️6-8h sun 💧Moderate (2x/week) 🧪pH 5.0-6.0 🪱Well-draining, light, sandy loam 🌬️Low | ✅Soil loosener ✳️Beans, corn ❌Tomatoes | ⌚80-120d 📊5-10 tubers (0.5-2kg) | ↔️ 30×30 cm ↕️ 30-60 cm | Hill soil as plants grow; avoid wet foliage | 🍲 💬Boil ‘em, mash ‘em, stick ‘em in a stew, 💬 and roasted! 🔬 Resistant starch (gut health) |
| Chili Peppers (Capsicum spp.) | ☀️8+h sun 💧Moderate (2x/week) 🧪pH 6.0-6.8 🪱Well-draining, light, sandy loam 🌬️Moderate | ✅Pest repellent ✳️Basil, onions ❌Fennel | ⌚70-120d 📊20-50 pods (0.3-1kg) | ↔️ 30×30 cm ↕️ 45-90 cm | Stress plants (less water) for hotter pods | 🍲 Sauces, dried 🔬 Capsaicin (pain relief) |
| Bell Peppers (Capsicum annuum) | ☀️8+h sun 💧Moderate (2x/week) 🧪pH 6.0-6.8 🪱Well-draining, light, sandy loam 🌬️Moderate | ✅Pollinator-friendly ✳️Carrots, marjoram ❌Fennel | ⌚70-90d 📊5-10 fruits (0.5-1.5kg) | ↔️ 45×45 cm ↕️45-75 cm | Stake stems; harvest when glossy | 🍲 Stuffed, raw 🔬 Vit C (200% DV) |
| Strawberry (Fragaria × ananassa) | ☀️6-8h sun 💧High (3x/week) 🧪pH 5.5-6.5 🪱Well-draining, light, sandy loam 🌬️Low | ✅Ground cover ✳️Spinach, thyme ❌Cabbage | ⌚60-90d 📊0.5-1kg/plant | ↔️ 30×30 cm ↕️ 15-30 cm | Mulch with straw; remove runners | 🍲 Fresh, jams 🔬 Ellagic acid (anti-cancer) |
| Blueberry (Vaccinium myrtillus) | ☀️6-8h sun 💧High (3x/week) 🧪pH 4.5-5.5 🪱Well-draining, peaty, acidic 🌬️Moderate | ✅Antioxidant-rich ✳️Lingonberries ❌Tomatoes | ⌚2-3yrs to fruit 📊1-3kg/plant | ↔️ 80×80 cm ↕️ 60-120 cm | Use peat moss; rainwater only | 🍲 Fresh, smoothies 🔬 Anthocyanins (brain health) |
| Lingonberry (Vaccinium vitis-idaea) | ☀️4-6h sun 💧Moderate (2x/week) 🧪pH 4.0-5.5 🪱Moist but draining, peaty, acidic 🌬️Low | ✅Evergreen ground cover ✳️Blueberries ❌Alkaline-soil plants | ⌚2-3yrs to fruit 📊0.2-0.5kg/plant | ↔️ 50×50 cm ↕️ 15-30 cm | Acidic mulch; cold-hardy | 🍲 Jams, sauces 🔬 Proanthocyanins (UTI prevention) |
| Currant (Ribes spp.) | ☀️4-6h sun 💧Moderate (2x/week) 🧪pH 5.5-7.0 🪱Well-draining, loamy, organic 🌬️Moderate | ✅Bird-friendly ✳️Chives, tansy ❌Black walnuts | ⌚2-3yrs to fruit 📊1-3kg/plant | ↔️ 100×100 cm ↕️ 1-1.5m | Prune old wood; net against birds | 🍲 Jellies, syrups 🔬 Vit C (4x orange) |
| Kumquat (Dwarf) (Citrus japonica) | ☀️6-8h sun 💧Moderate (2x/week) 🧪pH 6.0-7.5 🪱Well-draining, light, sandy loam 🌬️Moderate | ✅Winter fruit ✳️Basil, lavender ❌None | ⌚2-3yrs to fruit 📊1-2kg/plant | ↔️ 80×80 cm ↕️ 1-1.5m | Fertilise monthly in season | 🍲 Eaten whole (skin sweet) 🔬 Fiber, vit C |
| Lemon (Dwarf) (Citrus limon) | ☀️8+h sun 💧Moderate (2x/week) 🧪pH 6.0-7.0 🪱Well-draining, light, sandy loam 🌬️High (fruit drop) | ✅Year-round harvest ✳️Marigolds, chives ❌None | ⌚3-5yrs to fruit 📊5-10kg/plant | ↔️ 100×100 cm ↕️ 1-2m | Hand-pollinate indoors; winter lights | 🍲 Juice, zest 🔬 Alkalising citric acid |
| Marigold (Calendula officinalis) | ☀️6-8h sun 💧Moderate (2x/week) 🧪pH 6.0-7.5 🪱Well-draining, average garden soil 🌬️Low | ✅Nematode control ✳️Tomatoes, squash ❌None | ⌚50-60d 📊50-100 flowers | ↔️ 25×25 cm ↕️ 30-60 cm | Deadhead for continuous blooms | 🍲 Edible petals (garnish) 🔬 Lutein (eye health) |
| Nasturtium (Tropaeolum majus) | ☀️6-8h sun 💧Low (1x/week) 🧪pH 6.0-7.5 🪱Well-draining, sandy, less fertile 🌬️Low | ✅Trap crop (aphids) ✳️Cucumbers, radishes ❌None | ⌚35-50d 📊20-50 leaves/flowers | ↔️ 30×30 cm ↕️ 15-30 cm (trailing to 2m) | Self-seeds; drought-tolerant | 🍲 Peppery leaves (salads) 🔬 Natural antibiotic |
| 🍀 Pro tips: Balcony gardening |
| Container sizes: |
| ↳ Large (40L+): Dwarf fruit trees, zucchini |
| ↳ Medium (20L): Tomatoes, peppers |
| ↳ Small (10L): Herbs, radishes |
| Soil mixes: |
| ↳ Acidic (pH 4.5-5.5): Blueberries/lingonberries (use peat + pine bark) |
| ↳ Light & Airy: Cucumbers/beans (add perlite) |
| ↳ Moisture-Retentive: Strawberries (coco coir + compost) |
| Space savers: |
| ↳ Trellis/Towers: Cucumbers, pole beans, nasturtiums |
| ↳ Stacked Pots: Strawberries, herbs |
| Pollinator boosters: |
| ↳ Plant marigolds + nasturtiums at pot edges |
| ↳ Group basil + tomatoes for mutual benefits |
| ↳ Read more on soil science and supporting urban nature in module 5. |
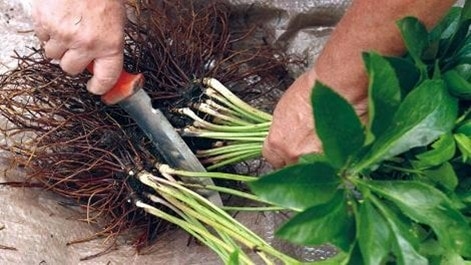
3.1.1. For the adventurous: compact fruit trees
Growing fruit trees in small spaces: Columnar & dwarf varieties
Even on a balcony or patio, you can enjoy homegrown fruit! The secret? Grafted fruit trees – where the plant’s stem is joined to special rootstocks that control their size and hardiness.
Columnar fruit trees (ultra compact)
These space-saving trees grow straight up like a pole, producing fruit along their central stem (no wide branches!).
Perfect for:
- Balcony pots (only need ~60cm/24in diameter)
- Small patios or against walls
- Experimental growers (shorter lifespan but fun!)
Top columnar varieties to try:
- Apple🍎 – ‘Northpole’ (cold-hardy), ‘Scarlet Sentinel’ (sweet-tart)
- Pear 🍐– ‘Golden Spice’ (juicy, compact)
- Peach/Plum🍑 – ‘Stark Saturn’ (donut-shaped peaches!)
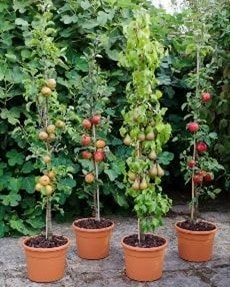
Dwarf & patio fruit trees
For longer-lived options (15+ years), try dwarf rootstocks:
- Apple (‘M27’ rootstock – grows 1.5m/5ft tall)
- Cherry (‘Gisela 5’ – ideal for pots)
- Fig (‘Little Miss Figgy’ – heavy producer)
🍀 Pro tips: Pair with strawberry pots or herbs below to maximise space!
3.2. When to grow herbs, veggies and fruit & ideal conditions
Now that you have your plant wish list, it’s time to start planning your garden schedule. When should you start?
Now that we’ve moved outside, Mother Nature’s in charge – complete with mood swings (looking at you, surprise frosts and heatwaves). But don’t worry, even small spaces like balconies can be tweaked to shelter your plants.
Timing is everything: The farther you are from the equator, the shorter your growing season – like a limited-edition plant sale! 🍀 Pro tips: Go local – nearby nurseries and seed swaps are goldmines for veggie varieties that already love your climate’s drama.
Bonus hack: Want more growing time? We’ll spill the tea on season extenders in module 5.6 (cloches, anyone?).
Check out this handy table with general tips on when it’s safe to start planting your seeds.
| Nighttime low | Suitable seeds | When to start |
| 🥶 Below 4°C | ❌ Too cold for most seeds | ⏳ Wait or start indoors |
| 🌬️ 4-10°C | 🥬 Cold-hardy greens: Peas, Lettuce, Spinach, Kale, Peas, Radish, Cabbage, Broccoli | 🌱 Early spring (before last frost). Can be started 4-6 weeks before your last frost date if nights stay above freezing. |
| 🌤️ 10-15°C | 🥕 Carrots, Beets, Chard, Parsley, Onions | 🌸 Spring, 2-4 weeks before last frost Best started when outdoor temps stay above 7°C at night. |
| ☀️ Above 15°C | 🍅 Tomatoes, Peppers, Eggplants, Cucumbers, Squash, Basil | ☀️ After last frost. Should only be started outdoors if nighttime temps stay above 10°C. |
| 🍀 Pro tips |
| Use a thermometer to check soil temperature (ideal range depends on the seed). |
| Vent the plastic cover on warm days to prevent overheating. |
3.3. Where to grow herbs, veggies and fruit
When it comes to containers, you have almost infinite options. While each type has its pros and cons, it really comes down to budget and aesthetics.
Here is a container cheat sheet: ideas for many upcycled and DIY options.
| Container type | Best for | DIY/upcycled? | 🍀 Pro tips |
| Terracotta pots | Mediterranean herbs (rosemary, thyme), dwarf fruit trees | Can be expensive, try to buy second-hand! | Terracotta pots absorb moisture, water the pot, too, so it doesn’t steal water from the plants. Paint them to reflect heat in hot climates! |
| Plastic pots | Leafy greens (lettuce, kale), bush tomatoes | Reuse plastic pots/packaging, drill drainage holes | Drill extra drainage holes – prevents soggy roots. Lightweight for hanging rails! |
| Fabric grow bags | Root veggies (carrots, potatoes), strawberries | Yes (old canvas totes) | Fold tops down as plants grow. |
| Wooden crates | Salad mixes, radishes, green onions | Yes (upcycled produce boxes) | Line with burlap to retain soil. Rot-resistant wood like cedar lasts longer. |
| Hanging baskets | Trailing herbs (thyme, oregano), cherry tomatoes | Yes (colanders, buckets) | Use coconut coir liner to retain moisture. Water daily in summer! |
| 20kg buckets | Peppers, eggplants, dwarf cucumbers | Yes (food-grade only) | Paint white to reflect heat. Add wheels for easy moving! |
| Gutter Planters | Shallow-rooted herbs (cilantro, arugula) | Yes (old rain gutters) | Mount on railings – perfect for tiny spaces! Add drip irrigation for lazy watering. |
| Egg Cartons | Seed starting (later transplant) | Yes | Biodegradable – plant directly in soil to avoid root disturbance. |
| Pallet Planters | Vertical strawberries, herbs | Yes (heat-treated pallets only) | Lean against walls for sun exposure. Line with landscape fabric. |
| 🍀 Pro tips |
| Container sizes: |
| 10-15L: Tomatoes, peppers |
| 5-10L: Cabbage, broccoli |
| 3-5L: Herbs, greens |
| Extra deep: Potatoes (30cm+- grow bags) |
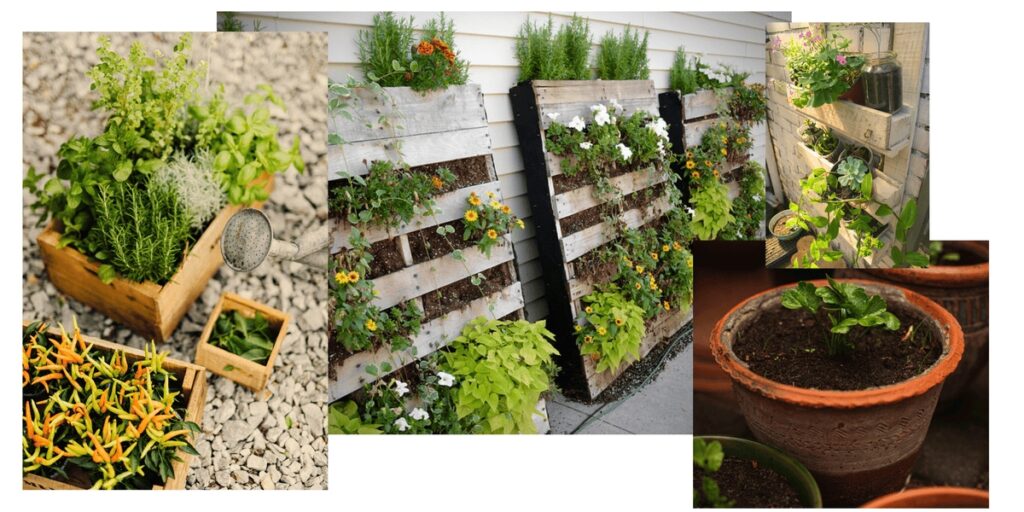
3.4. How to grow herbs, veggies and fruits: a step-by-step guide
Right! You have your list, know when to start, what type of containers you want and where to place them in your space. Now let’s get your hands dirty, follow our clear step by step guide to make your dreams a reality.
Whether you’re growing herbs on a windowsill or prepping veggies for your balcony, starting plants right makes all the difference! Here’s your foolproof guide.
Starting from seeds:
Materials list 📦
- Seeds (check the packet for planting dates)
- Seed trays or small pots (reuse egg cartons or yogurt cups!)
- Seed-starting mix (light and fluffy)
- Spray bottle or small watering can
- Plastic wrap or a humidity dome (reuse clear containers!)
- Sunny spot or grow light
Step-by-step instructions📋
- Make sure the timing is right (outdoor temperature)
- Fill trays with a damp seed mix.
- Plant 1-2 seeds per cell (check packet for depth).
- Cover lightly with soil and mist with water.
- Cover with plastic (like a mini greenhouse) until sprouts appear.
| 🍀 Pro tips |
| Keep them happy |
| ↳ Light: Once sprouted, move to a sunny window or under a grow light. |
| ↳ Water: Keep soil moist (not soggy) with a spray bottle. |
| ↳ Airflow: Remove plastic cover once seeds sprout to prevent mould. |
| Troubleshooting |
| ↳ Leggy seedlings? Not enough light – move closer to the window. |
| ↳ Damping off (tiny seedlings collapsing)? Too wet – let soil dry slightly. |
Starting from seedlings:
Materials list📦
- Larger pots (only 2-5 cm bigger than the original)
- Potting soil
- Trowel or spoon for transplanting
- Watering can
Step-by-step instructions📋
- Let them adjust
- New seedlings? Keep them in their original pot for a few days to settle.
- Repot gently
- Choose a pot slightly bigger than the original.
- Fill bottom with fresh soil, leaving space for the root ball.
- Squeeze the old pot to loosen roots, then tip it out, holding two fingers either side of the stem.
- Put fresh soil in the bottom of the new pot, place the plant on top, fill gaps at the side with soil, and water well.
- Hardening off
- Day 1-3: Place outside in shade for 1 hour.
- Day 4-6: Increase to 3 hours with some sun.
- Day 7+: Leave out all day (unless frost is coming).
| 🍀 Pro tips |
| Watering: |
| ↳ Seedlings: Keep soil moist (check daily). |
| ↳ Established plants: Water when the top 2 cm feels dry. |
| ↳ Outdoor containers: May need water daily in summer. |
| Extra tips for success: |
| ↳ Label your seeds! Trust us, you’ll forget what’s what. |
| ↳ Killed a plant? Congrats, you’re now a real gardener. Try again! |
3.5. Design options: balcony
Depending on your available time and space you can have a varied number of pots, beds, and trellises on your balcony. Below is an example of an herb, veggie and fruit setup based on your available space and time. Remember, these are estimates – consult your list of needs and resources to plan out the micro-garden that suits you.
| Time \ space | 1 m² (pots + planters) | 2 m² (shelves + vertical space) | 3 m² (full balcony garden) |
| 1h/week | 🌿 Herbs: 4-5 pots 🥕 Veggies: 2-3 plants 🍓 Fruit: 1 bush | 🌿 Herbs: 6-8 pots 🥕Veggies: 3-4 🍓 Fruit: 2-3 bushes | 🌿 Herbs: 10+ pots 🥕 Veggies: 5-6 plants 🍓 Fruit: 4-5 plants |
| 2h/week | 🌿 Herbs: 5-6 pots 🥕 Veggies: 3-4 plants 🍓Fruit: 1 bush | 🌿Herbs: 8-10 pots 🥕 Veggies: 5-6 🍓 Fruit: 3-4 | 🌿 Herbs: 12+ pots 🥕 Veggies: 8-10 🍓 Fruit: 6+ |
| 3h/week | 🌿 Herbs: 6-7 pots 🥕 Veggies: 4-5 🍓 Fruit: 2 bushes + 1 dwarf tree | 🌿 Herbs: 10-12 pots 🥕 Veggies: 7-8 🍓 Fruit: 4-5 | 🌿 Herbs: 15+ pots 🥕 Veggies: 10-12 🍓 Fruit: 8+ |
INSPIRATION
Ideas to maximise space:
- Place an old pallet up against a wall of railings to create small pockets for planting.
- Many rows of old guttering or hollowed out bamboo sticks are a great vertical arrangement.
- Make use of walls with trellises, wall hung planters and fabric pocket planters.
- Use hanging baskets if you have outdoor ceiling space
- Make use of railings by hanging planters from them (double sided are best!)
- Create a makeshift herb spiral (more on that later!) by stacking pots one on top of the other (start at the bottom with the biggest one, and smallest one at the top) or use one big pot and create the spiral with old terracotta shards.
- Use metal shelving units to maximise vertical space (best for seed starter trays).
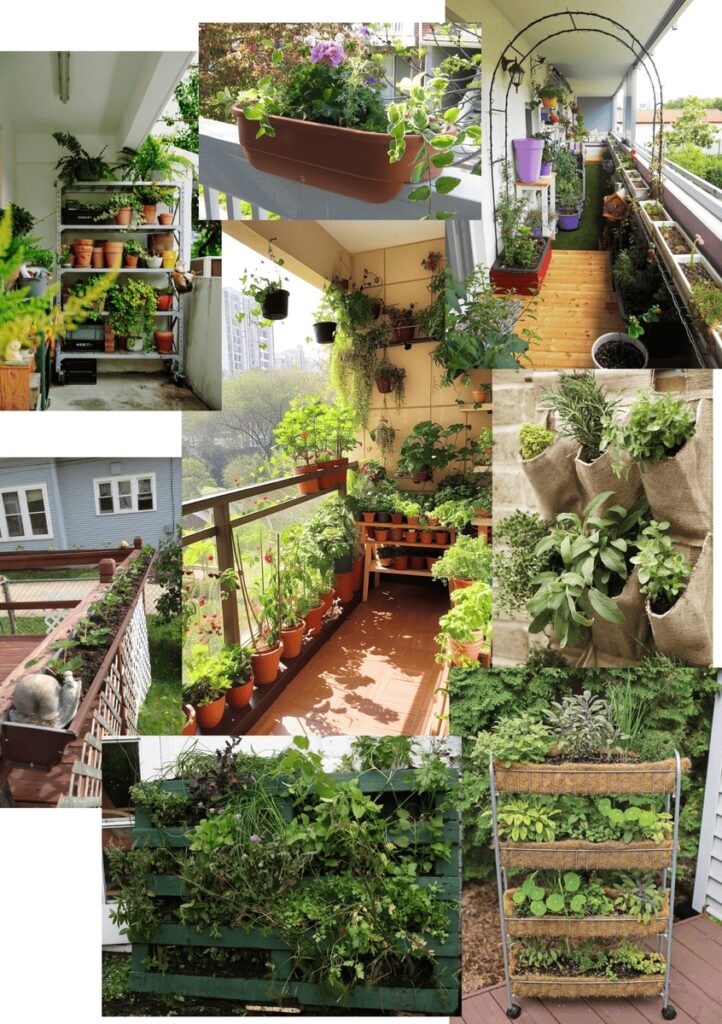
3.6. General maintenance calendar
Now you have your garden set up, but the fun doesn’t stop here. Your new plant friends still depend on you for most of their environmental needs. Check out our simple garden maintenance calendar to help you get your footing. This is a general look at what you need to focus on each month, don’t forget to look at each plant’s water needs along the way. Make sure to check your area’s last frost date and use any season extension techniques to buy more time (more in module 5.6)!
| Plant | Jan-Feb | Mar | Apr | May | Jun | Jul | Aug | Sep | Oct-Nov | Dec |
| Cabbage | 🌱 Start indoors | 🌿 Harden off | 🌿 Transplant | 💧 Keep moist | ✂️ Remove pests | 🍅 Harvest | 🌱 Fall sowing | 🍅 Harvest | ❄️ Frost protection | – |
| Broccoli | 🌱 Start indoors | 🌿 Harden off | 🌿 Transplant | 💧 Consistent | 🍅 Main head | ✂️ Side shoots | – | – | ❄️ Remove | – |
| Kale | 🌱 Start indoors | 🌿 Transplant | 💧 Nitrogen feed | 🍅 Young leaves | ✂️ Trim yellow | 🌱 Succession | 🍅 Peak harvest | ❄️ Winter hardy | 🍅 Overwinter | – |
| Onion | – | 🌱 Sets/seeds | 💧 Thin plants | 🌱 Green onions | 🍅 Bulbs swell | 💧 Reduce water | 🍅 When tops fall | 💾 Save seeds | ❄️ Mulch | – |
| Garlic | ❄️ Mulch beds | 💧 Water if dry | 🌿 Green shoots | 💧 Regular | 🍅 Scapes | 💧 Stop watering | 🍅 Harvest | 🌱 Plant cloves | ❄️ Mulch new | – |
| Radish | – | 🌱 Direct sow | 🍅 Harvest | 🌱 Succession | – | 🌱 Fall sowing | 🍅 Harvest | – | – | – |
| Zucchini | – | 🌱 Start indoors | 🌿 Transplant | 💧 Daily check | 🍅 First fruits | ✂️ Trim leaves | 🍅 Daily pick | – | ❄️ Remove | – |
| Cucumber | – | 🌱 Start indoors | 🌿 Transplant | 💧+Trellis | 🍅 Hand-pollinate | 🌸 Calcium feed | 🍅 Pick daily | – | ❄️ Remove | – |
| Beans | – | 🌱 Direct sow | 💧 Support vines | 🍅 First pods | 🌱 Succession | 🍅 Peak harvest | 💾 Save seeds | – | – | – |
| Peas | – | 🌱 Direct sow | 💧 Trellis | 🍅 Harvest | ✂️ Remove spent | – | – | – | – | – |
| Tomatoes | 🌱 Start indoors | 🌿 Harden off | 🌿 Transplant | ✂️ Remove suckers | 🌸 High-P feed | 🍅 Harvest | 💾 Save seeds | ❄️ Remove | – | – |
| Potatoes | – | 🌱 Chit tubers | 🌿 Plant in bags | 💧 Hill soil | 🍅 New potatoes | 💧 Reduce water | 🍅 Main harvest | – | ❄️ Remove | – |
| Chili Peppers | 🌱 Start indoors | 🌿 Harden off | 🌿 Transplant | 💧 Consistent | 🌸 High-K feed | 🍅 First fruits | 🍅 Peak harvest | ❄️ Move indoors | – | 💧 Reduce water |
| Bell Peppers | 🌱 Start indoors | 🌿 Harden off | 🌿 Transplant | 💧 Consistent | 🌸 High-K feed | 🍅 First fruits | 🍅 Peak harvest | ❄️ Move indoors | – | 💧 Reduce water |
| Strawberry | ✂️ Remove dead | 💧 Balanced feed | 🌿 Repot runners | 🍅 First berries | ✂️ Trim runners | 🍅 Harvest | 🌸 Post-harvest | ❄️ Mulch crowns | – | ✂️ Clean up |
| Blueberry | ✂️ Dormant prune | 🌸 Acidic feed | 💧 Check pH | 🍅 Green fruit | 🍅 Harvest | – | ✂️ Post-harvest | ❄️ Mulch | – | – |
| Lingonberry | ✂️ Light prune | 💧 Acidic water | – | 🌸 Flower buds | 🍅 Green fruit | – | 🍅 Harvest | ❄️ Mulch | – | – |
| Currant | ✂️ Dormant prune | 🌿 Repot if needed | 💧 Consistent | 🍅 Green fruit | 🍅 Harvest | ✂️ Shape plant | – | ❄️ Mulch | – | – |
| Dwarf Kumquat | ❄️ Indoor care | 🌿 Repot | 🌿 Move outside | 💧+🌸 Citrus feed | 🍅 Fruit develops | 💧 Daily | 🍅 Starts ripening | ❄️ Move indoors | 💧 Reduce | ❄️ Winter rest |
| Dwarf Lemon | ❄️ Indoor care | 🌿 Repot | 🌿 Move outside | 💧+🌸 Citrus feed | 🍅 Fruit grows | 💧 Daily | 🍅 Starts yellowing | ❄️ Move indoors | 💧 Reduce | ❄️ Winter rest |
| Marigold | – | 🌱 Start indoors | 🌿 Transplant | ✂️ Deadhead | 🌸 Low-N feed | – | 💾 Save seeds | – | ❄️ Remove | – |
| Nasturtium | – | 🌱 Direct sow | 💧 Pinch back | 🍅 Edible flowers | ✂️ Control spread | – | 💾 Save seeds | – | ❄️ Remove | – |
| 🍀 Pro tips |
| Pollination: |
| ↳ Hand-pollinate squash/cukes daily when flowering |
| ↳ Gently shake pepper/tomato plants to help pollination |
| Winter care: |
| ↳ Move citrus/peppers indoors when nights fall below 10°C |
| ↳ Wrap berry pots in bubble wrap |
| ↳ Move lemongrass, rosemary indoors below -1°C |
| ↳ Mint, thyme can stay out if pots are insulated |
| ↳ Elevate pots to prevent freezing to balcony floor |
| Fertiliser schedule: |
| ↳ Leafy greens: Every 2 weeks (high N) |
| ↳ Fruiting plants: Weekly after flowering (high P/K) |
| ↳ Acid-lovers (berries): Monthly acidic feed |
| Companion planting matters (more in module 5.5): |
| ↳ Even if plants are in separate pots, some can still help each other! |
| ↳ Aromatic herbs (like basil, mint, or rosemary) repel pests and benefit nearby plants. |
| ↳ Nitrogen-fixing plants (like peas and beans) only enrich soil they’re directly planted in – so keep them in shared containers if possible. |
3.7. Rewards vs. challenges
✨ Rewards
- Fresh flavours at hand – Homegrown veggies for salads & herbs for cooking
- Your personal green oasis – Unique living space atmosphere
- Endless learning – Connect with fellow plant lovers and exchange knowledge
🌧️ Challenges
- Smart watering – Adjust frequency based on weather (more in heatwaves, less when rainy)
- Plant loss happens – Dried plants become compost, nourishing new life
- Information overload – Filter advice through your own experience (every microclimate differs)
- Embrace experimentation – Let curiosity guide you to what works in your unique space
3.8. Community connection checklist
🌱 Basic (low effort, low social risk)
- Visit your local library for gardening inspiration and books.
- Post on your building’s bulletin board with a simple offer: “Have extra basil seedlings – free to a good home!”
🌿 Intermediate (engaging & reciprocal)
- Borrow unused gardening tools or extra seedlings from neighbours.
- Find your local gardening clubs or online plant swap groups on social media.
- Post a trade offer on your building’s bulletin board: “Have extra basil seedlings – would love to trade for gardening tips or other seedlings!”
🌳 Advanced (building community)
- Spot plant people at the farmers market (look for people carrying plants!) and give a genuine compliment to start a conversation.
- Organise or host a small seed/plant swap for your building or neighbourhood.
- Proactively connect with a local gardener: “Your balcony garden is amazing! I’m trying to learn. Would you be open to trading cuttings sometime?”
🧘 Grow With Yourself
- Celebrate learning a new plant fact
- Pat yourself on the back after repotting your first seedling
- Marvel at your first sprouted seed – life is amazing!
Every gardener starts somewhere – your green journey is just beginning! 🌱
4. Community micro-gardens: Grow together, thrive together
“The love of gardening is a seed once sown that never dies.”
Gertrude Jekyll
That unused rooftop or patch of grass by your building? It’s not just empty space – it’s potential farmland waiting to happen! Community gardens transform overlooked areas into vibrant, food-producing hubs where neighbours can grow (and share) fresh herbs, veggies, and fruits together. No experience? No problem. Our toolkit makes it easy to get started, whether you’ve got a few square meters or a whole rooftop to work with.
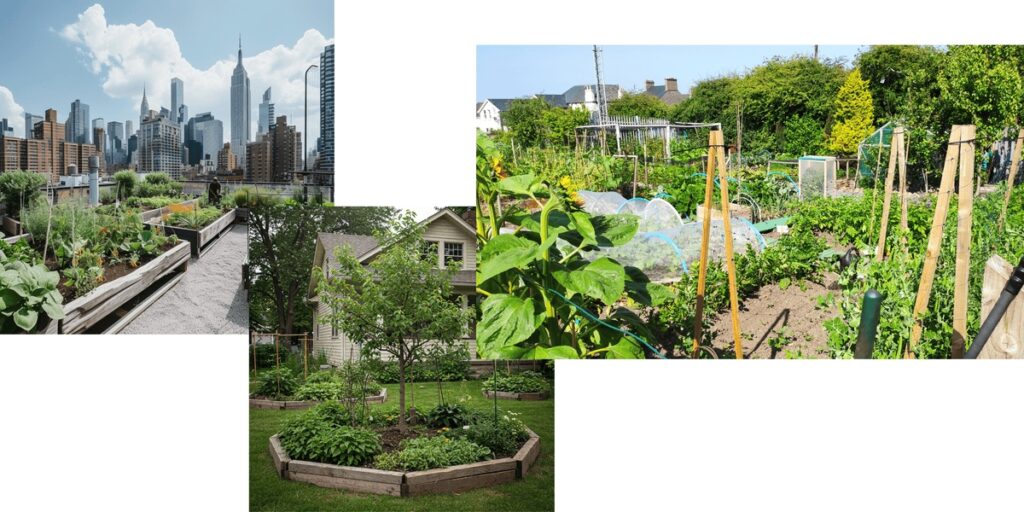
What you can grow (collectively!)
- Herb spirals (thyme, rosemary, sage) – Beautiful and practical
- Raised bed veggies (Zucchinis, beans, pumpkins) – High yield in small spaces
- Fruit bushes (Blueberries, currants) – Sweet returns year after year
- Communal fruit trees (Apples, figs) – Shade + snacks in one
Why community gardens rock:
- 🌱 Shared effort = bigger harvests (More hands make light work)
- 💬 neighbour connections (Swap gardening tips and surplus tomatoes)
- 🌳 Permaculture power (Create self-sustaining ecosystems together)
- 🍓 Resilient food sources (Fresh produce right where you live)
Your roadmap to success:
- Step-by-step setup guides – From getting neighbours on board to building your first beds
- Plant picks for shared spaces – Tough, productive varieties everyone will love
- Conflict-to-celebration tips – Smooth scheduling, watering rotations, harvest sharing
- Permaculture hacks – Rainwater systems, compost loops, natural pest control
Embark on a collaborative gardening adventure! This module guides you through starting and nurturing a community garden space, from understanding the basics to selecting the right larger-scale vegetables to grow. You’ll learn essential outdoor cultivation techniques, from direct sowing to transplanting seedlings, and discover how to incorporate permaculture elements like herb spirals and food forests. Find inspiration with design ideas and simplify your planning with a general maintenance table. To support your journey, we provide valuable tools to help you anticipate challenges, celebrate rewards, and build a thriving gardening community.
Ready to dig in? Grab a neighbour and let’s grow something greater than you could alone!
| Starting here? Go back to the design process starting point in the Introduction, it’s a crucial step of observation and analysis that will ensure the success of your chosen project! |
4.1. Cultivating community spaces: A guide to urban gardening connections
Community spaces – also called “third spaces” – are semi-private shared areas that belong to no one in particular, but everyone that lives in the vicinity. Here neighbours can grow together, both literally and figuratively. These gardens and green oases transform underutilised urban areas into vibrant hubs for connection, food production, and ecological healing.
To find existing spaces that you can transform into a community garden, look for these often-overlooked opportunities in your neighbourhood:
- Playground peripheries
- Apartment complex atriums or lawns
- Parking lot borders and dividers
- Neglected rooftops
- Building entryways and common areas
The space you pick should get at least 6 hours of sunlight per day. When you find a space like that, chat with your neighbours about the idea, post flyers in your building, or message your neighbourhood group on social media platforms. Together, decide on what your focus will be (ornamental or edible plants), how accessible the space needs to be and how it will be maintained. Research your area’s native plants and include them in the design to ensure resilience and their success.
| ⚠️ Legal permissions |
| Don’t forget to get any necessary approvals from property managers or other legal entities! Remember, vacant doesn’t always mean available. |
Remember, community gardens impact the whole community, not just you. Even if you are the sole garden caretaker, you must take others’ needs and wishes into consideration. Make sure you open a line of communication with your neighbours. The most successful community gardens grow from existing relationships as much as they grow plants. Start small with an herb exchange or seed library, and let the project blossom organically alongside your community connections.
| 🌱 Permaculture principle in practice: Apply self-regulation and accept feedback |
| Working in a space accessible to many neighbourhood people comes with an extra responsibility to be open to the wants and wishes of others. Make sure you don’t plant or leave things lying about that could be dangerous to other people’s children or pets. Make your garden accessible for differently-abled people and above all be open to any comments, critiques or praise they might have for you. Keeping good relations with the people involved in your project is an often overlooked, but very important key to your project’s long-term success. |
4.1.1. Best indoor/transitional spaces (small scale projects)
For apartment dwellers without yards, these creative spaces can become thriving green hubs. Here is a quick list of potential spaces you could use and what would be the best to place there.
- Entryways: Brighten vestibules with low-light plants
- Laundry rooms: Add humidity-loving greens (where possible)
- Hallways/stairwells: Install wall-mounted planters or shelf gardens
- Exterior corridors: Weatherproof containers with herbs or succulents
Design Tip: Use the “thriller–filler–spiller” method for beautiful container arrangements (read more in module 2.6.3.).
In these indoor/transitional spaces, the key is to choose low maintenance plants. Look again at the herbs, veggies, fruits and houseplants we listed in modules 2 and 3 and select those that could handle your chosen location.
Here’s a few more ideas to inspire you:
- Sunlit corners → mini raised beds
- Railings → hanging herb baskets
- Blank walls → living moss art
- Forgotten nooks → seed exchange libraries
- Sunny ledges → petite cactus rockeries
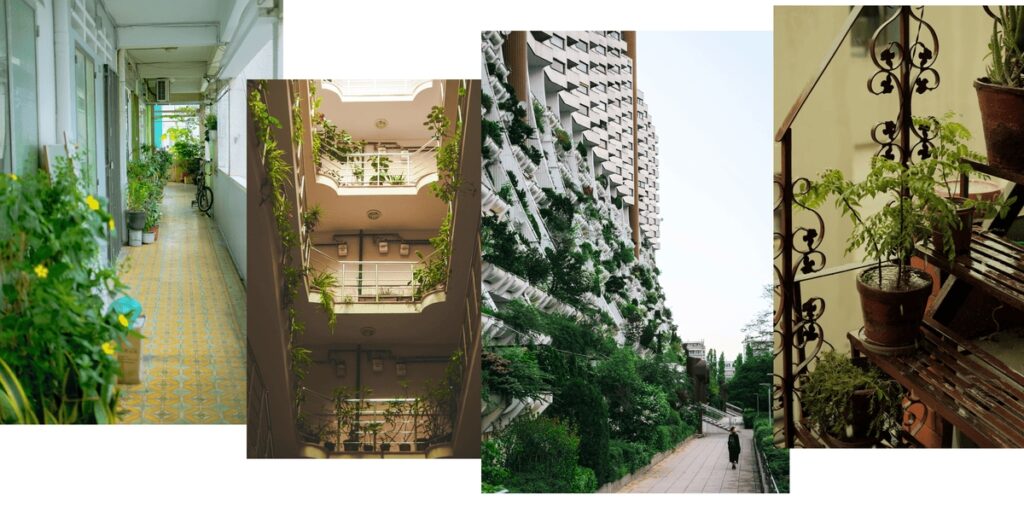
| 🍀 Pro tips |
| Always maintain clear pathways for accessibility and emergencies. |
| Use clear signage to encourage community participation. |
| Start with hardy plants to gauge interest and care commitment. |
4.1.2. Prime outdoor spaces (ideal for community gardens)
Some apartment blocks already have green community spaces ready for you to start your gardening journey. Here are some common places you might be able to use and what would be appropriate to plant there.
- Rooftops: Full sun for veggies and pollinator high beds
- Atriums: Protected areas for year-round potted plants
- Common lawns: Transform grass into productive edible landscapes
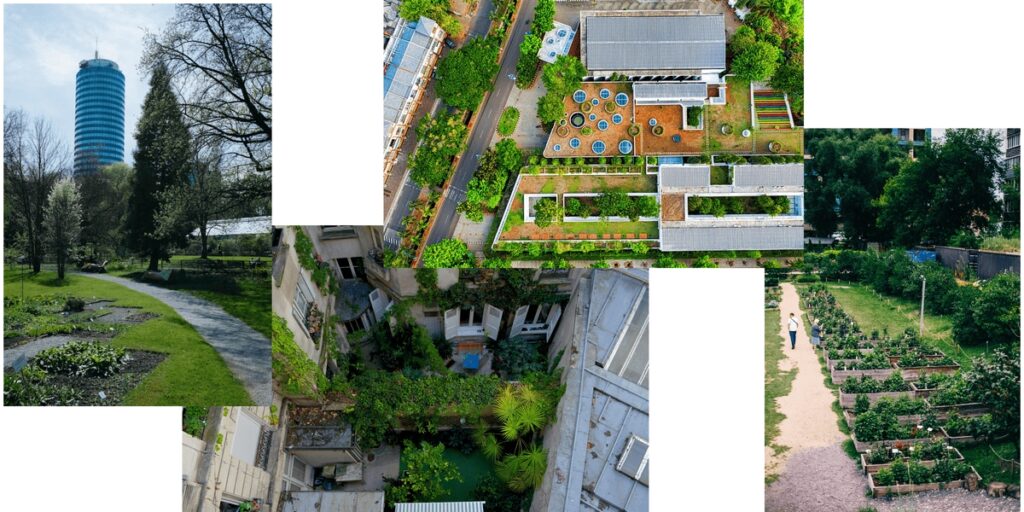
4.2. What to grow in outdoor community gardens
Let’s focus on the last three (outdoor) options, where we can have more space. Since we can now plant directly into the ground (or big raised bed) we have the option to choose any of the plants mentioned in the previous modules (herbs, leafy greens, smaller veggies and fruits) as well as these bigger ones that need more space.
Here is a detailed table of bigger veggies and fruits that do best planted directly into the soil. We have included all relevant helpful information to get you started: what each plant needs in terms of sun, soil and water, who they are good neighbours with, how long it takes to see results, any special tips to care for your new friends and how to use them.
Check out the table below for a helpful guide.
| Common & Latin name | Environmental needs | Functions & companions | Growth & yield | Spacing & height | Care tips | Culinary use & nutritional value |
| Pumpkin (Cucurbita pepo) | ☀️6-8h sun 💧High (3x/week) 🧪pH 6.0-7.5 🪱Well-drained, rich sandy loam 🌬️Moderate | ✅Ground cover suppresses weeds ✳️Corn, beans, nasturtiums ❌Avoid: Potatoes | ⌚90-120d 📊2-5 fruits/plant (3-10kg) | ↔️ 120×120 cm ↕️ 30-60 cm (vines spread 3-6m) | Hill soil at base; hand-pollinate flowers | 🍲 Roasted, soups, pies 🔬 High in vit A, fibre, antioxidants |
| Corn (Zea mays) | ☀️8+h sun 💧High (3x/week) 🧪pH 5.8-7.0 🪱Well-drained rich loam 🌬️High (stalk snapping) | ✅Nitrogen-heavy feeder ✳️Squash, beans, cucumbers ❌Avoid: Tomatoes | ⌚60-100d 📊2-4 ears/plant (0.5-1kg) | ↔️ 30×30 cm ↕️ 1.5-2.5m | Plant in blocks for pollination; mulch to retain moisture | 🍲 Grilled, polenta, flour 🔬 B vitamins, magnesium, fibre |
| Artichoke (Cynara scolymus) | ☀️6-8h sun 💧Moderate (2x/week) 🧪pH 6.5-8.0 🪱Well-drained rich loam 🌬️Low | ✅Drought-tolerant perennial ✳️Tarragon, cabbage ❌Avoid: Fennel | ⌚1st year: 150d (2nd year: 90d) 📊5-10 buds/plant (1-2kg) | ↔️ 90×90 cm ↕️ 1-1.5m | Cut back stems post-harvest; mulch heavily in winter | 🍲 Steamed, dips 🔬 Prebiotic fibre, vit C, silymarin (liver support) |
| Asparagus (Asparagus officinalis) | ☀️8+h sun 💧Moderate (2x/week) 🧪pH 6.5-7.5 🪱Well-drained rich sandy loam 🌬️Low | ✅Perennial (15-20yrs) ✳️Tomatoes, parsley ❌Avoid: Alliums | ⌚2-3yrs to harvest 📊0.5-1kg/plant/year | ↔️ 45×45 cm ↕️ 1-1.5m | Don’t harvest 1st year; cut ferns in fall | 🍲 Grilled, stir-fries 🔬 Folate, vit K, glutathione (detox) |
| Rhubarb (Rheum rhabarbarum) | ☀️4-6h sun 💧High (3x/week) 🧪pH 5.5-7.0 🪱Well-drained rich loam 🌬️Low | ✅Shade-tolerant perennial ✳️Strawberries, kale ❌Avoid: Sunflowers | ⌚1yr to harvest 📊1-2kg/plant | ↔️ 90×90 cm ↕️ 60-90 cm | Pull stalks (don’t cut); remove flower spikes | 🍲 Pies, compotes (leaves toxic) 🔬 Calcium, vit K, anthocyanins |
| Pomegranate (Punica granatum) | ☀️6-8h sun 💧Low (1x/week) 🧪pH 5.5-7.5 🪱Very well-drained sandy loam 🌬️Moderate | ✅Drought-tolerant ✳️Lavender, rosemary ❌Avoid: Walnuts | ⌚2-3yrs to fruit 📊10-20 fruits (0.5-1kg) | ↔️ 300×300 cm ↕️1-1.5m | Prune to shape; winter mulch below -12°C | 🍲 Juices, salads 🔬 Antioxidants (punicalagins), vit C |
| Apple (Malus domestica) | ☀️6-8h sun 💧Moderate (2x/week) 🧪pH 6.0-7.0 🪱Well-drained clay loam 🌬️High (fruit drop) | ✅Pollinator-friendly ✳️Chives, nasturtiums ❌Avoid: Grass | ⌚2-3yrs to fruit 📊10-15kg/tree | ↔️ 400×400 cm ↕️ 2-3m | Thin fruits to 15cm apart; net against birds | 🍲 Fresh, sauces 🔬 Fiber, quercetin (anti-inflammatory) |
| Brussel Sprouts (Brassica oleracea var. gemmifera) | ☀️6-8h sun 💧High (3x/week) 🧪pH 6.0-7.5 🪱Well-drained rich clay loam 🌬️High (stalk snapping) | ✅Frost-tolerant ✳️Dill, chamomile ❌Avoid: Strawberries | ⌚90-120d 📊0.5-1kg/plant (20-40 sprouts) | ↔️ 60×60 cm ↕️ 60-90 cm | Remove lower leaves to focus energy on sprouts | 🍲 Roasted, sautéed 🔬 Glucosinolates (cancer-fighting), vit C/K |
| Leek (Allium porrum) | ☀️6-8h sun 💧High (3x/week) 🧪pH 6.0-7.0 🪱Well-drained rich clay loam 🌬️Low | ✅Pest deterrent ✳️Carrots, celery ❌Avoid: Beans | ⌚120-150d 📊300-500g/plant | ↔️ 15×15 cm ↕️ 30-60 cm | Hill soil to blanch stems; mulch to retain moisture | 🍲 Soups, quiches 🔬 Prebiotic fibres, kaempferol (heart health) |
| Raspberry (Rubus idaeus) | ☀️6-8h sun 💧Moderate (2x/week) 🧪pH 5.5-6.5 🪱Well-drained rich sandy loam 🌬️Moderate (trellis needed) | ✅Self-fertile ✳️Nasturtiums, garlic ❌Avoid: Blackberries | ⌚1-2yrs to fruit 📊1-2kg/cane | ↔️ 80×80 cm ↕️ 1.5-2m | Prune old canes; mulch with wood chips | 🍲 Fresh, jams 🔬 Ellagic acid (anti-cancer), manganese |
| Blackberry (Rubus fruticosus) | ☀️6-8h sun 💧Moderate (2x/week) 🧪pH 5.5-7.0 🪱Well-drained rich sandy loam 🌬️Moderate | ✅Erosion control ✳️Tansy, yarrow ❌Avoid: Raspberries | ⌚1-2yrs to fruit 📊2-4kg/cane | ↔️ 100×100 cm ↕️ 2-3m | Train on trellis; tip – prune for bushiness | 🍲 Cobblers, syrups 🔬 Vit K, fibre, anthocyanins |
| Hazel (Corylus avellana) | ☀️4-6h sun 💧Low (1x/week) 🧪pH 5.0-7.0 🪱Well-drained rich clay loam 🌬️Low | ✅Nitrogen-fixer ✳️Comfrey, currants ❌Avoid: Walnuts | ⌚3-5yrs to nuts 📊2-5kg/tree | ↔️ 200×200 cm ↕️ 3-5m | Coppice every 5-10yrs; protect from squirrels | 🍲 Nut butters, baking 🔬 Healthy fats, vit E, magnesium |
| Watermelon (Citrullus lanatus) | ☀️8+h sun 💧High (3x/week) 🧪pH 6.0-7.0 🪱Very well-drained rich sandy loam 🌬️High (vine damage) | ✅Ground cover ✳️Corn, radishes ❌Avoid: Potatoes | ⌚70-100d 📊2-4 fruits/plant (5-15kg) | ↔️ 150×150 cm ↕️ 30 cm (vines 3m+) | Use black plastic mulch to warm soil; rotate fruits | 🍲 Fresh, juices 🔬 Lycopene, citrulline (heart health) |
| Sunflower (Helianthus annuus) | ☀️8+h sun 💧Moderate (2x/week) 🧪pH 6.0-7.5 🪱Well-drained poor loam 🌬️High (stalk snapping) | ✅Pollinator magnet ✳️Cucumbers, squash ❌Avoid: Potatoes | ⌚70-100d 📊1-5 heads/plant (50-200g seeds) | ↔️ 30×30 cm (dwarf) ↕️ 1-3m | Stake tall varieties; harvest when back of head browns | 🍲 Seeds, oils 🔬 Vit E, selenium, healthy fats |
| Elder (Sambucus nigra) | ☀️4-6h sun 💧Moderate (2x/week) 🧪pH 5.5-6.5 🪱Fertile moist soil 🌬️Low | ✅Bird habitat ✳️Comfrey, mint ❌Avoid: Black walnut | ⌚2-3yrs to fruit 📊5-10kg/bush | ↔️ 200×200 cm ↕️ 2-4m | Prune 1/3 old wood yearly; net clusters | 🍲 Syrups, wines (cooked) 🔬 Antiviral compounds, vit C |
| 🍀 Pro tips |
| Space saving: |
| ↳ Train blackberries/raspberries on vertical trellises. |
| ↳ Interplant corn + pumpkins + beans (Three Sisters method). |
| Low maintenance perennials: |
| ↳ Asparagus, rhubarb, elder – Designate permanent beds. |
| ↳ Hazel – Use as a windbreak at garden edges. |
| Pollinator support: |
| ↳ Plant sunflowers + elder together to attract bees. |
| ↳ Leave artichoke flowers to bloom for pollinators. |
| Harvest notes: |
| ↳ Brussel sprouts: Sweeten after frost – harvest bottom-up. |
| ↳ Elderflowers: Harvest in spring; berries in late summer (must be cooked). |
4.3. How to grow herbs, veggies and fruits for outside spaces
Materials list 📦
Basic supplies:
- Containers: Seed trays, peat pots, or recycled containers (yogurt cups, egg cartons) with drainage holes
- Potting mix: Seed-starting mix (lightweight, sterile) or potting soil + perlite (for drainage)
- Labels & marker: To track varieties
- Watering tool: Spray bottle (for seedlings) or watering can with fine rose
- Light source: Sunny windowsill or grow lights (LED/fluorescent)
- Warmth mat (Optional): For heat-loving plants (peppers, pumpkins)
For direct sowing:
- Garden bed/containers: Prepared soil or large pots
- Mulch: Straw, leaves, or compost to retain moisture
- Protection: Cloches, row covers, or cold frames for early crops
For transplanting:
- Trowel
- Organic fertiliser (compost, fish emulsion, or granular)
- Stakes/trellises (for vining plants like cucumbers, beans)
Step-by-step instructions📋
Starting seeds indoors
(best for tomatoes, peppers, eggplants, brassicas, herbs, flowers)
- Timing
- Check the seed packet for “weeks before last frost” (e.g., “start 6-8 weeks before”). Refer back to the table in 3.2 for a clear guide.
- Cool-season crops (kale, broccoli): Start 4-6 weeks before last frost.
- Warm-season crops (tomatoes, peppers): Start 6-8 weeks before.
- Sow seeds
- Fill containers with damp seed mix.
- Plant seeds 2x deeper than their size (tiny seeds = surface-sown).
- Cover lightly with soil; mist with water.
- Germination
- Keep warm (21-27°C). Use a heat mat if needed.
- Cover trays with plastic wrap to retain moisture (remove once sprouted).
- Grow seedlings
- Place under bright light (12-16 hrs/day). Rotate pots to prevent leaning.
- Water when the soil surface dries (avoid overwatering).
- Harden off
- 1 week before transplanting: Gradually expose seedlings to outdoor conditions (start with 1 hour/day).
- Transplant
- Dig a hole slightly larger than the root ball.
- Bury stems deep for tomatoes/peppers (up to first leaves).
- Water well + mulch to retain moisture.
Direct sowing seeds outdoors
(best for radishes, carrots, beans, peas, corn, sunflowers, squash)
- Prepare soil
- Loosen soil; remove weeds/stones. Mix in compost.
- For containers, use potting mix (not garden soil).
- Sow seeds
- Follow packet instructions for depth/spacing.
- Small seeds (lettuce, carrots): Scatter thinly, cover lightly.
- Large seeds (beans, squash): Plant 1-2 seeds per hole.
- Water & protect
- Keep soil moist (not soggy). Use row covers if frost threatens.
- Thin seedlings when 2-3″ tall to avoid crowding.
- Maintain
- Mulch to suppress weeds.
- Fertilise every 2-4 weeks (use half-strength for seedlings).
| Task | Indoor seeds | Direct sow |
| When to start | 4-12 weeks before frost | After last frost |
| Depth | 2x seed size | As per packet |
| Light needs | Bright artificial light | Full sun/part shade |
| Transplant time | After hardening off | N/A |
| Cold protection | Heat mat + grow lights | Cloches/row covers |
| 🍀 Pro tips |
| Seed viability test: Soak old seeds in water – if they sink, they’re still viable. |
| Boost germination: |
| ↳ Scarify hard seeds (e.g., nasturtiums) with sandpaper. |
| ↳ Soak large seeds (peas, beans) overnight. |
| Winter sowing: Plant hardy crops (kale, spinach, garlic) in autumn for early spring harvest. |
| Container gardening: Move pots to sheltered spots (against walls) in winter. |
| Check out module 5 for more tips on companion planting, pest control and season & climate extension. |
4.4. Permaculture design elements
Permaculture thrives in outside spaces and its most well-known elements, tips and techniques are great small-scale options for outdoor community spaces. To start off, we recommend using three classic permaculture techniques to use in your new community garden, from the smallest to the biggest.
4.4.1. The herb spiral: A compact permaculture powerhouse
What is it?
- A space-saving vertical herb garden that mimics nature’s equilibrium:
- Perfect for urban spaces – fits on balconies, patios, or small yards
- Self-regulating ecosystem: creates microclimates for different herbs
- Low-maintenance but highly productive
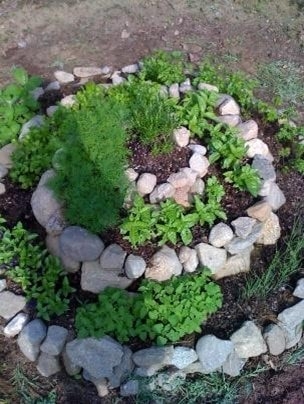
| 🌱 Permaculture principle in practice: Use edges & value the marginal |
| The most productive parts of the landscape are where two distinct areas meet (forest and meadow, river and bank, etc.) These overlapping spaces have characteristics of both biomes, making them more diverse and productive. It is therefore in our interest to widen/lengthen the margins we have to increase yield and biodiversity. An herb spiral maximises growing area in a small footprint by utilising height, increasing yield per square meter, while the spiral’s curved shape increases edge, creating more diverse microclimates in a compact area. |
Why it’s brilliant:
- Sun trap effect: Stones absorb heat, creating a warm haven for heat-loving herbs
- Smart water use: Water flows from drought-tolerant plants (top) to moisture-lovers (bottom)
- Space maximiser: Grows 10+ herbs on a small footprint
How to build an herb spiral?
Location tips:
- Choose a sunny spot (4-6 hours of direct light)
- Ensure good drainage underneath
- Consider weight limits for balconies
Materials list📦
- Local stones/bricks (porous materials like sandstone work best)
- Quality potting mix with compost
- Herb seedlings/seeds
- Organic mulch (straw/leaf litter)
Plant placement guide
Make sure the tail of the spiral (where it levels out to the grass) is positioned towards the north.
| Position in spiral | Conditions | Best herbs |
| Top | Dry, sunny, drought resistant | Rosemary, thyme, oregano |
| Middle, south-east facing | Moderate moisture, gentler sun on the east side | Sage, chives, basil |
| Bottom, north facing | Moist, shaded | Parsley, cilantro, mint, dill |
Step-by-step instructions📋
- Create the base: Clear a 1-1.5m diameter circle, cover with cardboard to suppress weeds.
- Build upward: Stack stones in a spiral pattern (must be at least 40cm high at the top) slowly descending from the middle outward.
- Fill with soil: Mix in 30% compost for nutrients
- Plant strategically: Follow the microclimate guide above
- Mulch heavily: Use compost to suppress weeds and retain moisture

| 🍀 Pro tips |
| Water deeply 2-3 times weekly in summer |
| Harvest regularly to encourage bushy growth |
| Refresh mulch every season to maintain soil health |
4.4.2. Raised, sunken and ground-level beds: Creating effective garden beds for community spaces
Well-designed garden beds provide structure and clarity for community gardens, making their purpose obvious to participants and passersby. Defined planting areas help establish expectations for maintenance and use while adding aesthetic appeal to shared spaces.
Choosing the right bed type for your climate
Each garden bed style offers unique advantages depending on your local environment.
| Best for | Considerations | |
| Raised beds (10-30cm high) | 🌧️Wet climates (600-750mm annual rainfall) 🧱Clay soils (improves drainage and prevents waterlogging) 🦽Accessibility (easier for gardeners with mobility limitations) | 💧Require more frequent watering in hot, dry climates 🛤️Need wide pathways (at least 1m) for wheelchair access |
| Sunken beds (10-20cm deep) | 🏜️Dry climates (<300mm rainfall) ⛱️Sandy soils (helps retain moisture) | 🌊Can flood in heavy rains – ensure proper drainage |
| Ground-level beds | 🏞️Balanced climates (moderate rainfall and temperature) 🪱Any existing soil (use any amendments needed) | 🪨Tip: Define ground-level beds with borders (stones, logs, or low fencing) to visually mark the gardening space. |
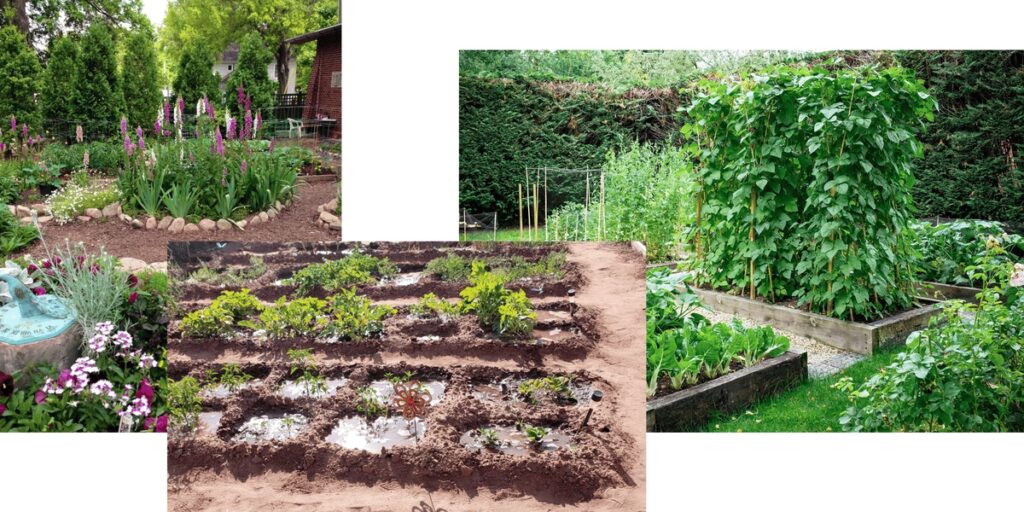
| 🍀 Pro tips |
| Making your garden inviting & functional: |
| ↳ Add clear signage with guidelines (e.g., “Pick some herbs, leave some for others!”) |
| ↳ Use mulch (straw, wood chips, or compost) to retain moisture and suppress weeds |
| ↳ Involve the community in bed design and plant selection |
By matching your garden beds to local conditions and community needs, you create a welcoming, productive space that encourages participation and care.
🌱Quick decision guide:
| Condition | Raised beds | Sunken beds |
| High rainfall (600-750 mm) | ✅ Best | ❌ Avoid |
| Low rainfall (below 300mm) | ❌ Avoid | ✅ Best |
| Clay soil | ✅ Best | ❌ Avoid |
| Sandy soil | ❌ Avoid | ✅ Best |
The living soil ecosystem
Healthy soil is a vibrant, living system teeming with earthworms, microorganisms, and beneficial fungi that continuously enrich and transform it. As these organisms break down organic matter you’ve added (like compost or mulch), you’ll notice the soil level gradually decreases – this natural process means you’ll need to periodically replenish your beds with fresh organic material. Read more about soil science in module 5.4.
Garden bed advantages
The defined borders of garden beds create several benefits:
Clear work zones
- Distinct separation between growing areas and pathways
- Prevents soil compaction in planting zones
- Makes vertical gardening systems easier to implement
Vertical expansion
- Attach trellises, nets, or pallets to support vining crops:
- Tomatoes
- Beans and peas
- Cucumbers and melons
Strategic placement
- South side for shade provision
- Windward side for protection of delicate plants
Efficiency benefits
- Contained growing area reduces wasted effort
- Prevents soil and mulch from spilling onto paths
- Creates optimal conditions for higher yields
4.4.2.1. For the adventurous: High beds
High beds can be more time and energy consuming to set up, but with its smart water features, it’s definitely worthwhile to try.
High beds vs. raised beds
While raised beds are typically 10-30 cm tall, high beds are elevated to waist height (60-90 cm), offering:
- Better accessibility (ideal for wheelchair users or those with limited mobility)
- Built-in irrigation options (self-watering systems, rainwater catchment)
- Easier maintenance (less bending, weeding, and soil compaction)
High beds can incorporate water-smart features:
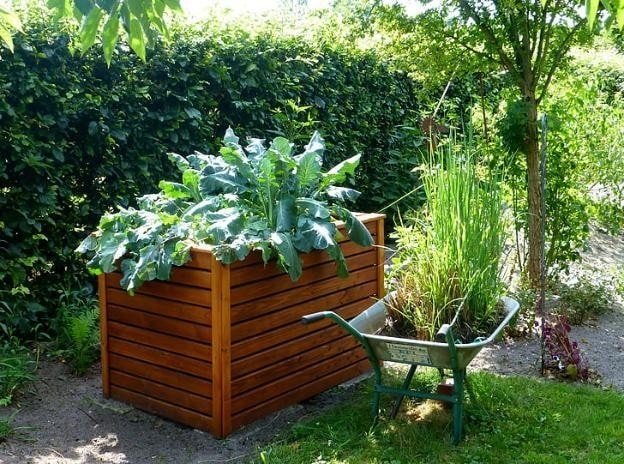
- Rainwater collection from nearby roofs or gutters.
- Drip irrigation for efficient watering
- Reservoir systems (wicking beds) for drought resilience
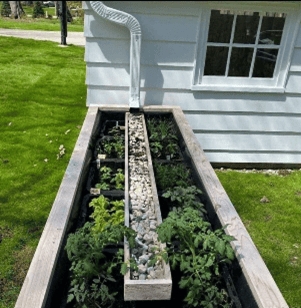
This high bed collects rainwater and slowly releases it through a wicking bed to the soil.
Sustainable construction materials
Instead of buying new materials, consider:
🌿 Natural options:
- Woven willow, hazel, or birch branches (soak in water first for flexibility)
- Reclaimed wood (old pallets, fencing, or scrap lumber)
♻️ Repurposed materials:
- Used pallets (disassemble and sand for safety, choose non-chemical treated ones, look for marking on the pallet)
- Metal sheeting (durable but may need insulation from heat)
- Bricks or stones (long-lasting and heat-retentive)
| 🌱 Permaculture principle in practice: Use & value renewable resources & services |
| Using natural materials should always be our go to choice. Sustainably harvesting and using natural materials encourages new growth and our long-term stewardship of the land. Unlike repurposed manmade materials, natural materials like wood don’t have any negative environmental impact at any stage of their use cycle – and it’s beautiful! |
4.4.2.2. How to build a garden bed: A step-by-step guide
1. Plan your space
- Measure the available area (consider sunlight, water access, and pathways)
- Choose your bed type (raised, sunken, or high) based on your needs
- Mark the layout with stakes and string
2. Select materials
For long-lasting beds (5+ years):
- Bricks or stones (durable and heat-retentive)
- Hardwood planks (cedar or oak resist rot)
- Metal sheeting (rust-proof options like galvanised steel)
For natural/temporary beds (1-3 years):
- Woven branches (willow, hazel – soak overnight to make flexible)
- Reclaimed pallets (disassemble and remove nails)
3. Prepare the site
- Clear grass/weeds (use cardboard as a weed barrier)
- Level the ground for stability
- Optional: Lay hardware cloth or chicken wire underneath if rodents are a problem
4. Build the frame
- Assemble side panels (secure corners with screws/rebar)
- For branch weaving:
- Install upright stakes every 30cm
- Weave soaked branches horizontally between them
5. Fill your bed
Layer from bottom to top:
- Coarse material (twigs, wood chips – improves drainage)
- Compost (kitchen scraps, leaf mould (decomposing leaves))
- Topsoil mix (60% soil, 30% compost, 10% sand)
| 🍀 Pro tips |
| Leave 2-3 cm at the top to prevent soil spillover |
| Water thoroughly after filling to settle the layers |
6. Maintain your bed
- Top up soil annually (it settles as organic matter decomposes)
- Refresh mulch every season to retain moisture
- Rotate crops to prevent nutrient depletion; or focus on companion planting and adding compost regularly.
4.4.3. The food forest: The ultimate permaculture technique
A food forest mimics the layered structure of a natural forest but is designed to produce food, medicine, and habitat. While it primarily uses perennial plants, you can integrate annual vegetables for added productivity. Think of it as companion planting on steroids!
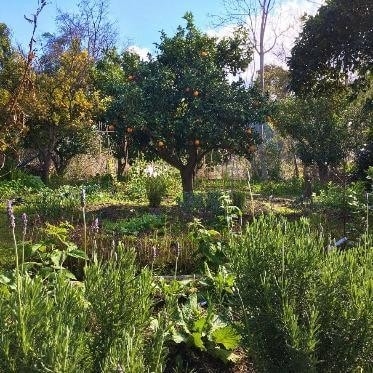
By stacking plants in ecological layers, each species supports the others:
- 🌳 Tall trees provide shade, wind protection, and habitat.
- 🌿 Shrubs & herbs generate organic matter and food.
- 🌱 Groundcovers prevent erosion and retain moisture.
- 🍄 Roots & fungi build soil health through nutrient exchange.
| 🌱 Permaculture principle in practice: Design from patterns to details |
| Observe nature, its patterns and processes. What do you see? A forest is a dense multilayered stable ecosystem. We can take that pattern in nature and apply it to our own needs. Now that we have the structure, we can design the details. Choose plants that are useful to you that also fulfil every layer and ecological function we see in a forest. Et viola! A food forest. |
Key ecological functions in a food forest
It’s not just the size of the plant that matters – each plant also has its own unique characteristics (or ecological functions) that strengthen the mini-ecosystems. The more of these characteristics we can input into our food forest the better.
To simplify things, we can divide the ecological functions into two broad groupings:
- Physical attributes, like growth habits. Tall trees provide sun, wind and frost procession to its lower neighbours, it also provides shelter to any number of animals, insects and plant life throughout the year. On the other hand, very low plants are great groundcovers, protecting the soil, keeping it together with its roots and ensuring the ground stays moist for longer. Then you have plants with very deep strong roots that help you break up compacted soil, making it easier for more tender plants to take hold.
- Chemical attributes: plants either emit a chemical through the air or soil that either attracts or deters certain animals and insects. With the right combination of plants, we can make sure we invite the right mix of garden friends to have a healthy abundant garden. Some plants are also hyperaccumulators and/or nitrogen fixers, meaning that they are better at accumulating certain minerals from the soil into their leaves or have the ability to transform nitrogen into a form that other plants can use as fertiliser. Diversity of plants in their physical and chemical attributes is the key to a well-functioning food forest.
4.4.3.1. How to build a food forest: A step-by-step guide
Materials list 📦
- Cardboard/newspaper – For sheet mulching (weed suppression)
- Wood chips/mulch – 10-15cm depth (retain moisture, build soil)
- Compost/aged manure – 5-10 bags (soil amendment)
- Spade, digging fork, pruning shears
- Wheelbarrow (for moving mulch/soil)
- Soaker hose/drip irrigation (efficient watering)
- Trellises (for vines) – Use bamboo or repurposed lattice
- Plant labels & waterproof marker
- (optional) Soil test kit – Check pH & nutrients (ideal: pH 6-7)
Step-by-step instructions📋
1. Assess your space (go back to the starting point in module 1.3. for extra info)
- Soil depth & quality: Avoid polluted or compacted soil.
- Sunlight & microclimate: Note shaded vs. sunny areas.
- Size: Even 2m² can host a mini food forest! Look at our suggestions for which layers to choose and how many plants to include based on your available space.
2. Choose your layers
A full food forest has 9 layers, but you can start with just a few (e.g.: measure your available land, choose a main plant that will fit in the centre (remember that you can get grafted dwarf varieties!), but leave enough space around its perimeter for other plants to grow.
Here is a handy guide based on available space:
| Layer | Example plants | Purpose |
| Canopy (tall trees) | Apple, pear, plum | Shade, windbreak, fruit, organic matter |
| Shrubs | Blueberries, currants | Berries, habitat, organic matter |
| Herbs | Comfrey, oregano, chives | Medicine, pest control, pollinator magnets |
| Groundcover | Strawberries, clover | Soil protection, edible greens |
| Underground | Garlic, radishes, onions | Pest control, soil aeration |
| Vines | Beans, nasturtiums | Vertical growth, nitrogen fixer, organic matter |
For the adventurous: Add an aquatic layer (duckweed, watercress in a pond) or fungal layer (mushroom logs) for extra diversity!

A – Tree layer
B – Herbaceous + groundcover layer
C – Shrub layer
D – Mini swale (a dip in the ground where water collects and slowly releases)
E – Underground layer
3. Plant placement
Central anchor: Place the tallest plant (e.g., a fruit tree) in the middle.
- North side: Shade-tolerant plants (e.g., leafy greens).
- East side: Tender plants that need part-shade
- South/West side: Sun-loving plants (e.g., tomatoes, herbs).
- Groundcover: Plant densely to suppress weeds around the main tree.
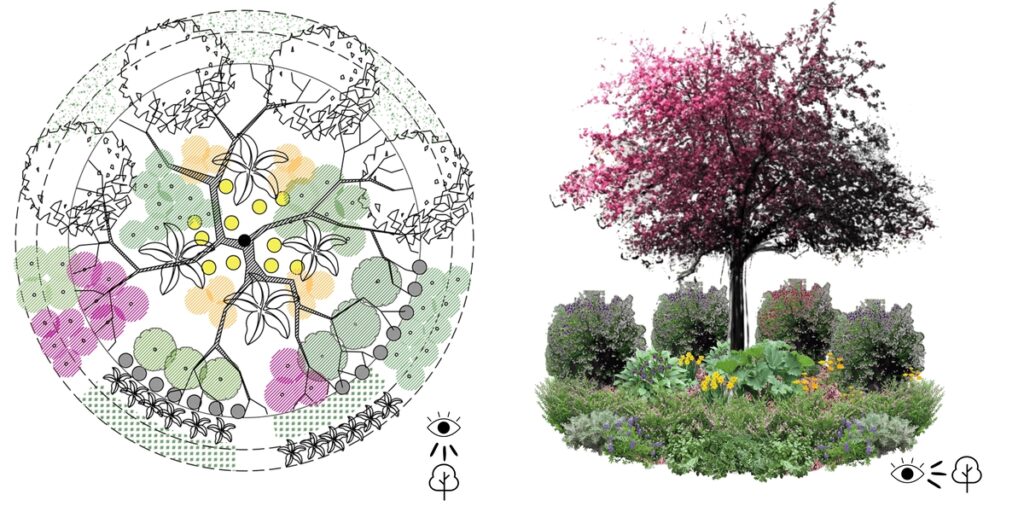
4. Planting & maintenance
- Dig wide holes, amend soil with compost, and mulch heavily.
- Water deeply after planting.
- Observe & adapt: Replace struggling plants with hardier varieties.
- Minimal upkeep: Once established, it mostly sustains itself!
4.5. Design options
Depending on your available time and space you can have a varied number of herb spirals, beds, and sizes of food forest on your community garden plot. Below is an example of an herb, veggie and fruit setup based on your available space and time. Remember, these are estimates – consult your list of needs and resources to plan out the micro-garden that suits you.
| Time \ space | 5 m² (herb spiral + 1 bed (1mx2m)) | 10 m² (2 beds + mini food forest) | 15 m² (3 beds + layered food forest) |
| 1h/week | 🌿 Herb spiral: 8-10 herbs 🥬 Bed: 3-4 veggies 🍓 Fruit: 1 berry bush | 🥬 Beds: 5-6 veggies 🌳 Food forest: tallest layer = shrub or columnar fruit tree (1x), 2 herbaceous, 2 groundcovers, 3 underground | 🥬 Beds: 8-10 veggies 🌳 Food forest: tallest layer = 1 dwarf tree, 2 shrubs, 4 herbaceous, 4 groundcover, 6 underground |
| 2h/week | 🌿 Herb spiral: 12+ herbs 🥬 Bed: 5-6 veggies 🍓 Fruit: 2 dwarf fruits | 🥬 Beds: 8-10 veggies 🌳 Food forest: tallest layer = shrub or columnar fruit tree, 3 herbaceous, 3 groundcovers, 4 underground | 🥬 Beds: 12+ veggies 🌳 Food forest: Tallest layer = 1 dwarf tree, 2 shrubs, 5 herbaceous, 5 groundcovers, 8 underground |
| 3h/week | 🌿 Herb spiral: 15+ herbs 🥬 Bed: 7-8 veggies 🍓 Fruit: 3-4 plants | 🥬 Beds: 10-12 veggies 🌳 Food forest: columnar fruit tree, 1 shrub, 4 herbaceous, 4 ground cover, 5 underground | 🥬 Beds: 15+ veggies 🌳 Food forest: 1 dwarf tree, 3 shrubs, 6 herbaceous, 6 groundcovers, 10 underground |
Ideas to maximise your space:
- Place a trellis along one side of your garden bed.
- Use a plant arch to shade the paths between beds (and other combinations!)
- Stack planters in a grid pattern to create height.
- Use pallets vertically as mentioned in design option module 3.5, either as a makeshift fence (if you need it) or along one side of a bed instead of a trellis.
- Use chicken wire to create a cylinder shape and place it vertically, you can use this as a potato planter or a simple airy compost pile.
- Make a vertical rain gutter/bamboo stick multi-tiered planter.
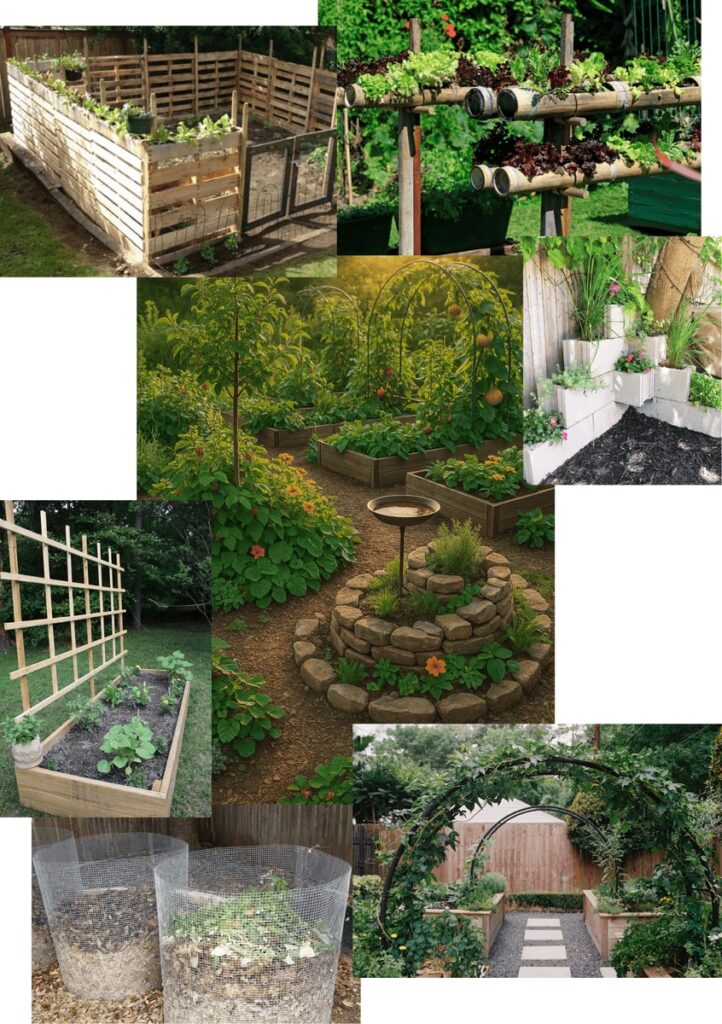
4.6. General maintenance calendar
Now you have your garden set up, but the fun doesn’t stop here. Your new plant friends still depend on you for many of their environmental needs, especially the annual plants. This is a general look at what you need to focus on each month, don’t forget to look at each plant’s water needs along the way. Check out our simple garden maintenance calendar to help you get your footing. Make sure to check your area’s last frost date and use any season extension techniques to buy more time!
| 🍀 Pro tips |
| Corn: Plant in blocks (not rows) for better pollination |
| Artichokes: In cold zones, treat as annual or heavily mulch |
| Berries: Net plants 2 weeks before fruit ripens to protect from birds |
| Tree Fruits: Use fruit thinning to prevent biennial bearing |
| Vining Plants: Use slings for heavy melons/watermelons |
4.7. Rewards vs. challenges
🌱 Rewards of shared growing
- Fresh, hyperlocal food – harvest veggies and herbs for shared meals
- Stronger social bonds – gardens spark conversations that grow into friendships
- Skill-sharing hub – learn from neighbours about plants, cooking, and more
🌧️ Challenges to navigate
- Group dynamics – balancing different opinions and gardening styles
- Conflict resolution – addressing disagreements about space use or plant care
- Collaborative decision-making – creating fair systems for maintenance and harvests
4.8. Community connection checklist
Practical & playful ways to grow your green network!
🌿 Branching out (community connections)
🌱 Beginner steps:
- “Tool borrowing hour” – Ask neighbours for unused gardening supplies
- Library raid – Check out gardening books (bonus: find DIY seed packet templates!)
- Bulletin board post: “Have extra basil seedlings! Seeking tomato growers to swap tips.”
🌳 Intermediate moves:
Spot fellow plant lovers:
- They’re the ones staring at nursery plants for 20+ minutes
- Often carry cuttings in their tote bags
Find them at:
- Farmers’ markets (herb stall = goldmine)
- Local plant swaps or composting workshops
🌻 Advanced community building:
- Start a seed bank – Use a waterproof box in your tool shed (label with expiry dates!)
- Partner with seed libraries – Donate extras, borrow rare varieties
🌱 Personal growth (celebrate your journey!)
- Learned how to repot without killing the plant (progress!)
- Successfully germinated a seed (tiny miracle!)
- Tried something new – like composting or pruning (bravery!)
- Collaborated on a garden task (teamwork win!)
💡 Praise effort over perfection – A wilted seedling still taught someone how to water better!
5. Communal and individual composting and sustainable gardening practices
“To nurture a garden is to feed not just the body, but the soul.”
Alfred Austin
You’ve planted the seeds and nurtured the growth. Now, let’s unlock the final superpower of the urban gardener: creating your own garden magic!
This module is all about working with nature, not against it. We’ll learn how to save every drop with clever water techniques, whip up DIY plant food from kitchen scraps, and brew natural pest sprays that protect our tiny ecosystem. When you support the life in your soil, you build a healthier, more resilient garden that truly thrives. It’s not just about growing plants – it’s about creating a vibrant oasis. By providing food, water, and habitat, your little patch becomes a lifeline for bees, birds, and butterflies, helping to weave nature back into the city.
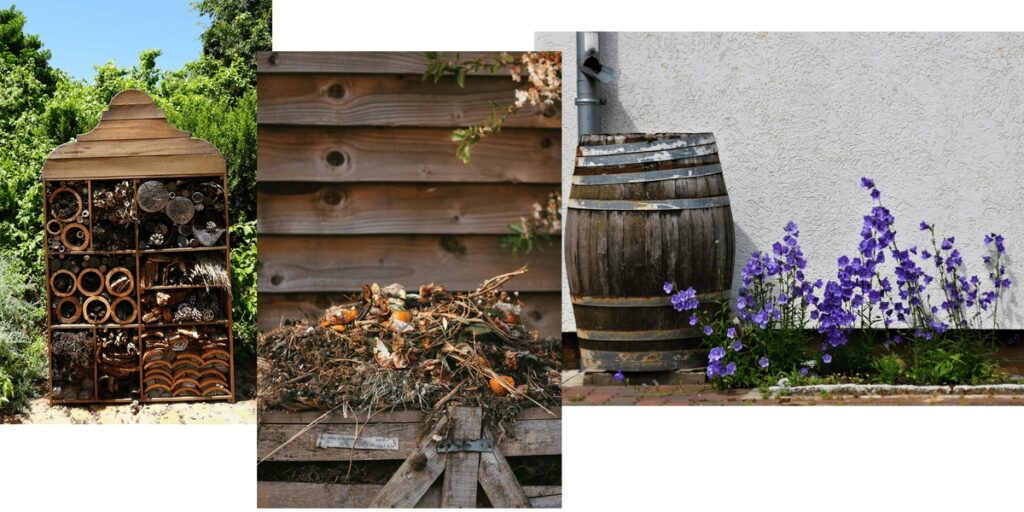
This module explores the essential practices that will elevate your garden’s health and productivity. You’ll learn to turn waste into wealth through various composting methods, enrich your soil with simple amendments, and master efficient water use with harvesting techniques. Discover advanced concepts like polycultures and season extension, and learn how to apply permaculture principles (even in urban spaces) by creating natural pest control and insectaries. This is your guide to cultivating a truly resilient and eco-friendly garden.
5.1. Small-space composting: From balcony to community garden
Composting is possible anywhere – even in apartments! Whether you’re working with a tiny balcony or a shared community plot, here are simple ways to turn scraps into “black gold”. Composting isn’t just throwing food into a bin; there’s an art to it. Here’s a quick beginners guide to proper composting.
The most important part of composting is getting the “ingredients” ratio right. You should have at least double the amount of brown waste
| 🍏 GREEN WASTE | 🍂 BROWN WASTE |
| ↳ Rich in nitrogen or protein, food source for microorganisms, decomposition heats up pile | ↳ Carbon or carbohydrate-rich materials, food source for soil-dwelling decomposers, ensure air-pocket/air flow |
| ↳ Food scraps: Fruit/veggie peels, coffee grounds, tea bags, eggshells | ↳ Paper/cardboard: Shredded newspaper, egg cartons, toilet rolls |
| ↳ Fresh plant waste: Grass clippings, green leaves, weeds (no seeds!) | ↳ Dead stuff: Dry leaves, straw, wood chips, sawdust (untreated wood only) |
| ↳ Other: Hair, pet fur, crushed nutshells | ↳ Fibers: Cotton rags, corks, fireplace ash (tiny amounts) |
| ⚠️ NEVER COMPOST: |
| Pet waste, diseased plants, glossy paper (or any other manmade material) |
| Meat, dairy, oily foods only in special bokashi and/or pest-proof composters (best in that order)! |
5.1.1. Apartment solutions
Bokashi composting:
What it is:
- An anaerobic (oxygen-free) composting method using inoculated bran to ferment food waste, including meat, dairy, and cooked foods (typically excluded from traditional compost).
- Uses a special airtight bin and bokashi bran (containing beneficial microbes like Lactobacillus).
How it works:
- Layer food scraps with bokashi bran in the bin.
- Fermentation (not decomposition) occurs over 2-4 weeks, producing a pickled, sour-smelling pre-compost.
- The output requires burial in soil or addition to a traditional compost pile to fully break down.
Pros:
✅ Works indoors (no odour if sealed properly)
✅ Handles all food waste (even citrus and small bones)
✅ Faster than traditional composting (~2 weeks vs. months)
✅ Produces nutrient-rich “bokashi tea” (dilute as liquid fertiliser)
Cons:
❌ Requires buying bokashi bran (or making your own)
❌ Not fully decomposed – needs a second step (soil burial – find a community or friend’s garden)
❌ Small bin capacity (best for apartments, not large households)

| 🍀 Pro tips |
| Drain the bokashi tea weekly to prevent mould. |
| Bury fermented waste deep in soil to avoid attracting pests. |
| Rinse the bin between batches to prevent residue buildup. |
| Best for: Urban dwellers, small-space gardeners, or those wanting to compost all food scraps year-round. |
Bokashi alternatives
If bokashi composting is not right for you, here are a few more ideas:
- Electric composters:
- Grinds and dehydrates scraps into fertiliser in hours.
- Drawback: Higher cost (~€300), but zero odour and minimal effort
- Community programs:
- Check for other community gardens that take food waste for their compost bins. If you cannot go regularly, you can try to freeze your food scraps until you are able to take to the compost, that way it won’t rot and attract flies in your apartment.
- Compost in a bottle/jar: Layer in soil, kitchen scraps and paper into a large plastic bottle with some air holes at the top. Keep in a warm place until it composts or take to a community garden. It’s great as a science experiment for kids, as they can see the process happening.
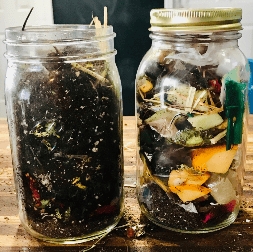
5.1.2. Balcony solutions
For the adventurous: DIY balcony vermicomposting – quick guide
Turn food scraps into rich compost with worms – perfect for small spaces!
Materials list📦
- Container – 3 plastic storage bins (10-20L, one with lid)
- Drill/nail – For ventilation holes
- Red wiggler worms (Eisenia fetida) – 250g (~500 worms)
- Bedding – Shredded newspaper/cardboard, coconut coir
- Food scraps – Fruit/veggie peels, coffee grounds, crushed eggshells
- Handful of garden soil – For grit (helps worms digest)
- Optional: Small trowel, spray bottle (for moisture)
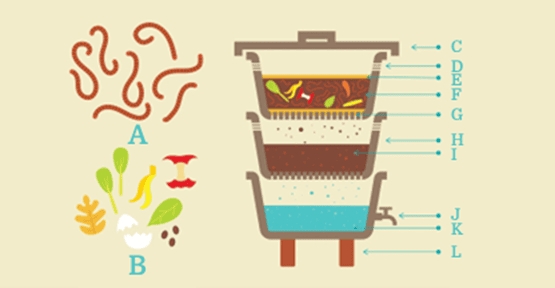
A – Worms
B – Items for compost
C – Cover
D – Holes (for ventilation)
E – Bedding material (e.g. cardboard)
F – Active area (garbage and worms)
G – Holes (for droppings)
H – Storage box
I – Worm castings (compost)
J – Spigot
K – Worm tea collection
L – Brick support
Step-by-step instructions📋
- Setting up: the foundation
- Base bin: This is the bottom bin, often with a spigot. It’s designed to collect leachate (the nutrient-rich liquid that drains down). Always dilute leachate 10:1 with water before using it as plant food.
- Start in bin #1: Drill holes (5mm) in the bottom of the bin (for drainage) and sides (for airflow). Fill the inner bin ¾ full with damp (not soggy) shredded newspaper/cardboard and mix in a cup of soil for grit. Add your red wiggler worms to the first stacking bin, which sits directly above the base bin. This is their initial home. Let them burrow in for 1-2 days before adding food.
- The active feeding phase (starting in bin #1)
- Begin feeding your worms in bin #1. Bury small amounts (1 cup/week) under bedding.
- Best foods: Banana peels, lettuce, coffee grounds.
- Avoid: Meat, dairy, oily foods, citrus (too acidic).
- Bury food scraps in a different quadrant of the bin each time you feed. Continue this until bin #1 is about 3/4 full of a mix of decomposing food and castings.
- Begin feeding your worms in bin #1. Bury small amounts (1 cup/week) under bedding.
- Adding bin #2 (the migration phase)
- Place the second bin directly on top of bin #1. This new bin should have a slatted or perforated bottom.
- Fill bin #2 with fresh, moist bedding and new food scraps.
- The worms, always seeking fresh food, will naturally migrate upward through the holes into bin #2. To help them along, you can stop adding food to the bottom bin.
- Continue feeding only in bin #2.
- Adding bin #3 & harvesting bin #1
- Once bin #2 is about 3/4 full and most worms have migrated into it, it’s time for bin #3.
- Harvest bin #1: By now, bin #1 should be almost pure, finished worm castings with very few worms left. Simply lift it off, scoop out the “black gold” for your garden, and return any straggler worms to the active bin.
- Cycle the bins: The empty bin now becomes your new top bin. Place it on top of the stack (now on bin #2), add fresh bedding and food, and continue the process.
- Maintain
- Keep moist (like a wrung-out sponge) – spritz if dry.
- Harvest compost in 2-3 months (move finished compost to one side, add fresh bedding to the other; worms will migrate).
| 🍀 Pro tips |
| Location: Place in shade (balcony corners work well) – worms hate heat! |
| Winter care: Insulate with bubble wrap or move indoors if <10°C. |
| Troubleshooting: |
| ↳ Smelly? Too much food – reduce portions |
| ↳ Fruit flies? Bury scraps deeper, cover with cardboard. |
| Bonus: Use “worm tea” (drainage liquid) diluted 1:10 as fertiliser! |
Alternatives to vermicomposting
Tumbling composter: a plastic aerated drum on legs you can put food waste in and turn, easy to install, use and is pest-resistant (rats/mice). They can be quite pricey, and depending on the balcony, also a bit big and an eye-sore, might be better on a rooftop or in a community garden.
5.1.3. Community garden solutions
Simple bucket composter guide
A quick, pest-resistant composting method for food scraps (even cooked food!).
Materials list📦
- 1 large bucket/crate/washing basket with a tight-fitting lid (5–20L, plastic or metal)
- Drill & drill bits (for ventilation/drainage holes)
- Shovel/trowel (for digging)
- Kitchen scraps (fruit/veggie peels, cooked food, coffee grounds, etc.)
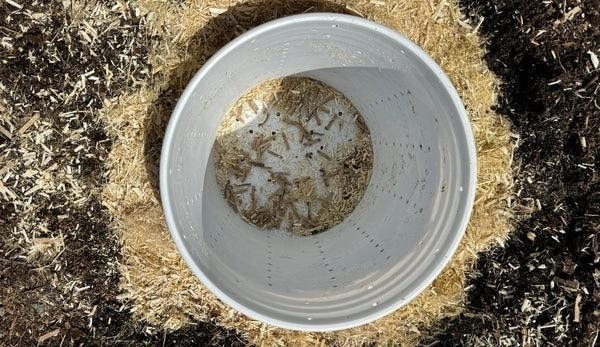
Step-by-step instructions📋
- Prepare the bucket
- Drill small holes (¼ inch) in the bottom and sides for drainage and insect access.
- Bury the bucket
- Dig a hole slightly shallower than the bucket’s height.
- Place the bucket inside, leaving the lid above ground.
- Fill gaps around it with soil for stability and insects access
- Add scraps & maintain
- Drop food waste into the bucket and secure the lid tightly (rats can’t open it!). Layer in other green. and brown waste.
- Small insects will enter through holes to break down scraps.
- Stir occasionally to speed up decomposition.
- Harvest compost
- After 1–3 months, scraps turn into rich compost.
- Scoop out compost to use in gardens or pots!
DIY pallet compost bin: Simple & budget-friendly
Turn wooden pallets into a high-capacity compost bin – perfect for gardens, balconies, or community spaces. This sturdy setup handles leaves, food scraps, and yard waste with minimal effort.
Materials list📦
- 4 wooden pallets (standard 1m x 1.2m size, untreated wood only)
- Zip ties, nails, or hinges (to secure pallets)
- Chicken wire (optional, to line sides for airflow)
- Hammer, drill, or staple gun
- Landscape fabric (optional, to retain moisture)
- Bonus: Use a 5th pallet as a removable top panel for easy access.
Step-by-step instructions📋
- Choose a location
- Pick a flat, shaded spot with good drainage (avoid concrete).
- Assemble the bin
- Stand 3 pallets upright to form a U-shape, securing corners with zip ties or nails.
- Attach the 4th pallet as the back wall.
- Optional: Staple chicken wire inside to improve airflow.
- Add the front panel
- Use a 5th pallet (or boards) as a removable door – attach with hinges or simply slide it in place.
- Start composting!
- Layer greens (grass clippings, food scraps) and browns (branches, leaves, cardboard) in a 1:2 ratio.
- Turn monthly with a pitchfork to aerate.
- Cover with fabric to retain heat/moisture (optional).
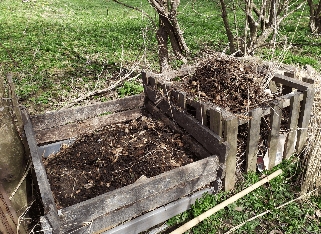
| 🍀 Pro tips |
| Speed it up: Chop scraps small and keep the pile moist (like a damp sponge). |
| No meat/dairy: Avoid attracting pests. |
| Need more space? Build a second bin for finished compost. |
5.2. Different DIY soil amendments
It’s rare that you are able to magically start off with soil that is already perfect for what to want it for. Luckily there are several ways of amending the soil by simply adding in DIY fertilisers and common household waste to get the perfect balance of drainage and organic matter. Less is more: It’s easy to over-fertilise, which can “burn” plants and harm roots.
5.2.1. DIY all-purpose plant fertiliser (N-P-K boost)
If you want to try your hand at making your own fertiliser, you can turn kitchen waste into a nutrient-rich plant tonic!
Why it works
This free fertiliser provides:
- ☕ Nitrogen (N) – From coffee grounds (promotes leafy growth)
- 🥚 Calcium & Phosphorus (P) – From eggshells (strengthens roots/fruits)
- 🍌 Potassium (K) – From banana peels (improves disease resistance)
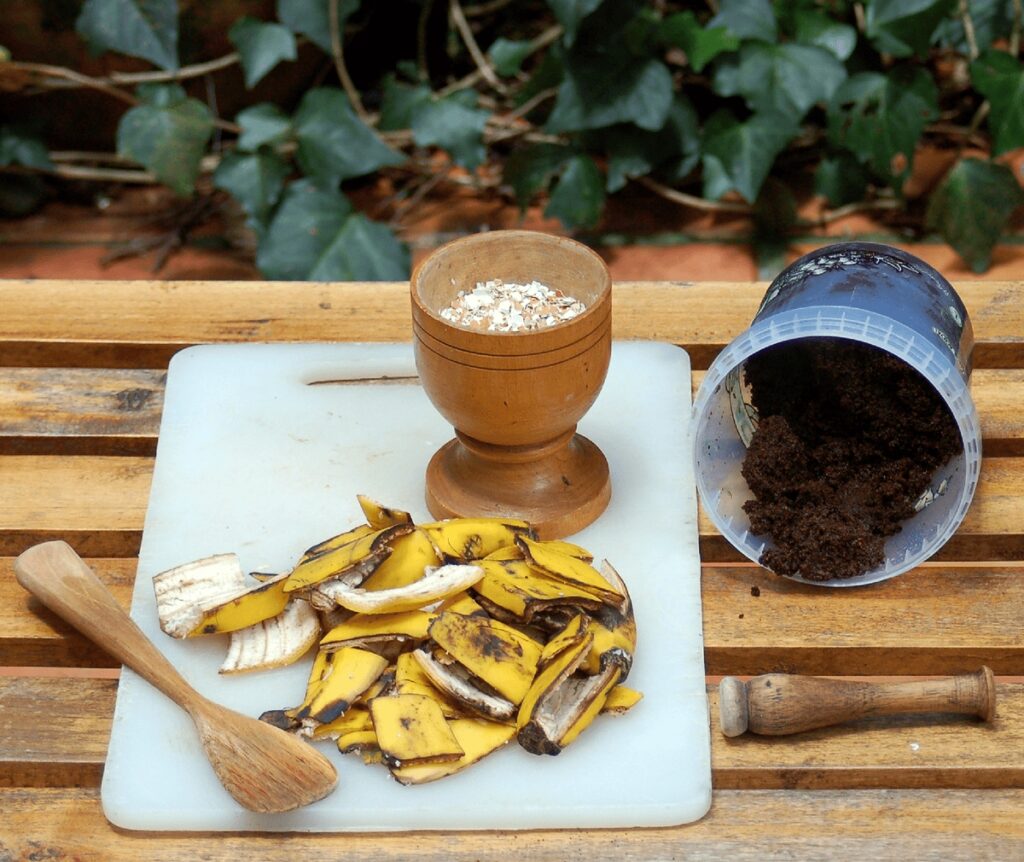
Materials list📦
- Used coffee grounds (8 tbsp)
- Eggshells (10 shells)
- Banana peels (4 peels)
Step-by-step instructions📋
Preparation
- Dry & prep materials:
- Rinse eggshells, dry overnight, then crush into powder (use a blender or mortar/pestle).
- Chop banana peels into small pieces (1-inch strips).
- Spread coffee grounds to dry (prevents mould).
- Extract nutrients:
- Option 1 (cold brew): Steep all materials in 1L water for 48 hours. Stir occasionally.
- Option 2 (fast boil): Simmer in 1L water for 30 mins to dissolve calcium faster.
- Strain & dilute:
- Pour mixture through a sieve.
- Mix 1 part fertiliser with 5 parts water (e.g., 1 cup fertiliser + 5 cups water).
- Apply:
- Water soil (not leaves) every 2-4 weeks in the growing season.
| 🍀 Pro tips |
| For faster breakdown: Bury scraps directly in soil (takes ~2 months to decompose). |
| Avoid overuse: Excess coffee grounds can acidify soil – test pH yearly. |
| Store extras: Keep unused powder dry for future batches. |
5.2.2. For the adventurous: Dandelion/nettle/comfrey compost tea
Weed tea fertiliser: A powerful (but stinky!) plant boost
Best for outdoor use only – this nutrient-rich compost tea is incredibly effective but has a strong odour. Perfect for community gardens or balconies (away from windows!).
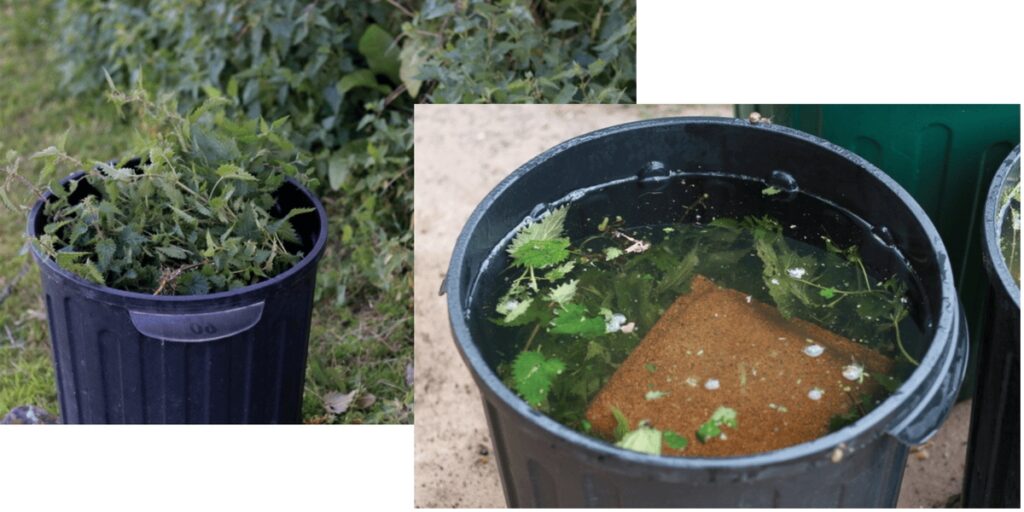
| ⚠️ Safety first: Avoid toxic weeds |
| Never use poisonous plants. Common European weeds to exclude: |
| ↳ Hemlock (Conium maculatum) |
| ↳ Deadly Nightshade (Atropa belladonna) |
| ↳ Foxglove (Digitalis purpurea) |
| ↳ Giant Hogweed (Heracleum mantegazzianum) |
| Tip: Snap a photo of unknown weeds and check with a plant ID app before harvesting. |
| 🌱 Permaculture principle in practice: Integrate rather than segregate |
| Weeds are one of the most derided plants on the planet. Starting a community patch probably means facing a weedy neglected lawn. At first glance weeds are just a hindrance, something that’s making extra work for you, but they have a very important ecological function, too. Most weeds are pioneer plants – the first to be able to settle on newly disturbed ground. They help cover and stabilise, but also loosen and enrich the soil. Don’t neglect their contribution, include them into your plan – even if it is pulling them out to make some compost tea. |
Materials list📦
- 5-10 handfuls of non-toxic weeds (roots/stems/leaves)
- A large bucket with lid (5-10L)
- Water (rainwater preferred)
- Old cloth (for straining)
Step-by-step instructions📋
- Chop weeds roughly (smaller pieces break down faster).
- Fill the bucket ¾ full with weeds, then top with water.
- Cover and steep for:
- 3 days → mild tea (dilute 1:1 with water)
- 2+ weeks → supercharged tea (dilute 1:10!)
- Stir occasionally to aerate (warning: it will smell!).
- Strain through cloth to remove seeds/plant matter.
- Apply to soil (not leaves) every 2-4 weeks.
Why it works
Weeds like nettle, comfrey, or dandelion are packed with nitrogen, potassium, and trace minerals. Fermenting them extracts these nutrients into a fast-acting liquid fertiliser.
| 🍀 Pro tips |
| Add wood ash (1 tbsp per litre) for extra potassium! |
5.3. Water saving and harvesting techniques
Plants don’t need much to survive, but like humans, they can’t go without water. It’s essential to have a guaranteed water source when gardening. A handy spigot is great to have nearby, and yet we can ensure our plants get their fair share of H2O in more sustainable ways, without using drinking water. Let’s start off with some general good watering practices and continue with water harvesting techniques.
Watering: Deeply & less frequently
The golden rule: It’s better to water deeply and less often than to sprinkle daily. This encourages roots to grow deep and strong, making plants more drought-tolerant.
How to check: Stick your finger 5 cm into the soil. If it’s dry, it’s time to water. If it’s damp, wait.
Best Time: Water early in the early morning or evening. This gives leaves time to dry, reducing disease risk, and minimises water loss to evaporation.
Target the Base: Aim water at the soil, not the leaves. Soaker hoses or drip irrigation are ideal.
5.3.1 Rainwater harvesting
| 🌱 Permaculture principle in practice: Catch and store energy |
| Designing smart ways of catching and storing resources while they’re abundant, to use later when they are not, is a technique used by humanity for millennia. It’s ecological, economical, but above all very savvy. It decreases our dependence on external water inputs and eases the damage on terrain made (the more we catch before it reaches the ground, less water accumulates on the ground to wreak havoc) by flash storms and floods, something that will probably increase due to climate change. |
| We can also catch and store sunlight, wind and water energy in the form of electricity. |
Here’s a curated list of simple DIY rainwater harvesting techniques for apartments, balconies, and community gardens, using low-cost or repurposed materials:
1. Balcony rain catchers (no gutters needed)
- Repurposed containers: Use clean takeout containers, large ice cream tubs, or plastic bottles to collect runoff from balcony railings or awnings. Line them up where rain drips heaviest.
- Tarp funnel: Drape a tarp over a railing or chair, angling it into a bucket or barrel to channel water.
- Umbrella hack: Invert an open umbrella in a large pot to act as a “rain saucer”.
- Tip: Cover stored water with a net to prevent mosquitoes and algae.

2. DIY rain barrel (small-scale)
- Barrel setup: Place a 5-gallon bucket or small barrel under a downspout (if accessible). Add a spigot at the base for easy access.
- Gutter-free diverter: Use an L-shaped metal strip under roof edges to direct water into containers without gutters.
- Balconies: Opt for slim, decorative barrels (e.g., 10-20L) to save space.

3. Community garden solutions
Shared standalone collector: Build a pallet-frame system with a large tarp or roof panel to funnel water into a central barrel or IBC water tote.
Make sure leaves and other debris don’t flush into the water tank, install a net over the entrance to the water tank.

4. Indoor/compact systems
Shower bucket: Collect cold water while waiting for the shower to heat up (not rainwater but saves water).
Window sill collectors: Attach a shallow tray outside windows to catch rain, draining into a jug.
5. Creative alternatives
Plant saucers: Large pot saucers can double as mini-catchments – tip collected water into storage containers.
Vertical garden integration: Use hanging bottles with cut-out funnels to direct runoff into planters.
| 🍀 Pro tips |
| Prioritise shaded storage to reduce chances of algae growth. |
| Use mosquito mesh (1.5mm holes) on all open containers. |
| Check local regulations – some areas restrict rainwater collection. |
5.3.2. Safe greywater sources for plants
Shower/bath water
Best for: Trees, shrubs, non-edible plants
Tip: Use biodegradable soap (no salts/boron).

Laundry water (from eco-detergents)
Best for: Ornamentals, fruit trees (not leafy veggies)
Tip: Use low-sodium, phosphorus-free detergents.
Kitchen sink water (veggie rinse, pasta water)
Best for: All plants (cool before using)
Bonus: Starchy water adds nutrients, but must be unsalted!
Dehumidifier water
Best for: Houseplants (distilled, but check for mould).

Aquarium water
Best for: All plants (rich in nitrogen/phosphorus).
| ⚠️ Greywater to AVOID |
| Dishwasher water (harsh detergents, food grease) |
| Water with bleach/softeners (kills soil microbes) |
| Meat/dairy rinse water (attracts pests) |
| Pet shampoo water (chemicals harm plants) |
| 🍀 Pro tips |
| Rotate sources to prevent salt buildup in soil. |
| Apply at roots (not leaves) to avoid mould. |
| For edibles: Use only veggie rinse/pasta water (no soap residue). |
5.3.3. Other smart watering techniques
1. Terracotta olla pots (ancient & effective)
How it works: Unglazed terracotta slowly releases water into the soil.
DIY steps:
- Bury a small terracotta pot (plug the drainage hole with a cork) next to plants.
- Cover with its respective lid, cover with a heavy stone to keep it in place.
- Fill it with water; the porous clay will seep moisture as needed.
Best for: Garden beds, potted plants.

2. Plastic bottle drip system
How it works: A slow-drip reservoir made from recycled bottles.
DIY steps:
- Cut the bottom off a plastic bottle.
- Poke tiny holes in the cap (or use a cotton wick).
- Invert and bury the neck near plant roots.
- Fill with water for gradual hydration.
Best for: Potted herbs, balcony gardens.
5.4. Soil science
One of the most important, but often overlooked, parts of growing healthy plants is soil. Whether you’re using containers, raised beds, or small urban plots, healthy soil is the key to a thriving garden.
Soil is a living ecosystem, not just dirt! It’s made up of minerals (like sand, silt, and clay), which give it structure. Organic matter, such as compost and decaying plants, adds nutrients. Water and air fill the spaces between particles, helping roots grow and breathe. Tiny but mighty microorganisms – like bacteria, fungi, and earthworms – keep the soil alive by breaking down organic material and protecting plants from disease.
It’s essentially the last stop in the cycle of all life on Earth – Nature’s graveyard! But no need to mourn, everything and everyone comes back to life as something new.

Healthy soil does more than just hold plants in place. It feeds them by supplying essential nutrients. It holds water long enough for roots to drink but drains excess to prevent rot. It also allows roots to spread and breathe, which is crucial for strong growth. Most importantly, it’s home to beneficial microbes that help plants resist pests and diseases naturally.
Plants that are growing in soil not suited to them will show you different signs, like going brown and dry if there is not enough moisture and organic matter, drooping and looking soggy and squishy if there’s too much. If your soil is missing essential nutrients, your plant will let you know with discolouration and spots. Check out the table below for more info on common nutrient deficiencies and how to combat them with commercial applications. Learn how to DIY your nutrient fix in the following section.
5.4.1. Common nutrient deficiencies
| Nutrient | Role in the plant | Deficiency symptoms | How to fix it |
| Nitrogen (N) | Leaf and stem growth (the “green” growth). | Uniform yellowing (chlorosis) of older, lower leaves first. Plant is stunted. | Side-dress with a high-nitrogen fertiliser (blood meal, fish emulsion, composted manure), or use a balanced fertiliser. |
| Phosphorus (P) | Root development, flowering, fruiting, energy transfer. | Purpling or reddish tint on leaves, stems, or veins. Dark green or bluish-green foliage. Stunted growth, poor flowering/fruiting. | Add a high-phosphorus fertiliser (bone meal, rock phosphate) or a fertiliser with a higher middle number (e.g., 10-20-10). |
| Potassium (K) | Overall plant health, disease resistance, water uptake, fruit quality. | Browning or “scorching” on leaf edges and tips, starting on older leaves. Leaves may look curled. Weak stems. | Amend soil with potassium-rich fertilisers (potash, wood ashes, greensand) or a fertiliser with a high last number (e.g., 10-10-20). |
| Calcium (Ca) | Cell wall strength, prevents blossom-end rot. | New growth is distorted, hooked, or stunted. Blossom-end rot on tomatoes/peppers (dark, leathery spot on fruit bottom). | Add gypsum or lime (if soil is also acidic) to soil. Ensure consistent watering, as drought prevents calcium uptake. |
| Magnesium (Mg) | Central atom in chlorophyll (essential for photosynthesis). | Yellowing between leaf veins on older leaves, while veins stay green (interveinal chlorosis). Leaves may curl upwards. | Apply Epsom salt solution (1 tbsp per 4l of water) as a foliar spray or soil drench. |
| Iron (Fe) | Chlorophyll production and energy transfer. | Yellowing between veins on young, newest leaves, while veins remain green. Similar to magnesium but on new growth. | Lower soil pH if it’s too high. Apply chelated iron as a foliar spray or soil additive for a quick fix. |

This picture shows the most common nutrient deficiencies. Nitrogen (N), potassium (K), phosphorus (P), manganese (Mn) and magnesium (Mg) deficiencies usually show on older leaves first. While calcium (Ca), iron (Fe), Sulphur (S) and copper (Cu) usually show on younger leaves first.
| 🍀 Pro tips |
| Key patterns to help you diagnose: |
| Where does the symptom start? |
| ↳ Older growth (lower leaves): Nitrogen, phosphorus, potassium, magnesium. |
| ↳ New growth (upper leaves): Calcium, iron. |
| What does the yellowing look like? |
| ↳ Uniform yellowing: Nitrogen. |
| ↳ Yellowing between veins (veins stay green): Magnesium (older leaves) or iron (new leaves). |
| ⚠️ Important notes before you fertilise: |
| Check the pH first! This is the most important step. Many nutrients become “locked up” and unavailable to plants if the soil pH is too high (alkaline) or too low (acidic). A soil test is always the best first move. |
| Rule out other problems: Symptoms like yellowing or stunting can also be caused by overwatering, underwatering, root damage, or disease. Make sure you’re not mistaking a cultural problem for a deficiency. |
| Don’t over-correct: It’s easy to cause more harm by adding too much fertiliser. Start with mild, organic solutions and follow package instructions. |
Before planting, check if your soil is sandy (dries too fast), clay-heavy (stays wet and dense), or loamy (the ideal mix). A simple squeeze test can help – just grab a handful of damp soil. If it crumbles easily, it’s sandy; if it sticks together tightly, it’s clay. You can use regular pH testing strips to test your soil pH. Just mix 1 part soil to 2 parts distilled water and use the strip.
Some plants have a wider range of soil type tolerance, but it’s always best to put plants in their ideal soil type. Check the plant tables we provided above to see what your chosen plants need in terms of soil. If the soil you have doesn’t fit your plants’ needs (whether in terms of texture, level of organic matter or pH) choose a soil amendment from the table below to get the perfect soil you need.
No need to buy specialised soil mixes for every plant you want to grow. Start off with a general garden soil and have some soil amendments on hand to make the perfect mix. Some other good commercial options are perlite for drainage and vermiculite for water retention.
5.4.2. Common household items/waste as soil amendments
Many things we already have lying about the house or throw away regularly can actually be used as great low-cost soil amendments. Check out the table below for some ideas you can use both indoors and outdoors.
| Material | Benefits for gardening | How to use |
| Pet hair | Adds slow-release nitrogen; retains moisture, deters small pests (e.g., rabbits, deer). | Scatter lightly around plants or mix into compost (avoid thick mats). |
| Wood ash | Raises soil pH (alkaline); adds potassium, calcium, and trace minerals. | Sprinkle sparingly (1/4″ layer max) around plants; avoid acid-loving plants. |
| Paper (shredded) | Improves moisture retention; adds carbon to compost. | Layer in compost or use as mulch (avoid glossy/coloured paper). |
| Cardboard | Suppresses weeds; retains moisture; breaks down into organic matter. | Use as sheet mulch (wet before laying) or compost in small pieces. |
| Pet feathers | High in nitrogen; slow-release fertiliser for soil. | Add to compost or bury lightly in soil (breaks down slowly). |
| Used tea bags or coffee grounds | Add acidity (lowers pH) and organic matter | Mix small amounts into soil, best if composted first |
| Greywater | Recycles water for irrigation (from baths, sinks); reduces freshwater use. | Use biodegradable soaps; apply to soil (not leaves). |
| Cinnamon powder | Natural antifungal; deters mould, gnats, and some pests. | Dust on soil surface or mix into seed-starting mixes. |
| Garlic powder | Repels insects (e.g., aphids, ants); mild antifungal properties. | Sprinkle lightly on soil or mix with water as spray. |
| Chili powder | Deters pests (e.g., squirrels, rodents) with capsaicin. | Dust around plants or mix with water for spray (avoid direct plant contact). |
| Nut shells | Improve drainage/aeration; slowly break down into organic matter. | Crush or compost (avoid walnut shells – contain juglone, toxic to some plants). |
| Broken terracotta shards | Absorb and release moisture as soil dries, improves drainage | Crush shards into smaller pieces (cca. 1cm) and mix into the soil |
| Sand | Improves drainage | Mix into soil |
| Baking soda (sodium bicarbonate) | Raises pH (makes it more alkaline) | Mix 15 mL (1 tablespoon) per 4 litres of water Water the soil lightly – this works fast, so don’t overdo it! |
| Crushed eggshells | Raises pH (makes it more alkaline); add calcium slowly | Dry and grind eggshells into a fine powder Mix 30-60 grams (¼ to ½ cup) per square metre into topsoil |
| White vinegar | Lowers pH (makes it more acidic) | Mix 250 mL (1 cup) per 4 litres of water Water soil sparingly – can harm microbes if overused |
| Citrus peels | Lowers pH (makes it more acidic), add organic matter | Chop peels from oranges/lemons and mix into soil Use peels from 2-3 fruits per square metre – works slowly |
| 🍀 Pro tips |
| Balance is key: Too much of any amendment (e.g., wood ash, pet hair) can harm plants. |
| Composting: Many materials (paper, hair, feathers) break down faster in compost. |
| Pest control: Spices (cinnamon, chili, garlic) work best as deterrents, not cures. |
5.5. Polycultures
The term polyculture includes any mixed planting. Through the years, people have used more specific words or phrases to describe similar concepts, but in the end, it’s all the same technique at heart. Companion planting is focused on annual herbs and veggies in the garden while a food forest is focused on perennials in long term plantings – both are polycultures! You can find each plant’s favoured neighbours in their respective table in previous modules above, but here is a general companion planting guide for whole plant families (technically genera: most plants in a genus have similar properties and needs).
A good rule of thumb is not to plant veggies of the same genus or species too close together as they attract the same pests and compete for the same nutrients.
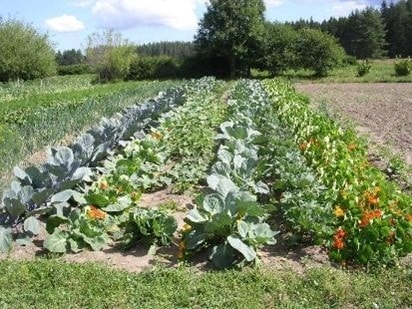
You can arrange companion plants however you want, as long as there are different species in close proximity. Here they are arranged into long lines, you can also plant them up into repeating square/circle units, let your imagination run wild!
| Genus (species examples) | ✅ Best with (genus) | ❌ Avoid (genus) | Notes |
| Brassica (Cabbage, Kale, Broccoli) | Allium, Daucus, Spinacia | Solanum, Fragaria | Dill attracts beneficial wasps |
| Allium (Onion, Garlic, Chives) | Brassica, Daucus | Phaseolus, Pisum | Repels most pests |
| Daucus (Carrot, Parsnip) | Allium, Solanum | Other Apiaceae | Intercropping saves space |
| Solanum (Tomato, Potato, Eggplant) | Ocimum, Daucus | Zea, Brassica | Needs heavy feeding |
| Cucumis (Cucumber, Melon) | Phaseolus, Zea | Solanum | Trellis for small spaces |
| Cucurbita (Zucchini, pumpkin) | Zea, Phaseolus, Mentha, Allium | Solanum, Brassica | Loves sun, shades ground below for smaller plants |
| Phaseolus (Bush/Dwarf Beans) | Zea, Cucumis | Allium | Fixes nitrogen |
| Lactuca (Lettuce) | Fragraria, Spinacia | Helianthus | Shade-tolerant |
| Spinacia (Spinach, Chard) | Brassica, Fragaria | Phaseolus | Cool-season crop |
| Zea (Corn) | Phaseolus🌱, Cucurbita | Solanum | Provides vertical support |
| Ocimum (Basil) | Solanum, Capsicum | Mentha | Repels thrips/mosquitoes |
| Fragaria (Strawberry) | Lactuca, Spinacia | Brassica | Ground cover |
| Mentha (Mint, Peppermint) | Brassica (pest control) | Petroselinum (parsley) | Container only (invasive) |
| Helianthus (Sunflower) | Cucumis (trellis) | Solanum, Lactuca | Allelopathic to many plants (inhibits growth) |
| Cynara (Artichoke) | Fragaria, Spinacia | Helianthus | Shade-tolerant |
| Amaranthus (Amaranth) | Zea, Phaseolus | Brassica | Drought-resistant |
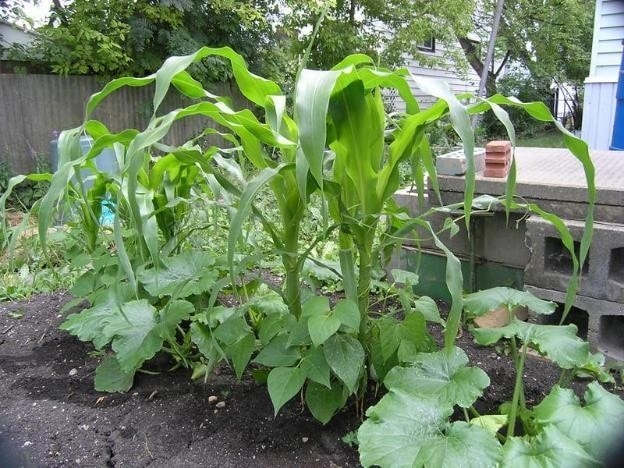
A classic is the North and Central American indigenous “Three Sisters” technique. The corn provides support for the vining beans, which in turn fertilises the soil with its nitrogen fixing abilities, making the soil rich for heavy feeders like the pumpkin, who shades the earth with its big leaves, keeping the soil cool and moist.
With food forests focus on fulfilling as many layers and ecological functions as possible. Perennial plants in general are more resistant to pests and hardier against weather changes.
5.6. Season and climate extension
Sometimes you just really want that rosemary plant, even if your climate is way too cold for it… lucky for you, there are many easy solutions to ‘hack’ your way into a longer growing season or a micro-climate more suited to your ultimate plant wish-list.
Season extension just means protecting your plants at the onset of autumn from the dropping temperatures, cold winds and first frosts. Frost does the most damage when it has direct contact with the plants, so your best bet is simply shielding your tender plants by covering them with plastic or glass (like a cloche or a cold frame).
| 🌱 Permaculture principle in practice: Creatively use and respond to change |
| Change is the only constant, be ready for it! Some changes are rhythmic and we can easily anticipate them – like the seasons. Plan how to stretch the time you have available to grow your own food. |
| But climate change is amplifying the frequency and force of change and throwing some unexpected spanners into the works. Have quick systems in place to react quickly when the need arises. |
| Method | How it helps | Tips for urban gardens |
| Row covers, frost blankets | Protects from frost/wind; traps heat. | Use lightweight fabric on hoops or PVC frames, or simply wrap around a tender bush or fruit tree |
| Cold frames | Mini-greenhouse for early spring/fall crops. | Repurpose old windows or clear plastic bins over raised beds, |
| Cloches | Place over young tender plants to protect from frost and cold winds overnight | Use old jugs and plastic bottles cut in half as a cloche (bell in French) |
| Mulching | Insulates soil (keeps roots warm in winter/cool in summer). | Use straw, leaves, or cardboard (free urban materials!). |
| Indoor seed starting | Gives plants a head start before outdoor season. | Use LED grow lights or sunny windowsills. |
| Season extension lamps | Adds light for winter greens (e.g., kale, spinach). | Hang LED strips in balconies or grow tents. |
| Bubble wrap | Insulates pots against cold | Wrap the bubble wrap all around the pot, secure with twine |

Like houseplants, some edible plants are “climate refugees”, not so well adapted to your hometown’s weather patterns. You can use these techniques below to help your chosen plant deal better with your climate, when the two aren’t the best fit. You can use all sorts of ideas to tweak your plants’ microclimate by increasing or decreasing light, sun and wind exposure.
| Your climate | Plants from this climate | Plants you want to grow | Solutions for plants from other climates |
| ❄️ Colder climates | 🌿 Kale, Brussels sprouts, carrots, parsnips, lamb’s lettuce. | 🌱 Plants from warmer climates like: aloe vera, lavender, peppers, amaranth, tomatoes, watermelons, etc. | 🌡️ Use thermal mass (water jugs, dark stones) to absorb heat during the day and slow release heat in the evening. 🧱 Plant against south-facing walls (radiates warmth). 🥬 Grow cold-hardy varieties (e.g., ‘Winter Density’ lettuce). Use mirrors to bounce light towards plants (be careful of scorching). |
| ☀️ Hotter climates | 🌶️ Okra, sweet potatoes, peppers, melons, amaranth. | 🌱 Plants from colder climates like: kale, lettuce, blueberries, | ⛱️ Shade cloth (30-50%) to cool plants. 💧 Water deeply in the morning to avoid evaporation. ⚪ Use light-coloured mulch (reflects heat). Use trellises and tall plants to shade tender plants. |
| 🌧️ Wetter climates | 💧 Mint, taro, cranberries, ferns, wasabi. | 🌱 Plants from drier climates like: Aloe vera, | 🪵 Raised beds for drainage. 🪴 Grow in containers to control soil moisture. 🛡️ Use fungus-resistant varieties. |
| 🏜️ Drier climates | 🌵 Agave, lavender, rosemary, prickly pear, tepary beans. | 🌱 Plants from wetter climates like: lettuce, spinach, peas, | 💧 Drip irrigation + mulch to conserve water. 🏺 Use self-watering pots or ollas (clay pots). 🤝 Group drought-tolerant plants. |
| 🌡️ Variable climates | 🌿 Peas, bok choy, Swiss chard, bush beans. | 🏡 Microclimates: Use walls, balconies, or windbreaks. 🏃 Quick-maturing crops (e.g., radishes, arugula). 🛌 Row covers for sudden frosts. | |
| 🏞️Temperate climates | 🍓 Peas, kale, mint, strawberries | 🌱 Plants from 🌴 tropical climates like: most houseplants that need higher humidity | 💧 Pebble tray with water 🤝 Group plants together 💨 Light misting (morning) 🛁 Place in bathroom ♨️ Place bowls of water near radiators. |
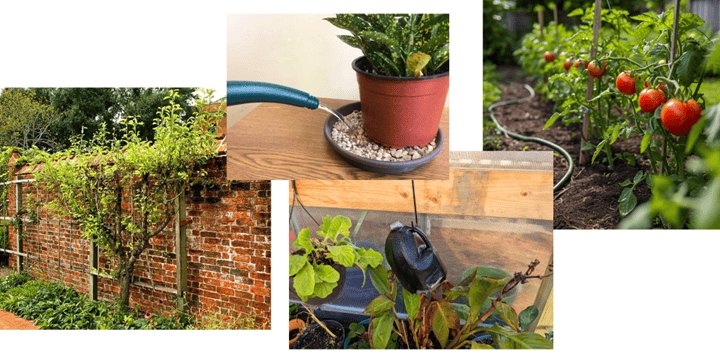
5.7. Bringing permaculture’s ‘Zone 5’ to urban spaces
In permaculture, Zone 5 is a designated wild, undisturbed area on your land where nature thrives. This principle (similar to ‘rewilding’) is key to helping protect nature and all its inhabitants, ensuring a safe place for them to live and thrive.
Often, we think of cities as the opposite of nature, completely manmade and barren, but there is much nature to be found even there. Nature is very adaptable and so far, many animals, plants and insects have adapted to finding a home in bustling cities. Let’s give them a helping hand by creating micro-habitats that provide food, water, and shelter for beneficial insects, birds, and small critters – while avoiding pests like rodents.
| 🌱 Permaculture principle in practice: Use and value diversity |
| Inviting more nature and its critters to your balcony/community garden creates a mutually beneficial web of ecological functions. You provide shelter, food and water, they provide the crucial acts of pollination and fertilisation. Try placing a bird feeder above a fruit tree, birds will love the seeds, the tree will love the guano. |
5.7.1. Insectaries & habitats for balconies
Balconies, quite far removed from the ground below, can be most easily visited by winged critters, like flying insects and birds. Read on for a few simple ideas on how to provide shelter, food and water for these small beings. It’s the least we can do in exchange for the ecological functions they provide us: pollination and fertilisation!
Most of these objects can be bought in garden centres and home improvement stores, but let’s try to DIY them!
5.7.1.1. Shelter
Bug boxes / insect hotels
DIY: Fill a wooden frame with pine cones, young bamboo stems, spent plant stems from veggies patch, straw, and drilled logs, focus on holes of different sizes.
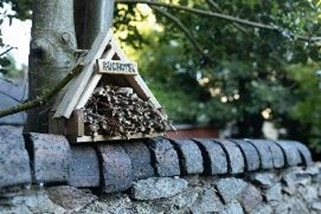
Bird boxes
DIY: Upcycle containers or wooden crates with a small entrance hole.
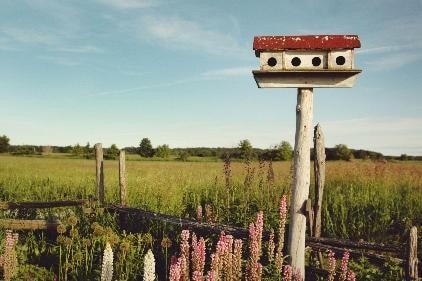
5.7.1.2. Water
Puddling stations for butterflies
DIY: Fill a shallow dish with sand, water, and a pinch of salt.
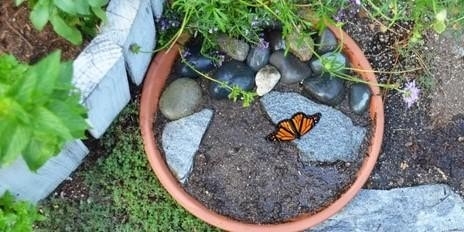
Water sources for birds & insects
DIY: Saucer with marbles/stones to prevent drowning.
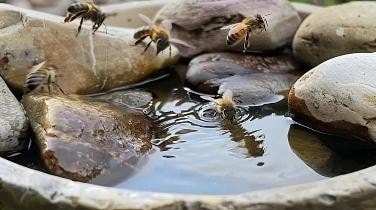
5.7.1.3. Food
Mini meadow pots
DIY: Plant native wildflowers (e.g., coneflowers, milkweed) in containers.
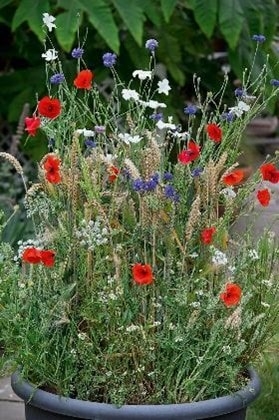
Herb gardens
DIY: Grow basil, thyme, and lavender in pots.
Bird feeders
DIY: Make a simple feeder from a pinecone coated in peanut butter & seeds.
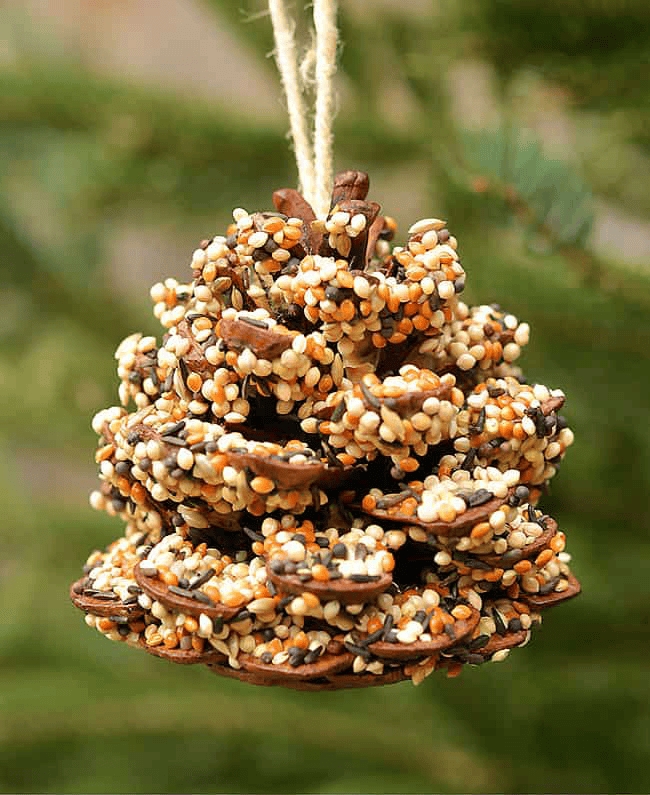
5.7.2. Insectaries & habitats for community gardens
In an outside community garden, some bigger urban animals might visit your garden. Help them feel welcome with some homes made especially for them (hedgehogs, bats and dragonflies are all very beneficial as they like to eat mosquitoes and slugs – yum!).
5.7.2.1. Shelter
Bat boxes
DIY: Build with plywood, following proper ventilation guidelines.

Rock piles
DIY: Stack spare bricks or stones in a sunny spot.

| ⚠️ Important notes |
| Habitats like these can also attract snakes, which in most cases are beneficial – they like to eat many insects and animals that are pests in our veggie gardens. They will keep to themselves if you leave them alone. |
| If venomous snakes live in your area though, it’s best to skip building them a home. |
Deadwood logs
DIY: Stack fallen branches in a shady area.

Community bug hotels
DIY: Fill wooden pallets with straw, wood, and terracotta.
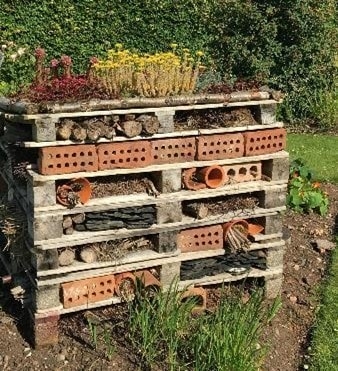
5.7.2.2. Water
Ponds or rain gardens
DIY: Rain garden: dig a shallow depression, line with stones of various sizes, add native plants that tolerate some standing water.
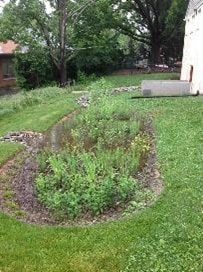
5.7.2.3. Food
Bigger animals mentioned above (hedgehogs, bats, dragonflies, birds) will find their own food amongst the other critters your garden will attract. Feel free to hang up a bird feeder in winter, don’t forget to make it squirrel proof (or put out A LOT of food to keep everyone fed)!
Squirrel-proof bird feeder
DIY: Find an appropriate place for a wooden post (sheltered from wind and sun), placing a slinky (kids’ toy) around the top of the pole before mounting a bird house/feeder on top. The slinky will stretch down when a cat or squirrel tries to climb the pole to the delicious seeds above. This protects the bird (and the seeds!) from their main predator.
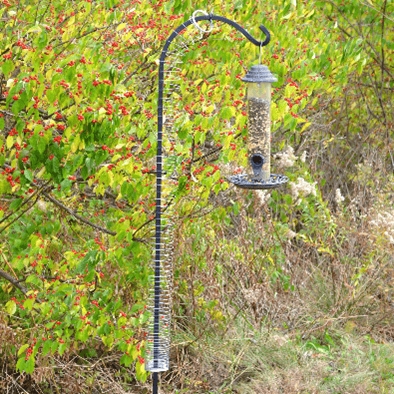
Beneficial insect zones
DIY: Plant yarrow, dill, and fennel to lure ladybugs & lacewings; milkweed & parsley for butterflies and other nectar-rich wildflowers for bees and bumblebees.
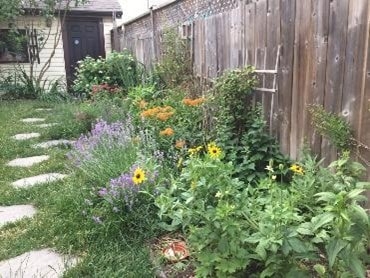
5.7.3. Pest & disease control
Using all the techniques we have taught you in this toolkit will create a beautiful, diverse garden with a delicate ecological balance. Despite our efforts to use polycultures and companion planting we can still experience a pest invasion or a bout of disease, that is completely normal! Especially when some years there will be a bigger or smaller mass of some animal/insects/pathogens due to weather patterns and food availability (e.g. when beech trees have a mast year (overproduction of seeds) there will also be a terrifying number of mice in the forest).
| ℹ️ Why do I not see sick/half-eaten plants in nature? |
| Plants that live out in the wild are much more hardy and more robust against the weather and pests. The weakest plants are usually eaten completely, leaving the strongest to live on. |
| On the other hand, our modern veggie varieties are bred to be super tender, juicy and tasty: no wonder they bring all the pests to your yard – and damn right, they’re better than the wild ones!🧋🎵 |
5.7.3.1. Pests
First, we must understand which beings are beneficial, neutral and destructive to our gardens. Remember: not all beneficial insects are cute, and not all cute insects are beneficial!
| 🍀 Pro tips |
| It’s not just single species that are friend or foe, usually the whole genus or family have similar characteristics. The pictures included below represent just one species. Use an app like iNaturalist or Google Lens to identify any visitors before you take action. |
🪲 Beneficial insects (garden allies)
Here are 6 most common insects that control pests, pollinate plants, or improve soil health.
- Ladybirds – Devour aphids, mites, and scale insects. Adults eat 50+ aphids/day; larvae consume even more.

- Lacewings – Larvae (called “aphid lions”) eat aphids, thrips, and caterpillars.

- Hoverflies (Syrphid flies) – Larvae prey on aphids; adults pollinate flowers.
- Ground beetles – Nocturnal hunters of slugs, snails, and cutworms.

- Parasitic wasps – Tiny wasps lay eggs inside pests (e.g., caterpillars, aphids), killing them.

- Bees (Honeybees & Native Bees) – Essential pollinators for fruits and veggies.

- Predatory mites – Combat spider mites and thrips.
How to attract them: Plant nectar-rich flowers (e.g., yarrow, dill, marigolds) and avoid pesticides.
🐜 Neutral insects (harmless or minor nuisances)
These insects rarely damage plants and may even aid decomposition:
- Springtails – Break down organic matter in soil.

- Sow bugs/Pill bugs – Mostly feed on decaying material but may nibble tender seedlings if overpopulated.

- Earwigs – Scavengers that eat dead plants but sometimes harm flowers (e.g., dahlias).

- Crickets – Mostly feed on decaying matter but may chew young plants if other food is scarce.

- Most spiders – Harmless to plants; prey on pests like flies and moths (exception: a few venomous species).

- Ants – Harmless to plants, can become a nuisance if they make a nest in your veggies bed as they can bite if disturbed. Some species also protect aphids from other predators like ladybirds, as they feed on the sweet secretions aphids produce after consuming plant sap.

Tip: Tolerate these unless they become problematic.
🐛 Pest insects (Common garden troublemakers)
These insects damage plants by feeding on leaves, stems, or roots:
- Aphids – Suck sap, causing curled leaves and sticky honeydew.

- Cabbage worms – Larvae of white butterflies; devour brassicas (e.g., kale, broccoli).
- Slugs & snails – Chew irregular holes in leaves, especially seedlings.
- Tomato hornworms – Large green caterpillars that strip tomato plants.
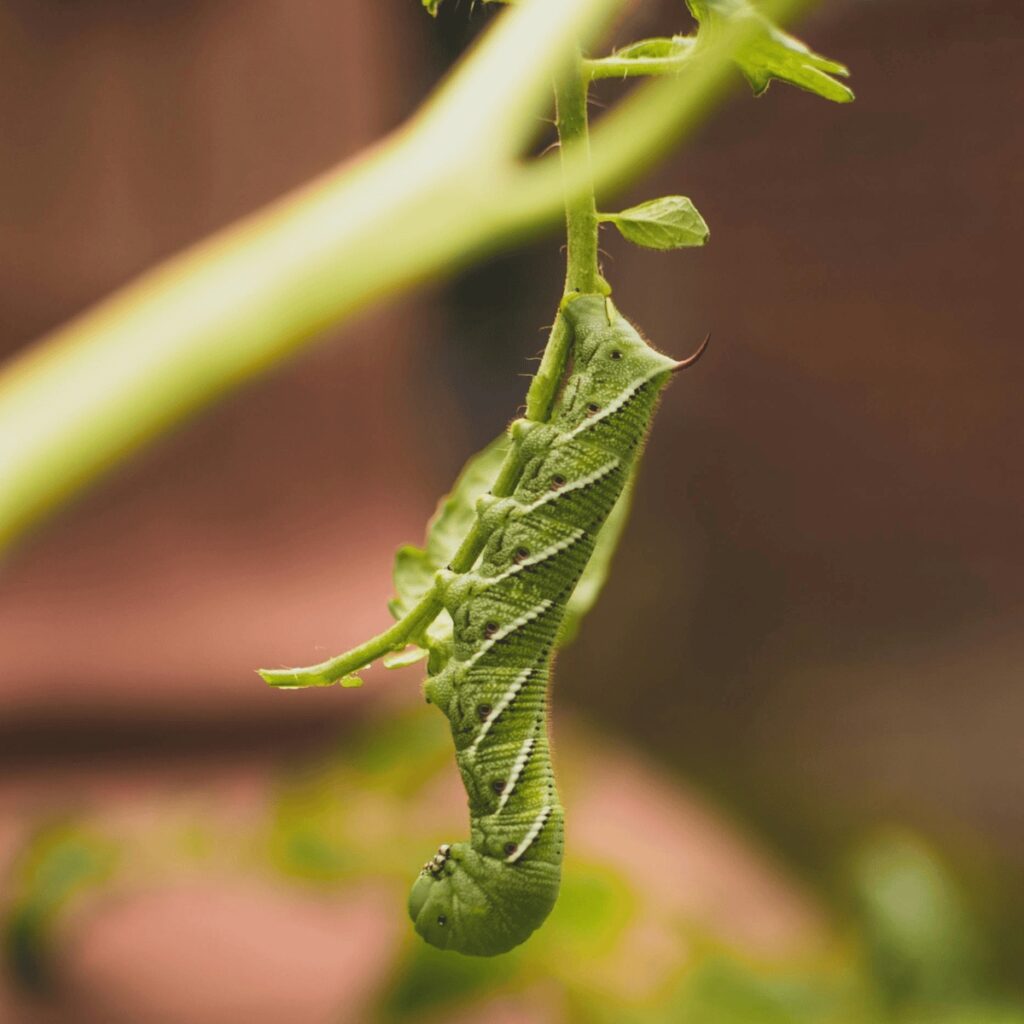
- Squash bugs – Pierce squash/pumpkin vines, causing wilting.

- Spider mites – Tiny pests that create webbing and yellow stippling on leaves.
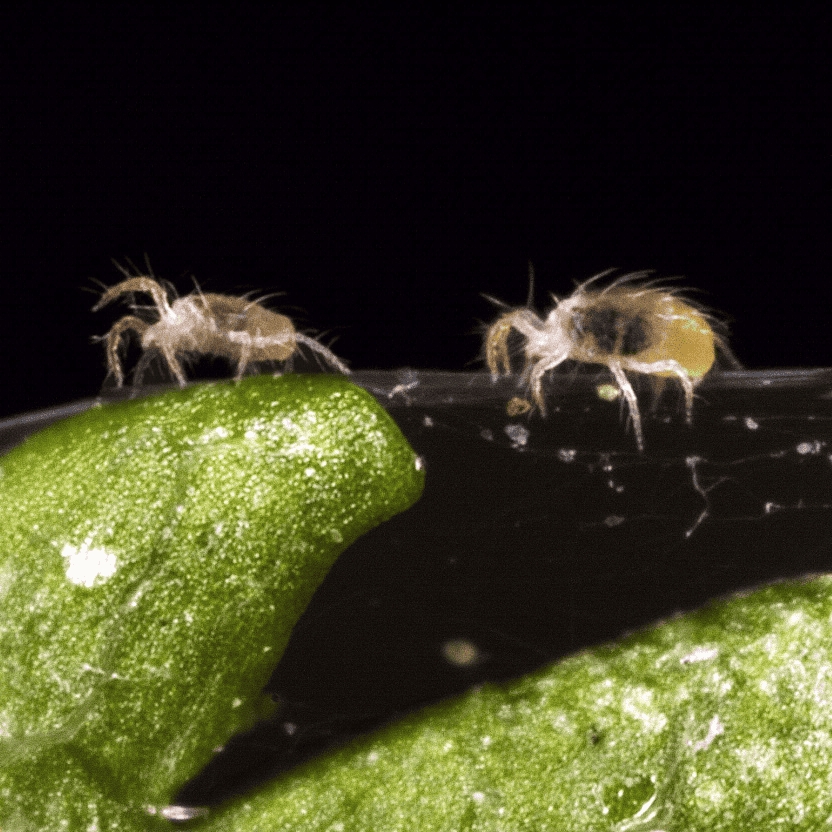
- Scale insects – Looks like brown/white bumps on stems/leaves, that leave a sticky residue, weakening indoor plants.

- Fungus gnats – Tiny black flies around moist houseplant soil, larvae harm roots and adults are nuisances.

Eco-friendly pest control techniques
If you do happen to have some unwanted guests in your garden (indoor or outdoor), here are some gentle, eco-friendly ways you can let them know they have outstayed their welcome.
🌿 For indoor houseplants
1. Neem oil spray
How it works: Disrupts pests’ life cycles (aphids, spider mites, whiteflies).
How to use: Mix 2 tbsp neem oil + 1 tsp mild soap in 1L water. Spray leaves (especially undersides) weekly.
| ⚠️ Important |
| Do not use it outdoors, as it can harm beneficial insects, too! |

2. Diatomaceous earth (DE)
How it works: A fine powder that dehydrates soft-bodied pests (fungus gnats, ants).
How to use: Sprinkle on soil or dust lightly on leaves. Reapply after watering.
| ⚠️ Important |
| Can be used outdoors, but only when beneficial insects are not active (like bees), apply only to ground and affected plant parts, never to flowers! |
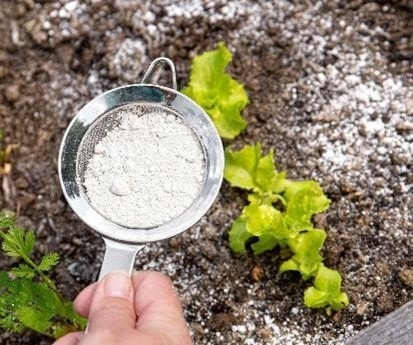
3. Insecticidal soap
How it works: Kills pests on contact (mealybugs, aphids).
How to use: Mix 1 tsp mild liquid soap (not detergent) + 1L water. Spray directly on pests.
4. Sticky traps
For: Fungus gnats, whiteflies.
How to use: Place yellow sticky traps near plants to catch flying insects.
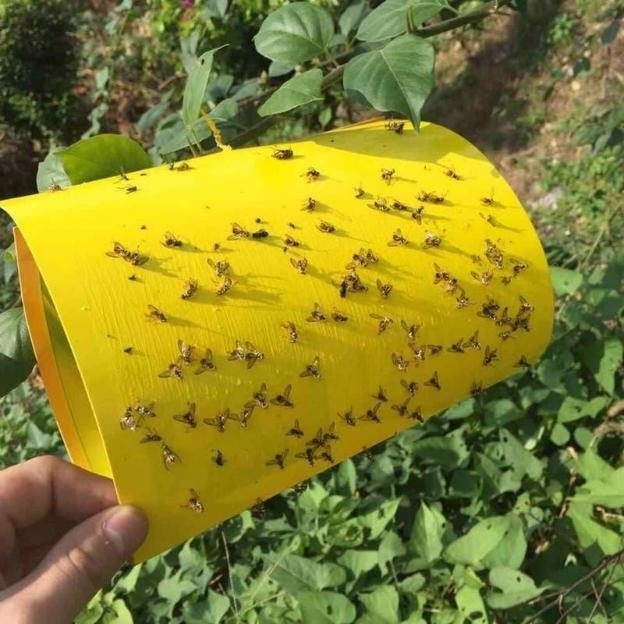
🥕 For veggie gardens
1. Physical barriers
Row covers (lightweight fabric): Cover plants to block pests (cabbage moths, carrot flies) when they are most active.
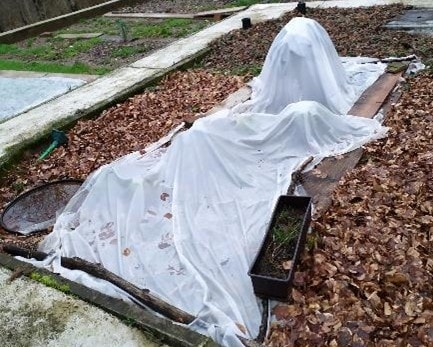
Copper tape: Place a thick (at least 5 cm) band around the edge of pots and garden beds to deter slugs & snails.
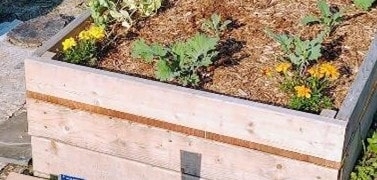
Rain gutters: Bury into garden soil so the top edge is the same level as the soil, mole crickets will fall in while marching across the soil, unable to climb out, because of the steep smooth surface.

2. Homemade garlic/pepper spray
How it works: Repels soft-bodied pests.
How to use: Blend 2 garlic cloves + 1 chili pepper + 1L water. Strain & spray.
3. Beer traps for slugs
How it works: Slugs drown in shallow beer-filled containers, a roof ideal, if not top up beer after every rain or when it evaporates.
Place near vulnerable plants (lettuce, strawberries).
5.7.3.2. Common diseases in indoor and outdoor gardens
Smaller, invisible “pests” like bacteria, viruses and fungi can also attack your plants, if their environment is out of balance. They cause various symptoms and diseases that can quickly decimate your flourishing garden. Check the table below for the most common diseases you might find in your indoor or outdoor garden.

| Disease name | Primary location | How to spot it (symptoms) | How to control & prevent it |
| Powdery mildew (1) | Both (very common) | White or grey powdery coating on leaves and stems. Leaves may yellow and wither. | Improve air circulation. Avoid overhead watering. Apply neem oil or horticultural oil. Use sulphur-based fungicide. Plant resistant varieties. |
| Root rot (2) | Indoor (very common) | Plant wilts despite wet soil. Yellowing leaves. Roots are brown, mushy, and smell bad (healthy roots are white and firm). | Prevention is key: Ensure pots have drainage holes and well-draining soil. Remove from pot, trim away all rotten roots, repot in fresh soil. |
| Leaf spot (3) | Both | Brown or black spots on leaves, sometimes with yellow halos. Spots may merge and kill the leaf. | Remove and destroy affected leaves. Water at the base to keep foliage dry. Apply copper fungicide. Clean up plant debris in fall. |
| Gray mould (Botrytis) (4) | Both (cool & humid) | Fuzzy greyish-brown mould on flowers, leaves, or stems. Affected parts become soft and slimy. | Improve air circulation. Remove dead flowers and leaves. Avoid crowding plants. Apply fungicide as a last resort. |
| Rust (5) | Outdoor | Orange, yellow, or brown rusty-looking pustules on leaf undersides. Yellow spots on top of leaves. | Remove infected leaves immediately. Ensure good airflow. Avoid wetting foliage. Plant resistant varieties. Apply fungicide containing myclobutanil. |
| Bacterial wilt (6) | Outdoor | Rapid wilting of the plant while leaves remain green. Stem oozes sticky, white bacterial ooze when cut. | No cure. Remove and destroy infected plants (do not compost). Rotate crops. Control cucumber beetles that spread it. |
| Late blight (7) | Outdoor | Water-soaked, grey-green spots on leaves that turn brown and crispy. White mould may form in humid conditions. | Destroy infected plants immediately (bag them). Serious disease that spreads rapidly. Prevent with copper fungicide sprays. |
| 🍀 Pro tips |
| ↳ Inspect regularly: Check your plants often, especially the undersides of leaves. |
| ↳ Isolate immediately: Quarantine new or sick plants to prevent spread. |
| ↳ Keep it clean: Remove fallen debris and disinfect tools between uses. |
| ↳ Create healthy conditions: Right plant, right place. Ensure proper light, water, airflow, and nutrition. A stressed plant is a susceptible plant. |
| ↳ Start with organic controls: Physical removal (pruning, hosing off), horticultural oils, and insecticidal soaps are always the first line of defence. |
| ↳ Use chemicals as a last resort: If you must use a fungicide or pesticide, always read the label and apply it precisely as directed. |
5.7.4. Seed saving
Saving your own seeds is the ultimate sign you have committed to gardening! It can be a rewarding, money-saving and practical gardening technique. By selecting the best seeds that have grown well in your garden, you will ensure the next gardening season will be even more successful, as your plants next year will be even more adapted to your garden’s microclimate.
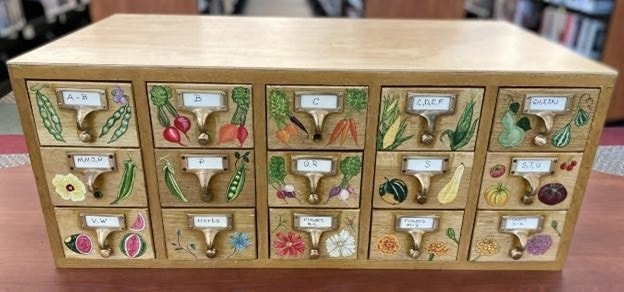
Here’s a few things you need to know to get the best results:
All wild plants are so-called open-pollinated, meaning all plants from the same species in the vicinity pollinate each other, mixing their genes together. This creates healthy seeds for the next generation, with small differences in each seed. Humans have been carefully selecting seeds for specific qualities for centuries, resulting in the garden varieties we have today. Let’s see which types of seeds you can buy today.
Types of seeds:
Open-pollinated (OP)
- Pollinated naturally (by wind, insects, or birds).
- Will grow true to the parent plant if isolated from similar varieties.
- Examples: Classic tomatoes, beans, lettuce.*
Heirloom
- A special type of open-pollinated seed passed down for generations (usually 50+ years).
- Unique flavours, colours, and stories – great for seed saving!
- Examples: ‘Brandywine’ tomato, ‘Dragon Tongue’ bean.
F1 hybrid (first generation)
- A cross between two different parent plants for specific traits (disease resistance, uniformity).
- Seeds won’t grow true – the next generation may be weak or unpredictable.
- Avoid saving these unless you want to experiment!
So, open-pollinated seeds will grow true to seed, but you might get some genetic interference if you are growing several varieties of the same species – this is called cross-pollination. Some plants easily cross with nearby relatives, creating unexpected hybrids. Here’s how to avoid surprises:
High-risk crossers (insect-pollinated)
- Mainly plant that have separate male and female flowers
- Squash, pumpkins, cucumbers – Different varieties will cross.
- Corn – Wind-pollinated; different types must be planted far apart.
- Brassicas (kale, broccoli, cabbage) – Can swap pollen if flowering at the same time.
Low-risk (self-pollinating)
- Mainly plants that have “perfect” flowers with both male and female parts.
- Tomatoes, peppers, beans, peas – Rarely cross unless bees interfere.
How to prevent unwanted mixing:
- Distance: Plant varieties 3-5+ metres apart (more for corn/squash).
- Time staggering: Grow different varieties weeks apart so they don’t flower at the same time.
- Bagging flowers: Cover blooms with mesh bags (for small-scale seed saving).
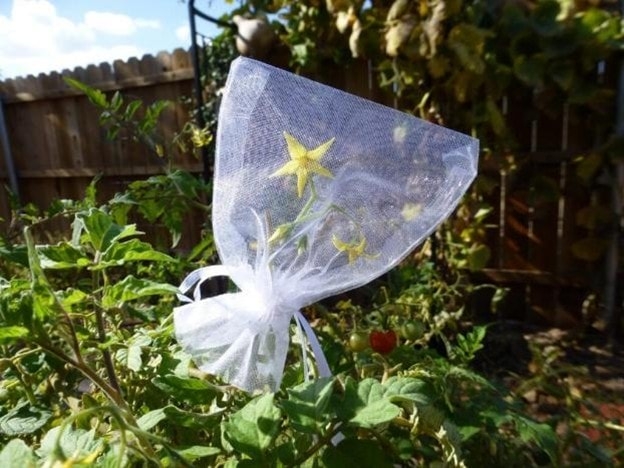
Now, how to store these seeds!
1. Choose the best “fruit”
- Leave at least a few of the best flowers, pods, fruits or veggies to ripen fully, letting them go to seed. This will ensure the best genes will get passed on.
- Healthy viable seeds are usually thicker and bigger, if the seeds you pick feel thin and small – as if nothing is inside – that might just be the case. It most likely wasn’t pollinated and has no seed embryo inside the husk.

Unpollinated vs. pollinated cucumber seed: the difference is obvious!
2. Harvest & process

Dry seeds (beans, lettuce, flowers): Let pods dry on plants, then collect.
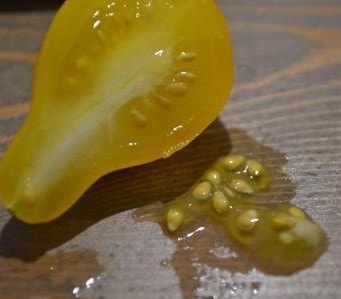
Wet seeds (tomatoes, cucumbers): Scoop out seeds, ferment in water for 1-3 days (removes gel coating), then rinse and dry.
3. Dry thoroughly
- Spread seeds on a paper towel or screen for 1-2 weeks in a warm, dry place.
Storing seeds for longevity
Once you have your seeds you need to store them correctly. Make sure you only keep the seeds themselves, dispose of any other organic material attached to them. Make sure they are completely dry, disease and pest-free.
| 🍀 Pro tips |
| Remember to choose: |
| ↳ The right container: Airtight is best (glass jar, zip lock bag). Paper envelopes, cardboard boxes are also good. |
| ↳ The right location: Cool, dark, and dry (fridge/freezer for long-term storage). |
| Don’t forget to: |
| ↳ Label: Name, date saved, and variety! |
| ↳ Test dryness: Seeds should snap, not bend. |
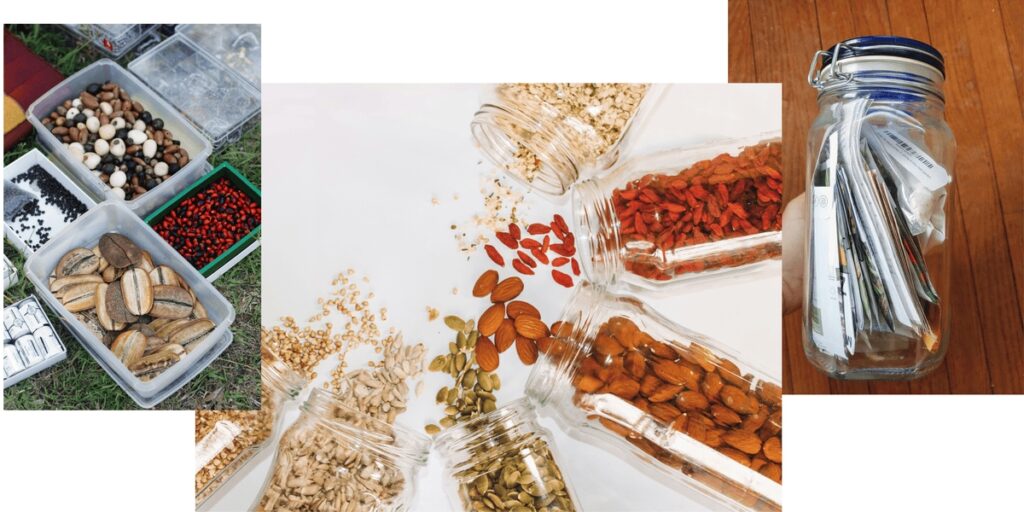
5.7.5. Pruning
An often overlooked, but essential garden task is pruning. It’s something most-often connected to perennials like fruit trees and bushes, but annual plants like vegetables can benefit greatly from pruning. Pruning improves air circulation, removes dead/diseased material before they spread, and directs the plant’s energy to producing flowers and fruit.
The golden rule: Always use clean, sharp pruners or scissors. This prevents crushing stems and spreading disease.
🌺 Annuals (plants that live for one season)
Goal: Encourage more flowers and a bushy shape.
- Pinching: When plants are young (15-20cm tall), use your fingers to pinch off the very top tip of the main stem. This forces the plant to grow two new side shoots instead of one tall stem, creating a fuller, bushier plant.
Examples: Herbs (basil, parsley, chamomile), chilli peppers.
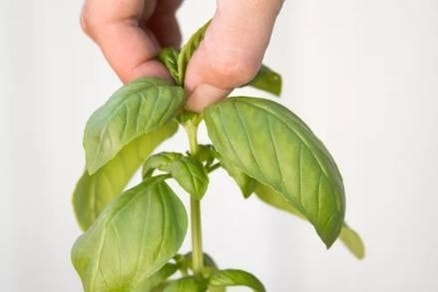
- Deadheading: Regularly snip off spent, fading, or dead flowers. This stops the plant from putting energy into making seeds and tricks it into producing more flowers to try again. How: Cut the flower stem back to just above a set of leaves or a side shoot.
Examples: Marigolds, nasturtiums, herbs.
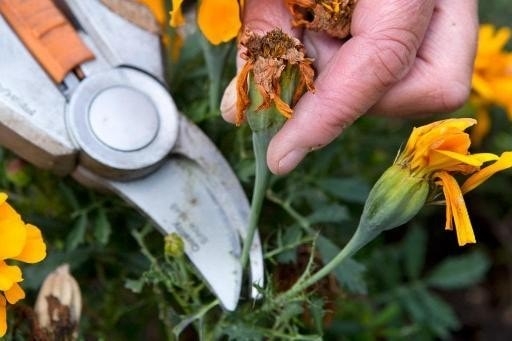
🌿 Perennials (plants that return year after year)
Goal: Promote health, control size, and encourage blooms.
- Spring clean-up: In early spring, cut back all dead foliage from the previous year to make way for new growth.
- Deadheading: Same as annuals. Remove spent flowers to encourage a second bloom and prevent unwanted self-seeding.
Examples: Herb and berry bushes like sage, rosemary, blueberry, raspberry.
- Cutting back (the “chop”): For tall, herbaceous perennials, cut the entire plant back by 1/3 to 1/2 in early summer. This encourages a sturdier, more compact plant and often delays flowering for a later, longer show.
Examples: Herb bushes, large herbaceous plants
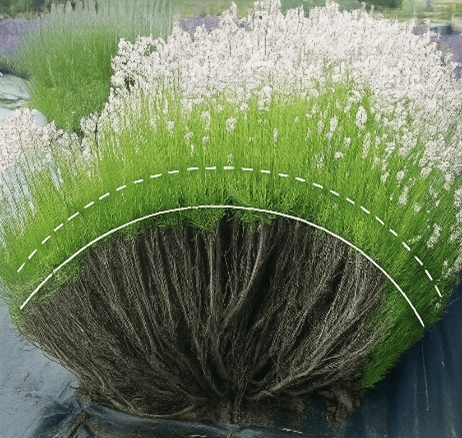
Prune lavender along the dotted line.
- Post-bloom prune: After a perennial has finished its main flowering, you can cut it back hard to tidy its appearance and encourage fresh new foliage.
Examples: Summer-bearing raspberries (canes that fruited are cut to the ground after harvest), rhubarb (flower stalks should be cut out as soon as they appear to direct energy back to the stalks).

✂️ Special technique: Removing suckers
- Goal: Direct the plant’s energy into strong growth and large fruit production, not excess foliage.
- What is a sucker? A sucker is a vigorous side shoot that grows from the leaf axil – the point where a leaf stem meets the main stem.
- How to remove: Pinch them off with your fingers while they are small (under 8-10cm). For larger, woodier suckers on trees, use sharp, clean pruners. Make a clean cut flush to the stem.
On tomato plants:
- Why: Removing suckers prevents the plant from becoming a tangled jungle. This improves air circulation (preventing disease) and directs all energy into ripening the fruit on the main stems.
- Indeterminate varieties (vining) benefit most from regular suckering.
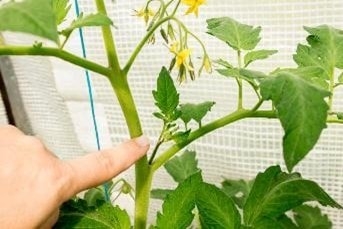
On fruit trees:
- Why: Suckers are non-fruiting shoots that drain energy from the tree. They often grow from the rootstock or the trunk below the graft union.
- Remove them whenever you see them to keep the tree’s energy focused on the fruit-producing branches.

What to always remove, no matter the plant:
- The 3 D’s: Any ‘Dead, Diseased, or Damaged’ growth should be removed as soon as you see it.
- Suckers: Energy-draining shoots on tomatoes and trees.
- Crossing Branches: Stems that rub together create wounds open to disease.
5.8. The final seed: Your journey begins now!
Congratulations, gardener!
You’ve just packed your mental wheelbarrow to the brim. You’ve journeyed from that first spark of “What if I could grow something?” to becoming a savvy designer of your own tiny, thriving ecosystem. You’ve learned how to find the right garden for your life, build it with creativity and upcycled flair, keep it healthy, and even outsmart the sun itself to create the perfect microclimate.
That’s no small feat! Give yourself a little pat on the back (maybe with a non-muddy hand).
Remember that first seedling you pictured in your mind? Look at it now. It’s not just a plant anymore. It’s a story.
It’s the story of the old pasta jar that became a micro compost bin.
It’s the story of the wonky balcony corner that became a salad bar.
It’s the story of the forgotten lot that became a community gathering place, one sunflower at a time.
You are now equipped with more than just knowledge; you have a gardener’s toolkit. And the most important tool isn’t your trowel or your watering can—it’s your empowered perspective. You now look at a shallow container and see a future for lettuce. You look at eggshells and see pest deterrent and calcium. You look at a shady wall and see a perfect home for mint, not a problem.
This isn’t the end of a manual. This is your beginner’s permit to experiment.
Your first tomato might be lopsided. Your basil might briefly stage a dramatic wilt. A squirrel might outsmart your clever defences and win a single zucchini (consider it a tribute to the local wildlife). This isn’t failure; it’s data! Every single thing that happens in your garden—the glorious and the slightly gnawed—is a lesson that will make you an even better gardener next season.
So, what’s next?
Start small, but simply START. Plant one thing. Today. A pot of parsley on the windowsill. A snap pea in a cup by the sink.
Embrace the happy accidents. That tomato that volunteered in your compost? Let it grow! See what happens.
Share your journey. Show off your quirky upcycled planters. Barter your extra basil for your neighbour’s rosemary. Your success and enthusiasm are the most contagious seeds you can sow.
You are no longer just a resident of your home; you are its steward, its designer, its chef, and its wildlife manager. You are part of a beautiful, gritty, and growing movement of people who are stitching more green, more life, and more resilience into the fabric of our cities.
Thank you for investing this time in yourself and your patch of the planet. The world needs more growers, more nurturers, and more people who believe that from a tiny seed, mighty, wonderful things can grow.
Now, go get your hands dirty! We can’t wait to see what you grow.
Happy Gardening!
P.S. Don’t be a stranger!
Tag us in your garden photos online using #InclusiGardens.
Let’s build a community of inspiration, one recycled container at a time.